Painting Walls Do It Yourself

Painting a room yourself can be easy and rewarding as long as you have the right tools and you take time to prepare the surface.
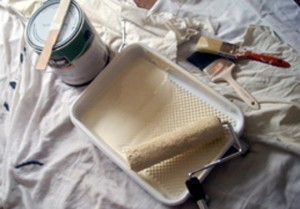
You will need a paint roller and tray, an angled brush for cutting in the corners and painters tape. An edger makes it easier to paint neatly along door frames and the ceiling.

Prepare The Surface To Be Painted and Apply Painter's Tape
Before you begin make sure the walls are in good shape.
- You will want to use a putty knife to fill nail holes and knicks with spackle. When the spackle is dry wipe off the excess with a damp rag and you will be starting with a smooth surface.
- Tape along the baseboards. If you choose not to use an edger you'll also want to tape along the ceiling and door and window frames.
- A word about tape: I have found the blue tape is the easiest to work with. Green tape is a little less expensive but tends to stick to itself. Although masking tape is the least expensive and tends to pull the paint off the wall when it's removed it is useful when taping the corners by the celing because it is so flexible.
- Take the time to carefully tape the surface you don't want painted. It really makes a difference in the finished project.
- Remove outlet and switch plate covers. Tape over the outlets and swiches to avoid getting paint on them.
- Remove fixtures (make sure you have turned off the power!) If you are not comfortable with disconnecting electrical wires you can tape around the fixture.
- Cover furniture and the floor with dropcloths.
Trimming and Cutting In The Corners
Now you're ready to start painting!
- If you didn't have your paint mixed at the store make sure you stir it well.
- For cutting in the corners and the trim you can pour some paint into a small container you can carry around the room.
- When you dip your brush into the paint make sure the paint is not more than halfway up the bristles and scrape off the excess on the edge of your container to minimize the drips.
- With your angled brush paint along the tape. Start above the tape and bring the brush down to the taped edge feathering it in and smoothing out any drips as you go along. You don't want to start right at the taped edge with a full brush because the paint may sneak under the tape and marr that protected surface.
- Cut in the corners and feather it out a couple of inches so when you use the roller you won't have to get too close to the corners.

Painting The Walls
- Pour some paint into your tray. When you dip the roller in the paint do so lightly. Roll on the rough edge of the tray to remove excess paint and evenly distribute the paint on your roller.
- When you place the roller on the wall spread the paint in a "V" pattern feathering out the egdes and filling in the middle.
- Roll out any drips or excesses of paint.
- Make sure the surface is completely covered before moving on.
- Don't roll over an area that has begun to dry because you can mistakenly remove some of that paint from the wall and leave little clumps on your roller.
- Roll slowly! This will minimize spatter.
- When you roll along the corners and trim that you have cut in make sure it is evenly blended.
- If you need a second coat read the recommendations on the can. It will usually say to wait one to two hours before you apply a second coat.
A Few Tips
- Have a damp rag to wipe up drips that land on the trim or other unwanted places.
- Remove the tape as soon as the paint is dry to avoid pulling the paint off with the tape.
- If you have a lot of painting to do you can reuse your tape a second time. I am currently painting just about every surface in my home and it has saved me some money.
- If you can't finish the project that same day you don't have to clean your brushes, rollers and paint tray. Place the brush in a sealed baggie. Wrap the roller in a plastic grocery bag and put the tray in a plastic garbage bag with the end closed tightly. You will be ready to go the next day.


