Painting Furniture with Chalk Paint


The Reason for the Project
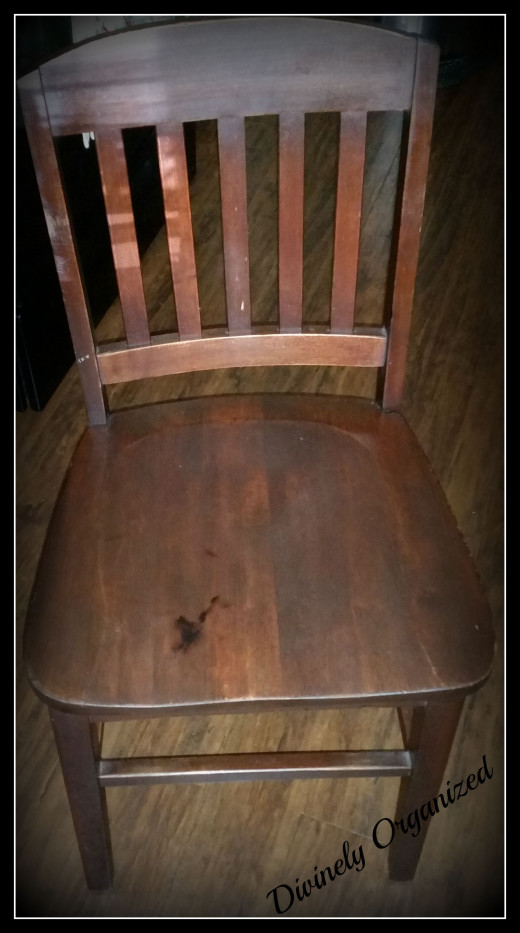
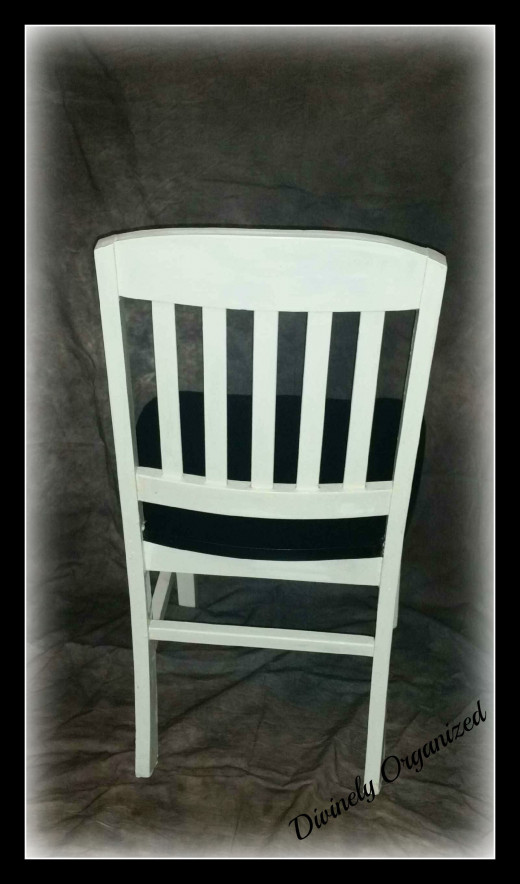
The original chair was stained dark and had seen better days. It was squeaky and the braces on the bottom were loose. The first steps were to repair the chair.
Supplies
· Wood glue
· Wood nails
· Dark mahogany stain
· Paint primer
· Folkart sheepskin chalk paint
· Stencil
· Satin clear polyacrylic
· Paint brush
· Sand block
· Sponge brush
· Latex gloves
. Drop cloth (I painted inside)
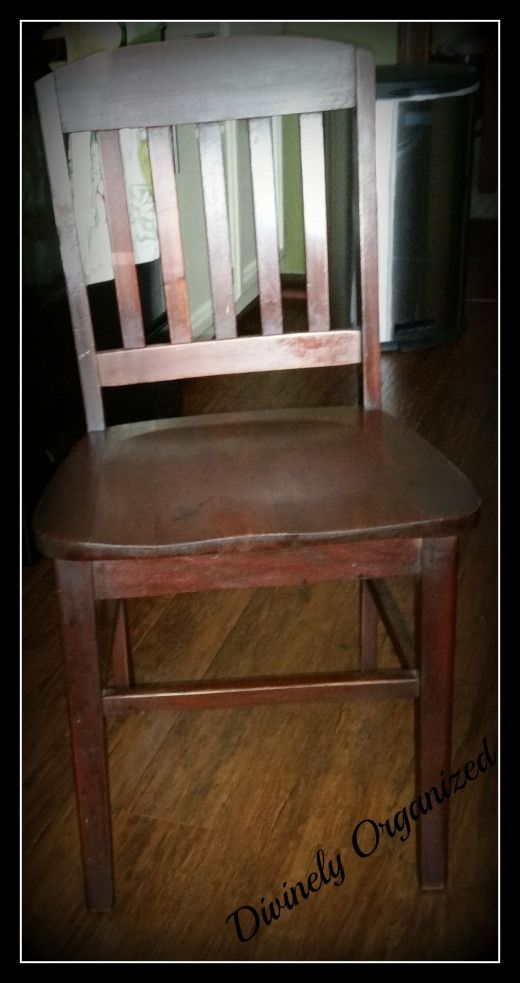
Repairing the Chair
· Nailed and glued the weak and squeaky parts of the chair
· Allowed wood glue to dry for at least 2-hours
· Sanded the chair lightly (some say you do not have to sand if using chalk paint but I sanded the top of the chair because the original stain was so very dark)
· Wiped down with a warm wet cloth to remove all of the dust
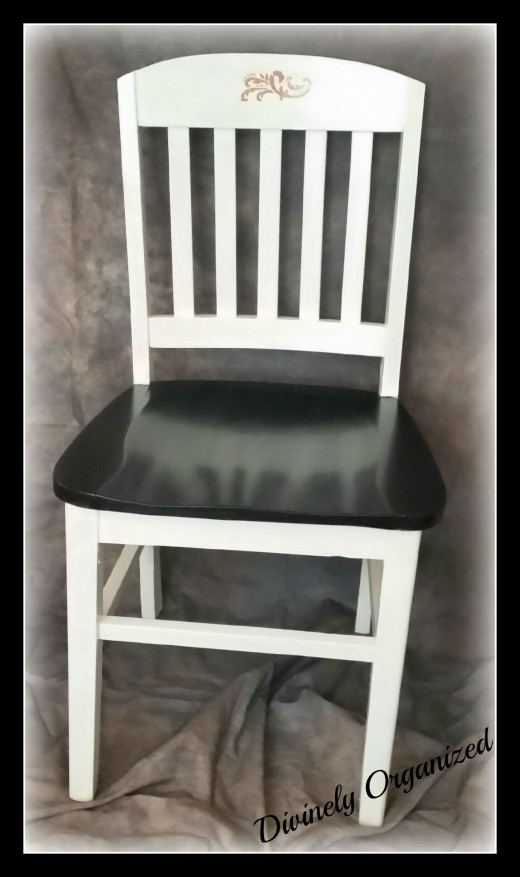
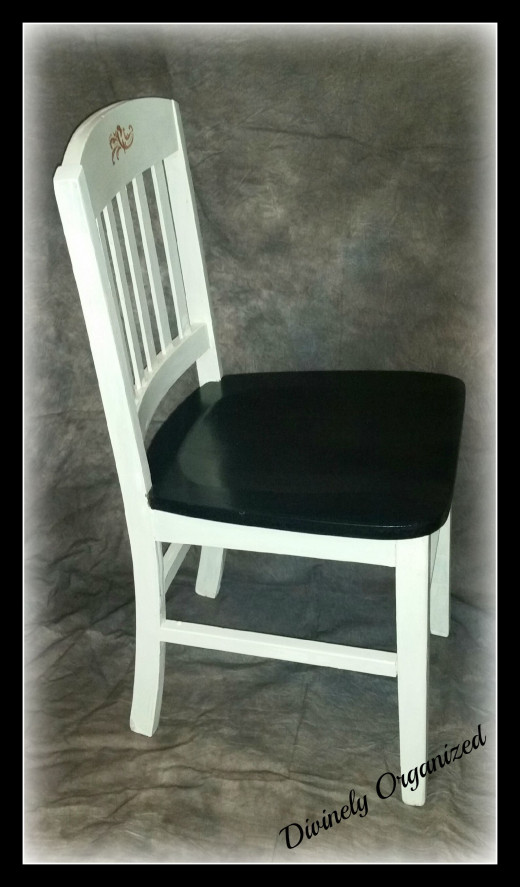
Painting, Staining & Stenciling
· Primed all of the chair that would be painted
· Left the part of the chair that would be stained for last
· I did not sand or prime the underside of the chair (I wanted to see if the paint would adhere and cover as well as recommended by others)
· Primed and allowed primer to dry for at least an hour
· Began painting the unprimed underside of the chair I felt the chair would be easier to manage if the underside was painted first
Note: the chalk paint covered very well without sanding and priming
· Painted 2 coats on the rest of the chair allowing to dry between coats
. Chalk paint dries very quickly. Therefore by the time I finished painting the first coat I could begin painting the second coat immediately (loved that)
· Allowed the second coat to dry overnight before I began staining the seat
· Used the sponge brush to stain the seat
· Used small art paint brush to stain the areas closest to the painted portion of the chair to avoid getting stain on the paint
· Allowed first coat of stain to dry overnight
· Applied second coat of stain
· While the stain was drying I added the stencil using paint I had around the house from a previous project
· Allowed second coat of stain and stenciling to dry overnight
· Added first coat of polyacrylic the next day and allowed to dry for approximately 6 hours before adding the second coat
· I added a total of 4 coats of polyacrylic allowing to dry between coats
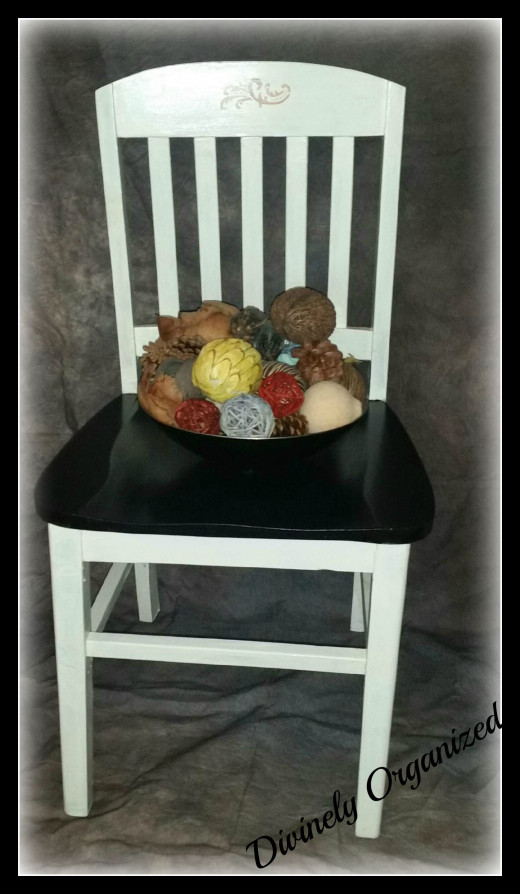
Results
The project took approximately 4 days to complete due to drying time. My observation of chalk paint is, “I’m hooked.” I even have a recipe for making my own that I’ve since tried out on some vases. The drying time is very quick, the paint covers really well and you actually use a lot less paint because it is so thick and covers so well. Chalk paint is also perfect for the distressed look. Although I chose not to go for the shabby chic look for this chair, I will be giving it a try on future chalk paint projects.
Having the recipe to make my own paint opens up a color mecca for me. I am so very excited. Stay tuned for other chalk paint projects in the future. I will also review milk paint sometime soon as well.
Chalk Paint Review Project Complete
Are you a chalk paint guru? If so, please feel free to share your expertise. If not, I hope my first experience will nudge you to give it a try. Connect with and let me see some of our chalk paint projects. I know there is a lot of talent and creativity out there.


")

