Put Up A Shelf - It's Easier Than You Think
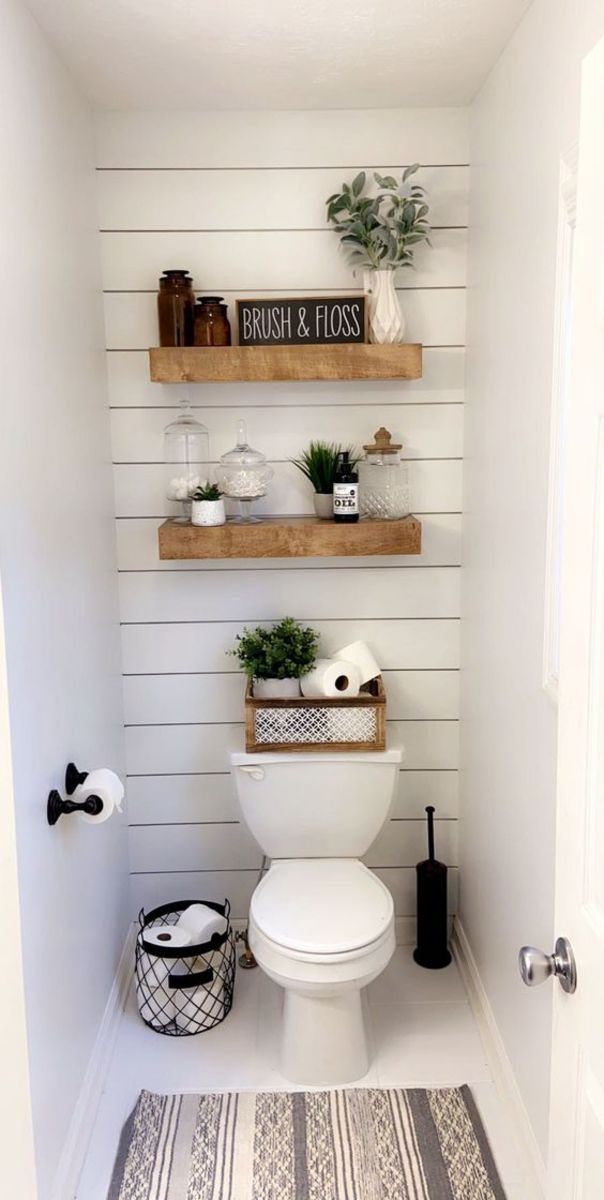
In many a home, extra storage space is often welcome to keep things in order and ensure that everything has its place. Even in a home that is designed in a more minimalist style, the odd shelf can still prove useful to provide a place for photo frames or the occasional piece of objet d’ art.
Rather than call a handyman or contractor just to put up a few shelves or ignore the need for shelves altogether, it would be useful and prudent to be aware of how to carry out the process yourself. This will help to ensure that you only need to spend a minimal amount of money on the procedure with the cost of labour being avoided and the cost of parts can be chosen by you.
By considering the steps needed for to fit a shelf and putting them into practice, you will find that this particular aspect of Do It Yourself (DIY) is not as scary as it may initially appear. With a little preparation and some confidence, it is possible to create an addition to your home that will prove practical and fuss-free and will result in a great sense of accomplishment.
The first step necessary for putting up a shelf is to prepare for the task by gathering all the equipment that you will need. While it may seem easier to just start the project and get any items you need as and when you need it, this can actually result in the whole process going wrong or you being forced to leave the project only half complete. This is particularly likely when you have not prepared and are not working with a helper and/or you discover – too late – that you do not have the things that you need.
Equipment required:
· Shelf components and fixtures
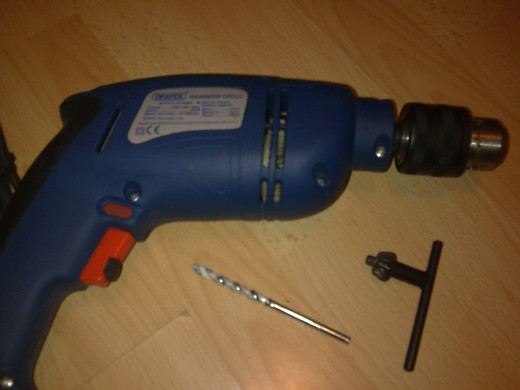
· Power drill
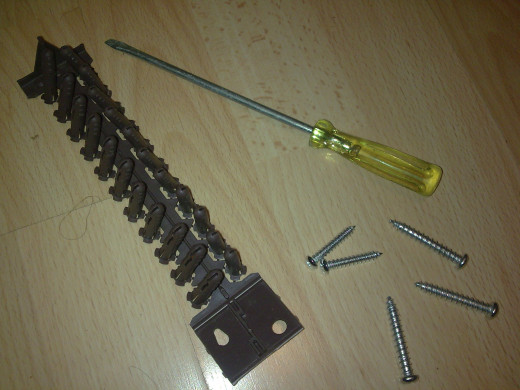
· Screwdriver
· Spirit level
· Hammer
· Tape measure
· Rawl plugs
· Pencil
· Stepladder
· Extension lead
· Wood glue
· Cloth
After gathering all the equipment and tools you will require, you will be ready to prepare the wall on which you intend to fit the shelf. You may already have an idea of where you want it to go, but there are a number of factors to consider when coming to this decision. It is essential to ensure that the wall is suitable for supporting a shelf.
One of the ways in which this can be determined is with the use of a stud finder, which is a small electronic device that can be obtained from most hardware/DIY stores. This device will provide a warning of an item beyond the wall that you need to be aware of, usually in the form of a beeping tone. It is best to avoid any region where there appears to be a significant number of pipes and/or wires, which you may find that is the case with load-bearing walls. This will prevent the risk of damaging wires or puncturing pipes.
Once you find a wall which is safe to use, you have to decide on the height at which you place the shelf. It should be at a height which is suited to everyone in the household who will be making use of it and in a position where no one is at risk of banging into it.
If you are using unfinished wood shelving, treat it with oil or varnish, if necessary, before proceeding with the process of attaching it to the wall. Similarly, if you want the shelf to be a particular colour, paint with a suitable paint before proceeding to avoid getting paint on the wall and ensure the task is completed correctly.
If you plan to fit the shelf at a point that is high enough to require a ladder, make sure you use an A-frame one that can stand on its own rather than one that needs to be propped against a wall. Have the ladder ready before you start the project and avoid stretching to reach the necessary point.
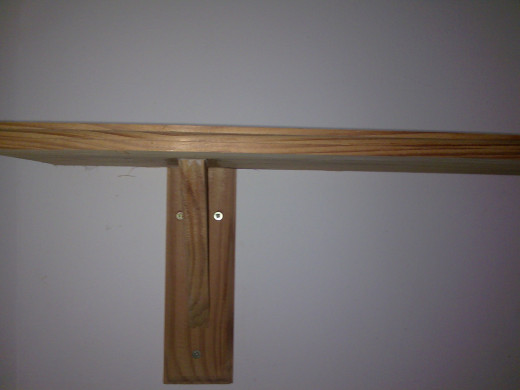
The manner in which you attach the shelf will depend on the type you are using. Most will require two points of attachment, but shelves that are longer than average may require three or four. As an example, a shelf that is around three feet long will require two brackets, which can be placed approximately five inches in from each end. There are likely to be several points at which the screws can be placed, which will be represented by pre-drilled holes.
Hold the shelf to the wall in the desired position and place the spirit level atop it to ensure that it is level. Once you note the air bubble is central and still, use a pencil to mark faint lines at either end of the shelf at the approximate two points where you will be fitting the brackets. The shelf can then be set aside while you work on putting up the brackets.
Make sure you use a pencil to mark the lines so that any marks that are still visible after the installation can be erased.
Place the top edge of one bracket to the wall aligned with the first pencil line (take into account the thickness of the shelf and remember that this will put the eventual surface at a slightly higher level.)
Many brackets will have pre-drilled holes where the screws are to be placed, which means that you will only need to use the pencil to mark the places where the holes need to be drilled. If you are working with a material that can have the screws drilled straight into it, this step will not be required. After marking the spots where the screws will be placed, put the brackets aside for a moment in order to drill the necessary holes for them. Follow this process to prepare to fit the second bracket.
When using a power drill, it is best not to be timid as this can result in mistakes from the tool not being used incorrectly. Place the tip of the drill bit against the first pencil mark on the wall and hold it firmly in place. Ensure the drill is securely within your grip and that the drill bit remains at the correct point. Tentative actions can cause the drill but to skid across the surface rather than penetrate it, which can result in damage.
Do what is necessary to gain some confidence with the drill before commencing the project, if you are not already. This may be as simple as running the drill in mid-air to enable you to get used to the weight and vibrations. If possible, try drilling a practice hole into a solid surface that cannot be seen. If you are not using a cordless drill, check the position of the closest electrical socket to your work area and use an extension cord, if necessary, to prevent any hindrance to your ability to manoeuvre while working.
Hold the drill handle tightly and, without being overly forceful, firmly press the drill into the wall and keep it steady to cleanly create the required hole. Take into account the length of the screws and the rawl plugs when drilling the holes to ensure the depth is correct. It is also necessary to take into account the size of the drill bit to ensure the rawl plugs will fit into the resultant hole.
Rawl plugs should be used for all masonry surfaces that are being drilled as this material is at risk of crumbling away beneath the pressure of a drill, which will prevent the ability of the screw to gain purchase and will not be in placed securely and is at risk of falling out. A rawl plug acts as a type of sleeve that lines the hole created by the drill sits in the hole created by the drill, allowing the teeth of the screw to cut into this plastic surface to remain securely in place
Blow away any resultant debris from the recess before proceeding to prevent the hole from becoming blocked with e are no particles to block the way. Follow the same process for each of the holes. You will then be in a position to push the rawl plugs into the holes that has been made by the drill, making sure they are completely inserted so that they are flush with the wall.
Align the holes of the first bracket with the drilled holes before inserting the screws to fix it in place. This can be undertaken manually with a screwdriver or by changing the drill bit to one that matches the screw head, which will make it possible to let the drill take the strain. Ensure each screw is fully inserted without over-tightening them, which can result in splitting and cracking.
Once the brackets are securely fixed in place, the shelf can be laid atop them to create a handy shelf. If you prefer the security of a shelf that is fixed in place, spread a little wood glue onto the tops of the brackets and carefully place the shelf on top, making sure it is evenly laid before holding it in place for a few minutes. Wipe away any excess glue that may seep out from the sides.
Finally, stand back and admire your handiwork before enjoying the benefits of the extra storage space or the display surface. It is also useful to bear in mind that the technique used to out up a shelf can be adapted a little to fit clothes hooks and box shelves.


