How to Repair a Leaking Sink Valve

How to Easily Repair a Leaky Faucet
This is an easy quick fix that I am going to run you through step by step. The water that you save fixing a simple drip is unbelievable. If you let it leak for days even a drip, then it accounts for several Gallons of water a day. If you don’t believe me then put a container under it and see how fast it fills up. If it is hot side that is leaking then the Bill will be even higher because the water tank will be trying to keep the water Temperature up. It does not take long to run up the water bill past the cost of the repair of around $10.00 to $20.00 dollars.

Tools Needed
The only tools needed: See photo B:
Crescent Wrench
Phillips Screwdriver
Flat Screwdriver


Removing the Handle
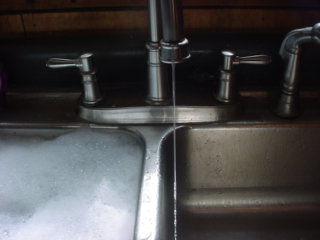
1. First thing to do is turn the water off under the sink. If you don’t have a turn off valve under the sink then find the main where it comes into the house and turn it off. While it is dripping turn the hot side first and see if it stops then turn the left side and see if it stops. Whichever side makes it stop is the side that needs fixed. Remember when you shut it off Righty tighty, (Clockwise Direction) Lefty loosy (Counterclockwise Direction). See Photo C
2. In this case it is the hot side that is bad. You should always turn both sides off. If you do not then when you remove the valve it may start to spray all over the place. Or if someone by mistake turns on the other handle while it is apart then you will have water everywhere.
3. Next remove the cap that covers the Valve with a straight screwdriver or sometimes they unscrew. See Figure D

Removing Handle
4. Look into the hole and determine whether it has a straight screw in it or Philips screw remove the screw that holds the handle in. Then Remove handle.See Photo F


Removing the Valve
5. After removing the handle by wiggling and pulling up gently take the crescent wrench and remove the retainer nut. See Photo G
6. After removing the retainer nut remove the valve stem by gently wiggling and pulling upwards. Photo H
7. Take the valve stem to your local Hardware Store. Tell them weather it is the cold or hot. The cold and hot turn in different directions. It is also handy if you know the manufacturer.
Some times all that needs Replaced are some O Rings. Note black O ring on Vale Stem ion Photo H. Those too are available at a hardware or Home Improvement Store


Replacing The Valve
8. To replace the valve gently push it back into the hole till it seats.
9. Screw the retainer nut onto the valve and tighten. BUT DO NOT OVER TIGHTEN. Photo I
10. Turn the Valve off and place the handle back on and check to see if it is lined up correctly. Gently push down till it is seated then, put the screw back in. See Photo J
11. Making sure that the handle is off turn the water back on slightly and check for leaks. If it leaks then tighten up whatever happens to leak. Then turn the water on all the way.
12. Replace the cover see Photo K


