Repurposing and Redesigning With Purpose!

"Eye-Spying" the quality of an old piece
As a Georgia home designer, I am amazed by the furniture people throw out on the side of the road. Often it's just cosmetically challenged but unless you have experience re-designing or re-purposing something, just replacing it may seem easier.
Historically, furniture was made to last through large families and their children's children so older furniture was made with sturdy woods and fabrics to withstand the test of time. In today's rush-rush world, furniture is made to break down on you within five to ten years so that manufacturers can make more money. That's not to say you can't buy good furniture these days... it's just really expensive.
The hope with this article is that you will come away with some ideas to redesign or repurpose some of your own pieces, and hopefully be armed with a way to accomplish it!
The Talent for being happy is appreciating and liking what you have, instead of what you don't have.
— Woody AllenRefurbishing an Eyesore
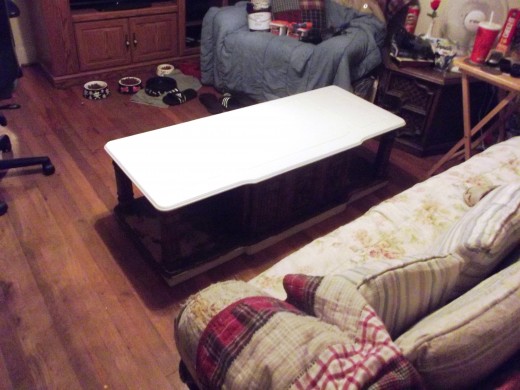
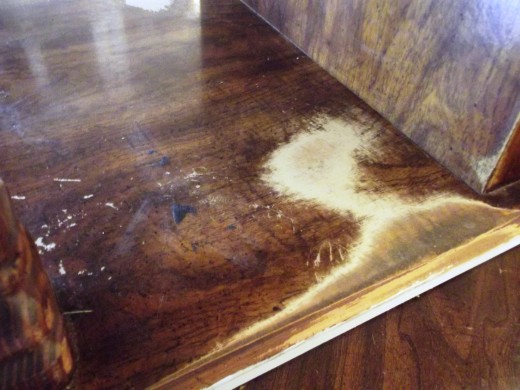
Sometimes an older piece of furniture becomes an eye sore just from the passage of time and use. Coffee tables are a good example of overused furniture. Kids color on them, condensation put rings in the finish, they get bumped, dinged and worn. The truth that if it's an older piece, it can be "redesigned" to become a focal point for your room, or "refinished" just make it last a few, (if not several), more years. This is usually less expensive than buying something new.
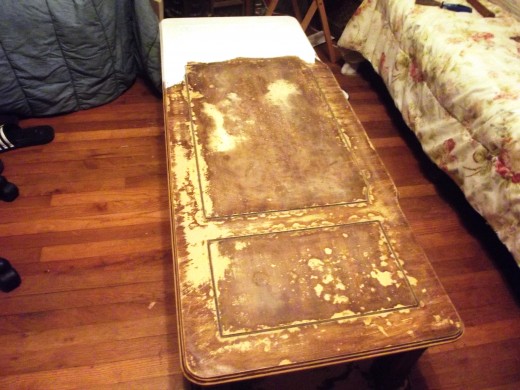
My husband is the worst for bringing home old junk. He brought me a coffee table someone had thrown out because our newer one had a broken leg, and the one he found had all four appendages and a sold base. It was a heavy piece, (however ugly), so I let him have it and just covered it with table cloths. When our family room underwent an overhaul, something had to change.
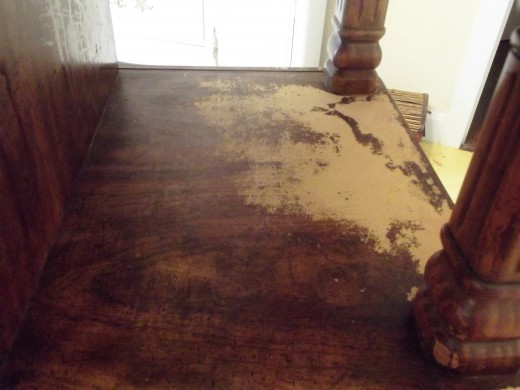
Originally, this piece (probably made in the early 70's), had a photo finish on it, but it had a solid foundation of real wood beneath. So, I started by stripping the finish down with some 60 grit sand paper. Once I had the finish stripped, I then sanded it again with some 150 grit sand paper to give it a smooth surface. Ironically enough, all the bumps, grooves and stains came completely off.
What you need to refurbish old wood
- 60 grit sandpaper
- 150 grit sandpaper
- a quart of paint or stain
- a quart of clear brushing lacquer
- 2" Trim/paintbrush
- about 6 hours
Step by Step
- Using the 60 grit sandpaper, sand the finish off your old piece of furniture
- Once the finish is gone, use 150 grit sandpaper to soften or, "smooth" the wood
- Apply stain or paint, following manufacturer's instruction. Be sure brush strokes move with the grain of the wood. (To get an even coat with either paint or stain, you may have to apply two to three coats.)
- After applying the final coat of paint or stain, it's time to apply clear brushing lacquer. Again, follow manufacturer's instructions, making sure to brush with the grain of the wood. Make sure to apply more than one coat to ensure a long-lasting finish.
Style and Function
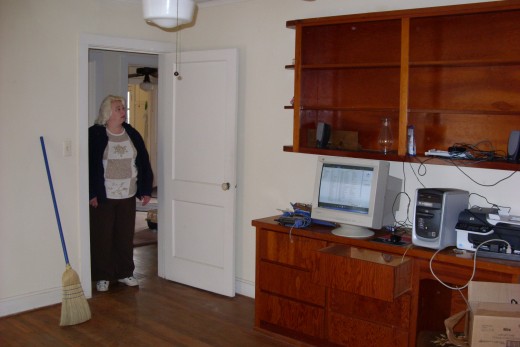
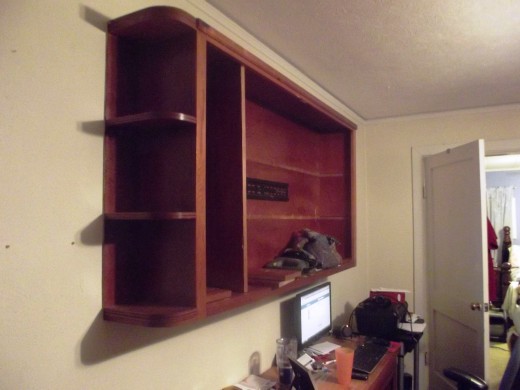
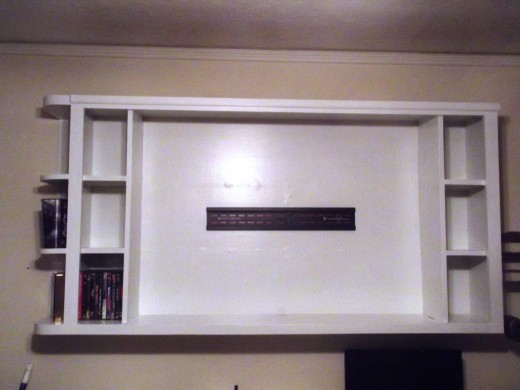
Sometimes we walk into a room with built-ins and are blown away by how beautiful they are and then other times we take one look at it and think "what the heck is that thing"?
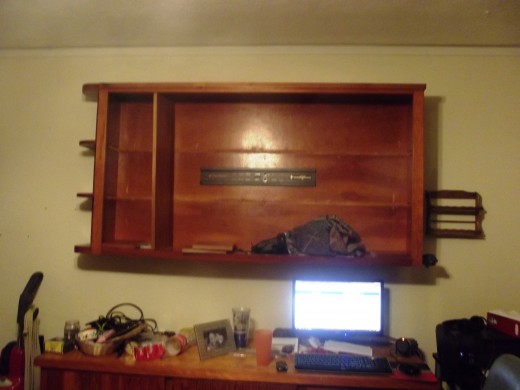
That's what happened when we bought this small cottage in the park district. The home was built by the man who owned it back in 1943 and he was very good at woodworking apparently. Having said that, the family room of the house had a large book case hanging on the wall and a large desk beneath it that was just an eyesore.
Repurposing a weird built-in
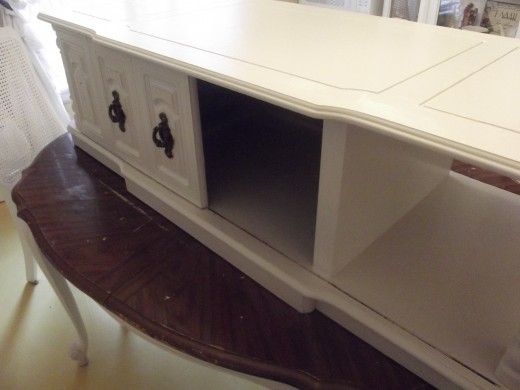
We had to ask ourselves what the purpose was for this room. It was in an odd place in the middle of the house and was used as a family room before. We decided to make it an entertainment room.
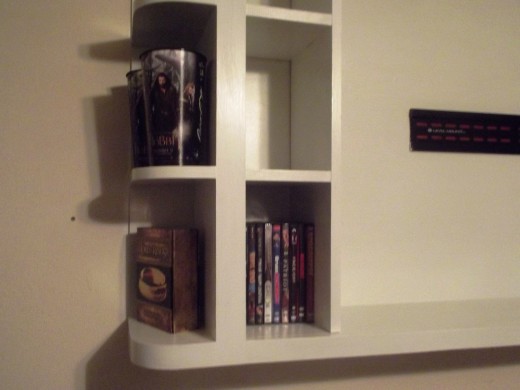
With that in mind, there was no room for a giant book case and desk. We removed the desk and gave it to my father for a work bench. Then we went to work on the book case to repurpose it as a place to hang our television. We wanted it to house some of our DVD and movie memorabilia so it would need to keep some of the shelving.
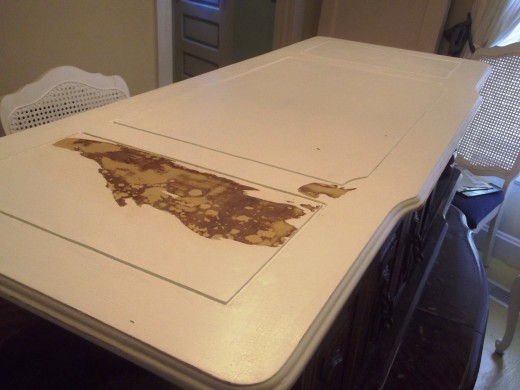
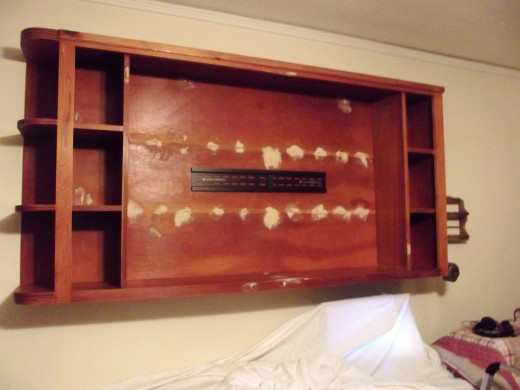
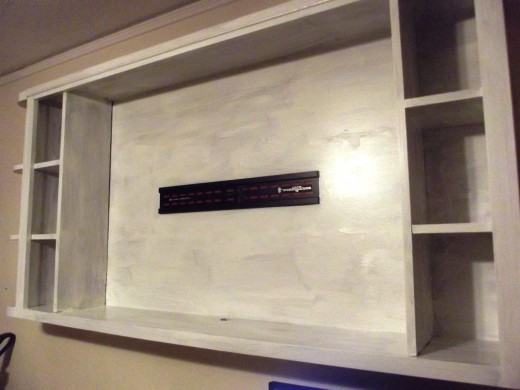
Taking all of that into consideration, we also elected to use white as a furniture color to create the illusion of space. The dark wood of the cabinet made the room feel small. We started by removing the shelves. Unfortunately, they left big splinters and pock-marks in the wood, so we had to use wood filler to compensate for the imperfections.
Once the wood filler was dry, we sanded it down, using the same techniques as we used on the coffee table. We sanded the finish off with 60 grit sandpaper and then used a 150 grit sandpaper to smooth everything flush.
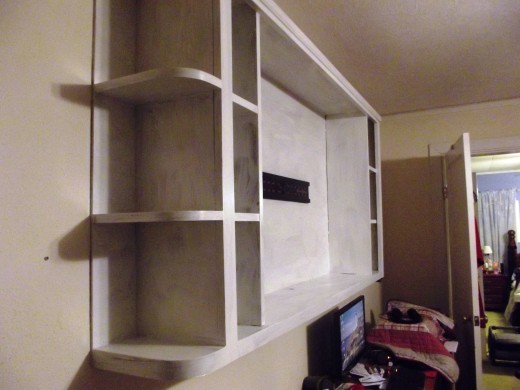
Elements of the "Repurpose"
In an effort to make this built-in functional, we removed the shelves to make room for the television, but wanted to keep some of them to house our DVD's. Rather than build something new, we just cut down the shelves to do what we needed. In the beginning the shelves were horizontal. We took them out, put them up vertically, then made some small horizontal ones to put movies on.
Once we had the structure and design we needed for the piece to provide maximum functionality, we had to work on the look and feel of it. Since the old coffee table got a facelift in white, we used the same paint here. The first coat didn't cover, but fortunately the second coat did. Since this unit wasn't likely to get much physical contact, we didn't need a coat of lacquer.
Style AND Function!
Each repurposed piece gives us the opportunity to save money and like what we already have, but more importantly, it gives us something that no one else has and makes your space more unique.... more you. The next time you're thinking about demolishing or throwing out an old piece, try to think what other purposes it can serve or how you can save it.
Recovery
Sometimes it's not that the old furniture is uncomfortable, it's just that the fabric is worn or dated and we want something fresh...new.
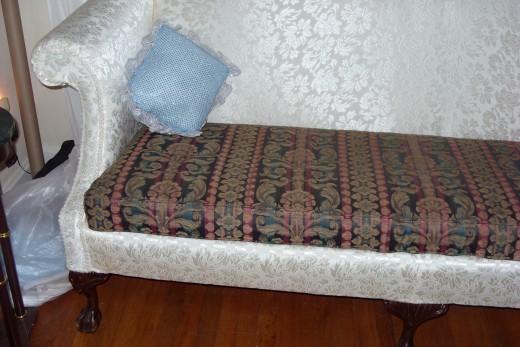
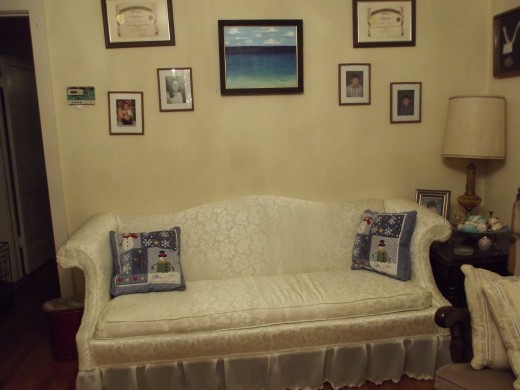
An attorney's office was moving and had an old "French Provincial" couch they threw out. Made at the turn of the 80's it was a solid piece, but the fabric was multi-colored in those popular eighties colors, Mauve, Gold and Hunter Green! Yuk!
My husband brought it home and we lived with it until we knew what to do with the formal living room we put it in.
We settled on a creamy colored brocade with a chiffon skirt. I have never actually recovered a couch, but I knew what I wanted. So I measured the couch, converted it into yards, added a couple extra yards in case I missed anything, and then went out to get some fabric.
I recognize that the existing fabric should have come off, but elected to simply sew the new fabric onto the old. I basically held the cloth over the couch, tucked it in places and cut my pattern based on the couch itself, following what had been done before. I then took some upholstery needles I bought for a couple bucks, and sewed it on. ** NOTE I have discovered that it is very important to pull the fabric tight so with that in mind, I ALWAYS pinned the pieces snugly into place prior to sewing them so that I could see how they would look once finished.
When it came time to do the seat cushion, I unzipped it and took the cover off. Taking it apart, I used it as a pattern for my seat cover. I used the zipper off the old cushion, and reused the piping by making a sheath for it out of my brocade. If you ever get into recovering a couch or chair, you'll see that these items are costly so if you can reuse the zipper or piping you can save yourself a lot.
Doo-dads
I wanted something that would really knock people's eyes out. I shopped at hobby and fabric stores for something sparkly to trim the couch and the chiffon skirt with. Sometimes, little things do a big job for furniture. I found a clearance sale on wedding trim and got several yards for next to nothing. I incorporated beaded strands into the couch covering by sewing them directly onto the couch in places that wouldn't be affected by people sitting on it. I then trimmed the chiffon skirting with wedding sequins. The results were stellar!
By hanging onto the older couch, we gave it a noticeable glance back to the historical timeframe that the style originated from, (with the brocade and skirting), and brought it forward with trimming and homemade pillows. It gave the room a period feel, but the neutral color opened up the pallet for the rest of the room.
Recovering old furniture may not be for you, but upholsterers in your local community are usually willing to work with you on redesigning older pieces and it's almost always cheaper than buying new. You may even find that the piece you refurbish lasts as long now as it originally did the first time around!
The Finished Product!


Summing it Up
The main focus here is to help people to see how many beautiful things may already exist in your home. Next time you're putting something out on the street, reconsider what other purpose it may serve, or how you can save money by refurbishing it... or call me! Either way, you won't be sorry. :)


