Restoring or Replacing a Handsaw Handle

[New Saw Handle]

Why Not Just Buy A New Hand Tool
Unlike power tools which operate under their own momentum hand tools are powered by their users. The skillful use of hand tools requires that an intimate relationship be formed between the tool and the user and they two become one. Through such a relationship the hand tool begins to develop character and a personality that the tool user becomes partial to. The hand tool user learns just how to guide that particular tool on to perfection in its craft. When that tool suffers severe wear from aging or accidental damage the relationship is threatened and the thought of parting with that tool is like the losing of an old best friend. The tool may not have to be retired though often much of the tool damage can be repaired.
How To Make A Handsaw Handle
Tools You Will Need

What The Project Will Require
To replace the handle on this old handsaw we are going to need a few tools and some materials. We are going to use an old piece of plywood that I had laying around. It is not in the best condition, but I think it will be fine for this project. The old weathered plywood will give some style and character to the appearance of the completed handle. To cut the plywood I am going to use a jigsaw because it cuts along the curved lines and around small radius corners very well.

Yellow Hacksaw Handle For Template

I will also need a drill to create a hole in the plywood to insert the jigsaw blade to start the cut for the inner handle hole. The drill will also be necessary to drill the three bolt holes for fastening the new handle to the blade of the handsaw. I will use the yellow handle of the metal cutting hacksaw as a template for the hand grip of the new handle that I am making. I have here also a dremel which I will use to smooth out the rough edges of the handle that will be caused by the jigsaw blade as it cuts the plywood. I will also use the dremel with a metal cutoff wheel to cut the extra length off of the bolts and screws that I will use. I will need a pencil as well to draw marks on my plywood.
Trace The Pattern

Old Handle Marking

The First Step
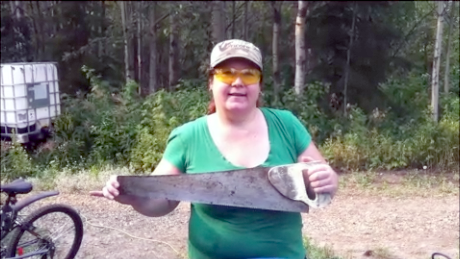
The first thing that I am going to do is lay the yellow handled hacksaw onto my plywood in a location where it can be traced around without contacting any damaged area on the plywood. After I have positioned the yellow handle precisely where I desire it I side the old saw blade under the hacksaw up to the yellow handle, making certain that the teeth of the old blade are at the bottom end of the hacksaw handle. Now with both pieces in place I trace with my pencil around the top, back, bottom, and inside the handgrip of the yellow handle of the hacksaw. Then I attempt to transfer to marking of the old handle stain on the old blade to the plywood.
TIP: You could use trace paper to first trace the exact stain mark of the old handle on the old saw blade and use the trace paper stencil as a pattern to mark the plywood.
I am only going to guess at the circumference of the old handle, which includes the bolt holes, by transferring the stain mark on the top and the bottom of the old saw blade to my plywood. Then I remove the blade and by free hand technique draw the circumference of the stain mark joining the two marks on my plywood together. Then I compare my mark to the stain on the old blade to be certain that the curvature is relatively close to the original stain mark.
Drill Holes To Begin The Cut

The Next Step
Next we will need to drill some holes in the corners of the inner handgrip of our handle. These holes will allow us to insert the jigsaw blade plus provide us with little radii in the four corners of the inner handle. After drilling the holes we can go ahead and insert the jigsaw and proceed with the cutting out of the inner handgrip.
Cut The Inner Handgrip

TIP: It is much easier to cut the inner handgrip out before cutting the complete handle off of the sheet of plywood. If we cut the handle off first then we have a much smaller piece of wood to work with and it will be difficult to hold the small piece of plywood while drilling the holes and cutting the inner handgrip out.

Smooth The Edges

After cutting the inner handgrip out go ahead and cut the complete handle section off of the plywood sheet. Once the handle is cut from the sheet of plywood take a dremel with a wood sanding tip and smooth all of the cut edges to remove any wood burs and chips, finishing the cut edges nicely. Sand both the inner handgrip edges and radii as well as the outline edge cuts.
TIP: If you do not have a dremel, you can use a hand held file or some sandpaper to smooth the edges of the handle.
The Second Handle Section

Making The Second Side Of The Handle
After the first handle section is smoothed use it as a pattern to trace the second handle section on to the plywood. Position the first handle section where it fits nicely on the plywood in the area where the first handle section was cut out from.
TIP: To save wood rotate and tuck the first handle pattern section into the angle of the existing cuts.
The Second Side of the Handle

After tracing the second handle section drill the four holes inside the inner handgrip and then take the jigsaw and cut the inner handgrip out. Then cut the second handle section off of the plywood sheet.
Drill and Cut the Inner Handgrip First

Once the second handle section is cut off of the plywood sheet place it on top of the first handle section to compare them in shape and size. They should be reasonably close, though, they will not be exact. With the sanding wheel on the dremel smooth the edges of the second handle section. After smoothing hold the two sections together once again and identify any grossly high spots on each section and sand the high spots down a little more. The two handle sections will then be fairly close in size and shape. Close in size and shape is good enough for this project. We can now proceed to mark holes on the handle sections for the saw blade bolts.
Mark and Drill Holes in the Handle Sections


Drilling The Mounting Holes
On one section of handle set the saw blade to its proper location. Line up the stain mark on the old saw blade with the radius of the wood handle section. After the blade is correctly positioned use the drill or a pencil to mark inside the holes in the blade onto the wood handle section. Then remove the blade and set the handle section in a place where you can drill the three holes through the handle.
Line Up The Two Sections

TIP: Use a drill bit the same diameter as the holes in the old saw blade. The bolts you use should be the same diameter as the holes in the saw blade also so that they hold the blade secure without allowing excess movement between the bolt and the hole in the metal blade.
Once the first handle section is drilled for all three holes set the first section uniformly on top of the second handle section and clamp or hold the two handle pieces together tightly. Place the two secured handle sections in an area where you can drill completely through the holes in the first section making holes in the second section.
Hole Diameter

Holding The Sections Secure

TIP: After drilling the first hole through the two handle sections you can insert one bolt into that hole to help keep precise alignment of the two sections. After the second hole is drilled insert a second bolt and then drill the final hole. This technique will make certain that all three holes are precisely aligned. in both handle sections.

Tighten The Bolts

Cut The Bolts

Mounting The Handle
After the three holes are drilled in both the handle sections you can bolt the two sections to the old saw blade. Set one handle section on each side of the metal saw blade and insert the three bolts into the holes and through all three pieces, the first handle section, the blade, and the second handle section. The bolts that I am using have large tapered heads that will countersink into the wood so I will put no washers on the head side of the bolts. I will put washers on the nut side of the bolts, however, to keep the nuts from tightening into the soft wood. After installing the washers I put the nuts on the bolts and tighten the nuts. Because the bolts are too long I will put a metal cutting disc on my dremel and cut the access of the bolt off just above the nut.
Repairing The Old Wood

Wood Filler

Old Plywood Repair
One of the problems with using old materials is that their condition is often not immaculate. The plywood that I am using is quite old and well weathered and dry. Plywood is manufactured by bonding thin wood sheets together with a glue. As the plywood becomes weathered the old glue often becomes weak and the plywood laminate separates and is easily damaged when working it; especially around the edges.
TIP: To minimize damage on all plywood both new and old a fine tooth saw blade is best for cutting. A coarse blade will always rip and tear the wood along the edges of the saw cut.
Screw The Handle Together

Securing The Outer Handle Sections
After squeezing wood filler in between the two handle sections we will screw the two sections together to secure them. I am using fairly large wood screws that I found laying around in my supply of used items. These screws are too long so after inserting them I will cut them off. The screws are fairly wide and may split the plywood so I will have to drill a pilot hole in the plywood before inserting the screws.
TIP: Whenever inserting wood screws in any wood there is a danger of splitting the wood so the drilling of a pilot hole for the screw to be screwed into will alleviate the danger of splitting the wood.
The Pilot Hole
Use a drill bit that is the diameter of the core of the wood screw. Subtract the thread portion from the wood screw and that is the diameter of the core of the screw. The pilot hole will displace the wood making room for the core of the wood screw. Only the threads of the wood screw need to cut into the wood. Be cautious, however, not the drill a pilot hole any larger than the core of the wood screw or the screw will be lose and not bite into the plywood as it is intended to do.
Drill A Pilot Hole

Screw the wood screws into the pilot holes while the wood filler is yet wet. This will cause the two sections of the handle to squeeze tightly together as the excess wood filler is forced out from between the two sections. Insert two screws in from one side and put the third screw in from the opposite side drawing the two sections in towards each other. This fastening technique will provide the best securing results.
Inserting Screws

After the wood screws are inserted take the dremel with the metal cutting disc and cut off the screw excess. Then wipe off all the excess wood filler that squeezed out from between the two handle sections. After the wood filler has completely dried you can sand the remainder off of the handle until it has a smooth finish. Then you can stain or paint the handle if you prefer.
All Finished

Questions or Comments
I welcome all your questions and comments as well as any suggestions or ideas of your own. Please contact me through any of my links with any input that you desire to contribute. I enjoy hearing from everyone.
Thank you
How To Pam
Related

How to Make an HDD Storage Rack From Wood for External Hard Drives
 To Install Hardiplank And The Like")
Lap Siding: How (Not) To Install Hardiplank And The Like

Rustic Birdhouse Ideas: How to Use Salvaged Wood, Reclaimed Lumber, and Old Pallets

Cutting Metal With A Variable Speed Jigsaw

The Environmental Impacts of Offshore Oil Drilling


")