Saving Tomato Seeds for Planting

Why Does one Prepares and Saves Her Own Tomato Seeds?
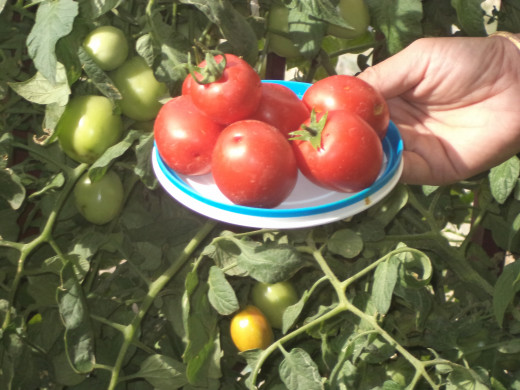
For a kitchen gardener, there is nothing more delightful to see plants from self prepared seeds. If it comes to tomatoes, it is even an easier task to prepare seeds for the next harvest at home than to purchase seeds from a supermarket or a commercial nursery. It is almost six years now in a row, I am harvesting tomatoes in my balcony on the sixth floor of a residential building and when I say that in a balcony of around 8 ft x 10 ft I harvest around 50 kilograms of tomato every season, I am not exaggerating. In a year, there are only 4-5 months when I have to buy tomatoes from the market. Otherwise, it is my balcony that gives me the fruits every day. The first picture in this hub is taken from another hub of mine “How to Grow Tomatoes in your Balcony using Grocery Sacks and other waste Materials”. The picture shows approximately the amount I harvest every day from my tiny balcony during March-mid July and from September-December.
Initially during 2007-08, I accidentally created some plants by using seeds of a rotten tomato in disposable tea cups. I grew the plants in some grocery sacks and got quite a few tomatoes. It was for the first time I was growing tomatoes in containers. It was quite an experience and I thought I can grow more tomatoes if I use quality seeds purchased from a store. I did that, but it was a disaster. Most of the seeds did not germinate or was too weak to sustain sudden changes in temperature. Although, the per plant harvest was reasonably satisfactory, the plants died soon in around one and half months of bearing first fruit, contrary to my first experience in which the plants gave fruit for around 3 months. For me it was convenient to handle some fruits everyday and I could pluck them as an when I needed. Probably there was a problem with the seeds I purchased. I decided to devote time and energy only in things for which I need not depend on unknown factors. That was why; I was interested in developing my own tomato seeds rather than purchasing.
Over a couple of trial and error, I developed my own way of saving tomato seeds and the hub is based on my experiments.
The seeds prepared without fermentation process

Popular process of saving tomato seeds through fermentation
Seeds with gel coatings are collected in a container (preferably a glass jar). Some clean water is added and to it and it is left for five to sever day in order to get fermented and the gel coating to get destroyed in the process. It requires occasional stirring of the jar to speed up the process. The seeds are then collected by draining the excess water and drying thoroughly before saving the seeds for the next year.
Inconveniences Involved
Firstly, the most inconvenient part of the process is the time it takes for the process. It typically takes around six days to get the gel completely removed through germination. If you are living in a cold climate, then the process may take longer too. For a kitchen gardener who is into the process for the first time, the initial interest may get reduced by the days passing. After all, the seeds are being prepared for the next year and not for immediate use.
Secondly, getting the seeds fermented in a corner of your house starts leaving a foul smell once the fermentation starts. It may be harmless, but certainly inconvenient for me even if I covered it with plastic sheets.
Thirdly, when I started drying it under sunlight some of the seeds started germinating after a day that I wanted to happen only in the next season.
Probably, this is a process best suited for commercial preparation of seed or seeds in bulk where one may use an air dehydrator to dry the seeds after the gel coatings are removed. For a kitchen gardener who is interested to save only a few seeds for planting in some containers the best method is probably what I have discussed in this hub.
Tomato seeds and the Gel Coating around it: The way I perceive the Gel Coating
In an effort to understand the best way to preserve tomato seeds, a lot of information came on my way through internet sources and some experts of Botanical sciences. I worked on those and did some experiments. The most popular process of preparing seeds for saving tomato seeds is probably a process called fermentation that I have discussed in the Box-1. I did experiment that too. Although the results were amazing, there were some issues as far as my own conveniences are concerned. But before I discuss that let me explain something about tomato seeds.
Tomato seeds are typically covered with a gel coating that is supposed to prevent it from being germinated. This gel like substance need to be removed for better germination experiences and the popular process of fermentation is all about removing this gel like substance.
However, I would like to have the gel coating get dried with the seeds for several reasons.
(1) This gives an extra protection to seeds from bacterial and fungal infection after being dried.
(2) One need not spend days to ferment the gel as the gel will automatically disintegrate when you put it for planting next season.
(3) No need to have a smelly thing in your house and give additional care and attention for some days.
(4) With the gel intact we can have the seeds saved in a more convenient manner by fixing the seeds against a piece of paper.
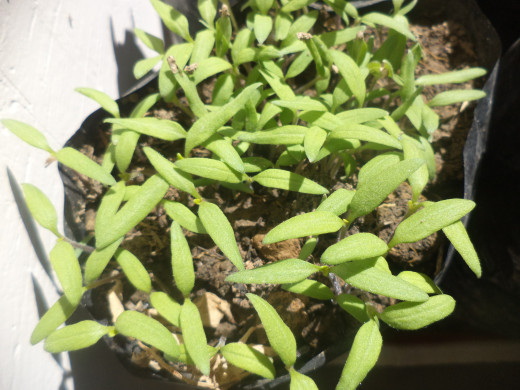
5-6 days after germination of the seeds
The benefit of the process of stirring and removing the water:
One may notice that while stirring, only the seeds that are heavy and healthy will settle down fast and very thin seeds with less germinating material in it would keep on moving in the water for a longer period. This will help in a manual sorting of the healthy seeds and the lighter seeds will get drained with water. On the other hand, in the fermentation process, even the ‘not so healthy seeds’ will also remain in the collected seeds as after the disintegration of the gel coating all the seeds whether healthy or not will settle down.
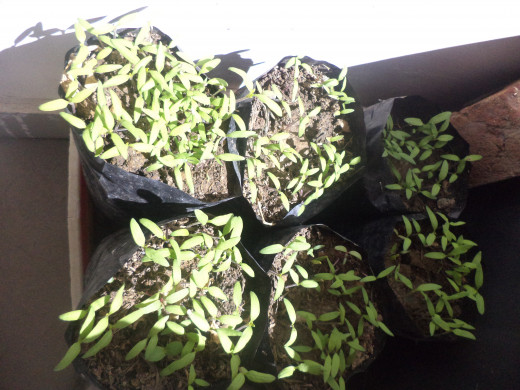
The seedlings prepared from the seeds
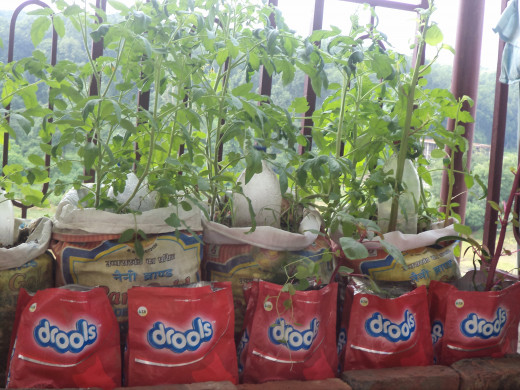
Tomato plants in grocery sacks
My compost bins

My process of Saving Tomato Seeds for future use in just 15 minutes without Fermentation:
What a kitchen gardener may be interested in processing are the seeds collected from a couple of tomatoes and the purpose is not to save kilograms of seeds but some seeds sufficient to generate 30-50 plants in the next season. Here is what one needs to do.
If you are saving seeds from the tomatoes of your own plants, identify some tomatoes and let it get ripened properly while on the plant itself. Select those fruits which are bright in color, uniformly shaped, fully grown and attractive in its look. Just let those fruits hang on the tree till they do not fall down automatically with a slight jerk or the tomatoes look quite mature (dark red like blood clot if they are red tomatoes) in color.
Once they are ready for processing, arrange for some pieces of bloating paper or paper napkin or toilet roll. Cut the tomato in half across the fruit so that it is cut in its equator. It is easier to remove seeds that way. If the tomato is ripe enough, you may squeeze the seeds out easily in the manner you squeeze a lemon (do not squeeze it as hard as you may squeeze a lemon. You need the seeds only and not a tomato paste). If the seeds do not come out easily, use a spoon or kitchen knife or your fingers to scoop them out. Once you have the seeds collected in a bowl, you may eat the seedless part or use it in manners you like. We are currently interested in seeds only.
Take 2-3 cups of water in the seed bowl and with your hands try to mix the seed well in water. You may also use a fork to stir it well. You may notice that while stirring, the seeds will settle down and the pulp parts are still moving around in water. Gently drain this moving liquid out of the bowl. You may need to repeat this process twice or thrice to remove the pulp part adequately.
Now when most of the water is removed just pour the remaining of the bowl on a piece of plain white paper spread on the floor or table. The excess water will flow away leaving the seeds at one place on the centre of the white paper. Please note that the paper should not be bloating paper, but any ordinary writing paper, glossy paper would do. Now, with your finger, try to arrange the seeds in rows and columns. In order to save time, you may also just spread the seeds throughout the piece of paper evenly instead of arranging it properly. Once the seeds are arranged, take a piece of bloating paper or toilet roll. Put the toilet roll on the arranged seeds, press it little and try to remove the toilet roll as shown in the video. You may see all the seeds stuck on the toilet roll itself. This is primarily because of the gel sticking to the bloating/ toilet roll. Keep on adding pieces of toilet toll on the seed roll till it becomes dry enough to handle properly. Just keep it on your shelf and leave it. You may put it for drying under sun as well. The layers of toilet roll sheets will let the seeds dry completely as it will keep on soaking moisture till it is completely dry. Once all moisture is removed, take the seed paper and store it for future use. In order to plant it, just spread the seed paper sheet on soil and sprinkle. The toilet roll will absorb water and help in germination. Otherwise, you may also tear the seed paper into pieces and use these pieces for germination.
The entire process is shown in the video.


")