Simple DYI tips on Laminate Flooring

Never fear, it's really quite simple......
It's hard to know when a DYI job is really something that you can do yourself. If you're at all like me and rather enjoy charging into these situations at full speed and half brain then this is a Tip Guide for you!!
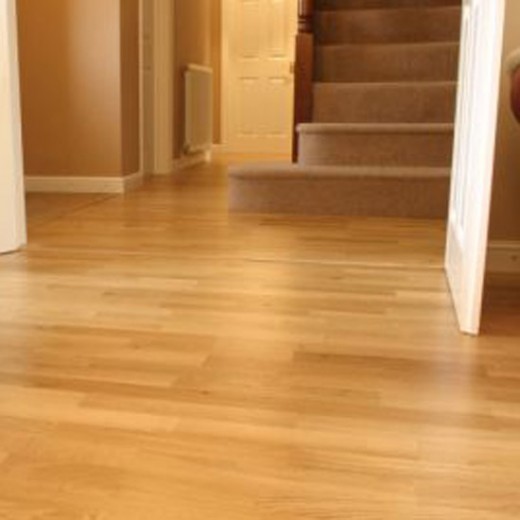
Laminate flooring really is easy to install, looks wonderful when you're done and can completely change the visual perception of a room making it appear longer or wider depending on the direction that you lay it. There are many other pluses to it such as maintenance and cleanliness also. Here are some basic guidelines and tips which make this job a cinch and the result beautiful.
Laminate is easy to install and completely changes the look of a room
Tips:
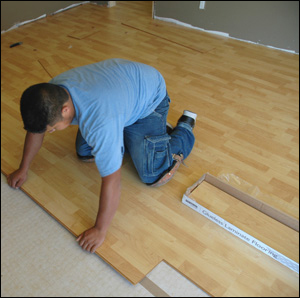
The first thing to remember is that when you say to yourself, "Oh, I have a rubber mallet at home, I don't really need the kit that is recommended", stop it. Buy the kit. Or borrow one from a friend. You need it. It comes with the mallet, the bar necessary to install the flooring along the walls, the block used to lock the flooring into each other and the spacers. Once you get past that part, just follow these simple tips along with the instructions on your product.
- Flooring is usually laid in same direction as the main window in the room faces. The light runs along the length of the flooring and makes the room appear bigger. However, in a narrow basement room with no windows or very small, high ones you can lay the flooring width-wise to give the room the illusion of being wider.
- Measure the distances across the room to make sure the walls are consistently the same distance apart throughout the whole area. If the distance at one end is 24 feet and the distance at the other end is 24 feet 3 inches, then the flooring isn't going to be square with the room once you get to the last row and the distance between the wall and the edge of the flooring will be too great for a trim to cover. Adjust with the spacers (you may have to double up on one end or use the thick side on one end of the room and the thin side on the other end) and width of your trim.
- Make sure your laminate is no less than 8mm thick. They sell thinner laminate for a lesser price but it's just not as good. It doesn't seem to self level as well and can break/snap easier. Absolutely an inferior product by comparison.
- Best to vacuum before putting down your underlay, don't just sweep. Make sure there are no nail heads poking up as they can end up causing problems down the road. Most imperfections other than that are inconsequential and laminate can be laid directly on existing flooring such as linoleum, tile, etc.. The best part of using this underlay and the laminate is that it's what is called a "floating floor" and "self levels".
- When starting the first few rows, you'll find the spacers will pop out and be tempermental. I actually ended up taping mine to the wall so that they held their place and stopped causing problems. A couple strips of masking tape across the top works just fine and makes sure the flooring stays square.
- The first row begins with a whole laminate strip. When you get to the end and cut the extra off, that end piece now becomes the first piece of your next row. Always start rows at the same end of the room.
- There are two slits in the edge of the block that comes with the kit. When putting in the board do so on a 45 degree angle and use the slit farthest from the floor when getting it into place. Once the board is in place it should rest a centimeter or so off the floor. Flip the block over and use the slit closest to the floor. When you tap on the block this will lock the laminate into place and make it lay flat. If you miss this step the flooring could end up with the seams causing "peaks" as one piece will be raised and the next may lay flat. A tip no one told me so I know............
- Laying the last row against the wall is the trickiest part I found. You'll really have to work out a technique that works best for you. My friend and I personally found that the first step of locking it in was easier if you only did the lengthwise edge then gently tapped it up into place to click in to the one before it on that row. The bar that comes in the kit comes in handy as you can't really use the block, though be careful as it can chip the flooring easily and ruin it.


")

