The Best Way to Clean a Dryer

Believe it or not, your dryer does get dirty. Dirt, grime, and especially lint build up in places that you probably wouldn't expect. This build-up will then affect the appliance's performance in the long term. We have put together this guide to help you...
- clean up emergency spills,
- clean up the lint that builds up over time, and
- avoid costly repair and replacement costs in the future.
This guide will be organized by component parts of the dryer that you are interested in cleaning, starting with the dryer drum and lint vent all the way to the back panel and exhaust tubing where the real trouble starts.
In most cases, cleaning is simply a matter of wiping away any loose or hanging particles of lint and forcing the rest loose though a tumble dry. To accomplish this, you will need a few supplies:
- washcloth or rag
- 4 - 5 additional rags or old T-shirts
- dishwashing liquid
- rubbing alcohol
- bleach
- acetone (optional, depending on how well the previous items clean up the grime)
Step 1:
Mix a bowl with 2 parts water and 1 part dishwashing liquid. Place your washcloth / clean rag into the mixture until it is soaked thoroughly. Next, wring it until it is damp (not soaking).
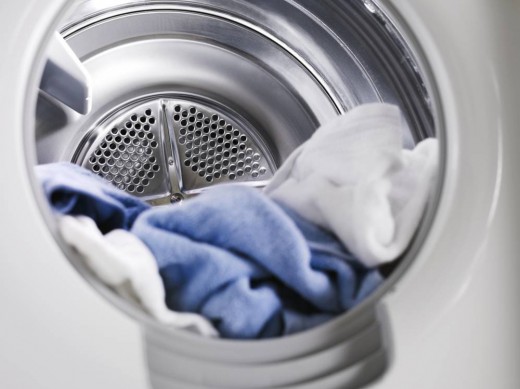
Step 2:
Use the damp washcloth to wipe down the inside of the dryer drum. This should help pick up all the loose dust bunnies and dirt. At the same time it will help sanitize the inside of your device for future laundry cycles.
Sep 3:
Lastly, you will attempt to remove any remaining grime by running a laundry cycle. Simply place the group of rags or unused T-shirts into the dryer and run them through a full dryer cycle one time. When the cycle is done, remove the clothes and hopefully your drum will be brand sparkling new. Or else....
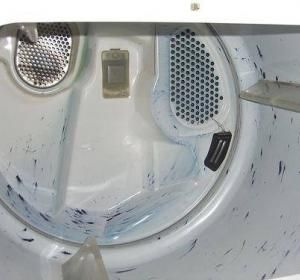
Removing Ink Stains From Inside Your Dryer
Unfortunately, sometimes dishwashing liquid is not a good enough cleanser for cleaning the dryer drum. Consider this frightening scenario. You put you clothes into the dryer, however— gasp— you forgot that have left a marker in your favorite pair of jeans, and they are going through the spin cycle right now. You open the dryer door and not only are your favorite jeans ruined, but the inside of your dryer is now been turned into a polka-dotted mess. What can you do?
Well, first of all, don't fret. All we have to do is to follow the same procedure as last time, but with stronger chemicals.
Step 1:
Mix a bowl with 2 parts water and 1 part bleach. Place your washcloth / clean rag into the mixture until it is soaked thoroughly. Next, wring out the washcloth until it is damp (not soaking).
Step 2:
Use it wipe down the inside of the dryer drum. This should help pick up all the loose dust bunnies and dirt.
Sep 3:
As in the last method, you will attempt to remove any remaining ink by running the laundry cycle. Place the group of rags or unused T-shirts into the dryer and run them through a full dryer cycle one time. When the cycle is done, remove the clothes and hopefully your drum will be brand sparkling new.
Step 4:
As an extra precaution, you should take another clean rag (rag without bleach) and wipe the inside of the dryer drum clean of any remaining particles of bleach. Wet this new rag if you have to.....it is very important to get bleach and other harsh chemicals out of the dryer drum before drying another load.
Step 5:
At times, ink stains may form on the inside of your dryer drum that you don't notice until days later. These stains may be very difficult to get out since they have had time to solidify onto the dryer drum. Therefore, you probably need to use acetone. Just repeat steps 1 to 4 with the acetone and make sure to give the dryer drum a good wipe down after running your unused t-shirts or rags through one dryer cycle.
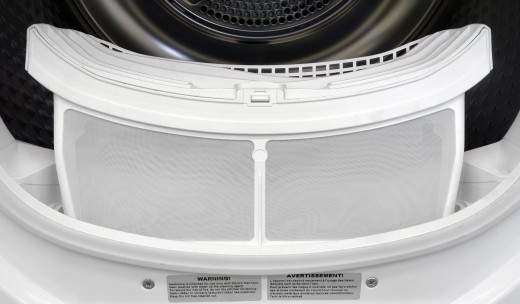
The next component that we should be concerned about is, of course, the all important lint collector. Usually located immediately on the inside of the dryer door, the lint collector collects loose lint, dust bunnies, and dirt that accumulate in the dryer drum over the course of a dryer cycle. To clean the dryer vent properly, please follow the following steps:
Step 1:
Pull the lint collector out of its housing. Again the lint collector is usually clearly marked on somewhere immediately inside of the the dryer door. Proceed to scrape off the accumulated lint from the vent as best as you can.
Step 2:
Now you should test how clean the lint collector is by pouring water over the mesh. If the water begins to pool on top of the mesh, then proceed to step 3. Otherwise, simply place the dryer vent back in its place.
Step 3:
If the water did pool on top of the lint collector, then you should take a soapy sponge or a soapy wet rag and scrub the mesh portion of the dryer vent until it is clean enough for water to pass through. When this is done, you should be finished with cleaning your lint collector. On to the next part.
As usually indicated on the warning labels of every dryer on the planet....you should clean the lint collector of excess particles after each load of laundry that it handles.
Wow!! You made it this far, how about taking a poll?
How often do you clean your dryer?
Cleaning Your Dryer Exhaust Vent & Back Panel
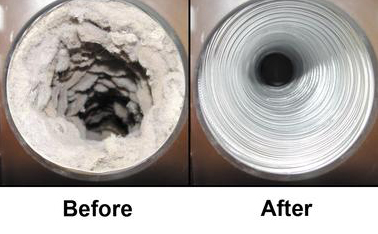
It may not seem like it, but the exhaust tube (aka exhaust vent) and back panel of the dryer machine are crucial parts to be cleaned if you want your dryer to last up to or beyond the expected warranty coverage date. However, be forewarned, this part of cleaning your dryer is a little more difficult that the others. You will probably need access to the back parts of your dryer; therefore do not lift of shift the device without proper assistance. Now let's begin:
Step 1:
As a safety precaution, at this juncture, you should plug out your device. You will be dealing with machine parts that have the potential to blow hot air and breathable particulates into your face. Plug out your appliance to prevent this from happening.
Step 2:
Disconnect the exhaust hose from the back of the appliance. You can definitely expect the hose and all connections associated with it to be full of dust and debris. Clean the hose and all connections of dust and lint with your hands/gloves.
Step 3:
In addition to the exhaust hose, oftentimes a dryer has a back panel that can be safely removed either by delicately prying it open with a screwdriver or by loosening a series of screws. Remove the panel and (depending on how extensively you have used your appliance) you should see an aggregation of dust and grime underneath the panel. Once again, use hands/gloves and manually remove all visible and loose grit, grime and dust.
Step 4:
Now to finish everything off, try to vacuum up any of the dust particles that you may have missed with your manual cleaning. Vacuum the exhaust tubing, all associated connections and the particularly grimy parts of the back panel.
Now assuming you've completed previous steps to your satisfaction, congratulations......you have probably added years to the life of your appliance. Just remember to repeat this step every year of so.


