- HubPages»
- Home and Garden»
- Home Appliances»
- Kitchen Appliances
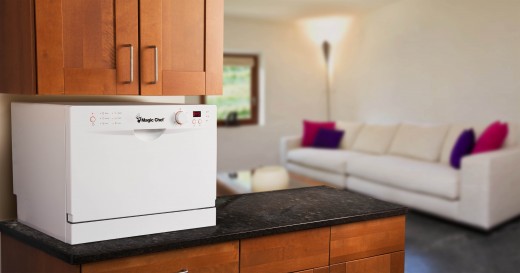
The Best Ways To Diagnose a Leaking Countertop Dishwasher

A leaky countertop dishwasher could create some serious problems if not addressed right away. If it's leaking where you can see it, the likelihood that there's also water where you cannot see it, are very high. If you have an issue which you can't see, you may have a larger problem than simply a wet floor. If you find moisture and warmth left for any period, mildew and mold will quickly follow. Mold or any kind of mildew can be quite detrimental to your health and has been linked to deaths of infant babies. For this reason, you need to quickly find and repair any leak, as well as clean and treat any residual water left behind.
Step 1 - Inspect the Door Seal
As with most compact dishwashers, a rubber gasket is installed around the edges of the dishwasher door; this prevents the soap and water contained inside the washer. Any tears or cracks will probably be the cause of your leak. To determine if it's the gasket, look for cuts or tears. If you do not see any, insert a thin piece of paper into the top part of the door along the side. After closing the door, gently try and pull out the piece of paper. Open the door and slowly move the paper to the next space and do this all along either side of the dishwasher. If the dishwasher has a good seal, the paper won't slip out so easy.
Step 2 - Check the Hoses
The dishwasher's water inlet and return hoses can spring leaks at their connections. Before you start any work on any appliance, unplug it first. Examine the attachment in the rear of the dishwasher for correct attachment. There are two hoses connected to most dishwashers: a fill hose and a drain hose. They're about 1 to 1.5 inches thick. They should now be accessible; slide your hand over them and feel for any wet areas. Look near the connection points and also on the floor directly underneath the attachment points. If there are leaks, check and see if the connections are tight. If they are loose, tighten them. If it is wet at the hoses, look for punctures in the lines. Any damage will call for a replacement.
Step 3 - Inspect the Pump and Inlet Valve
The inlet valve has a flap that opens up and allows water to be introduced into the washer tub, and the pump disperses and drains the water. The valve rests on top of the water inlet line near the bottom of the washer. If the hose connection at the valve is corroded, then this may be the cause of your leak. There is also a seal in the valve in that pump that you might have to replace. To replace the seal, remove the pump from underneath the washer. While the pump is out inspect it for cracks in the housing. If the pump housing is cracked, you should replace the pump to stop the leak.
Step 4 - Check for Unusually High Level of Water
Your washer will leak if the water level inside the dishwasher is too high. You'll want to run your washer (without dishes) until it stops in the cycle. When the water stops running open the washer's door. The water should not come past the edge of the door when looking inside the machine. If it is coming past the ledge, inspect the sprayer arms for clogged ports or damage.
Another thing you might want to check is the plastic float in the bottom of the washer. If it is damaged or not operating correctly, it will not send the signal to the inlet valve to close. Lastly, and this should be first, check to make sure you are not overloading the dishwasher. Consult your owner's manual for the proper loading procedures for your washer. While these aren't problems associated with a leaking dishwasher, they are the ones that are frequently found. If your washer still leaks after trying these inspection tips, you might want to call the customer hotline or a plumber.

")


