Update Your Ceiling Fan for Pennies
Redecorate the Blades
How to Makeover Your Ceiling Fan
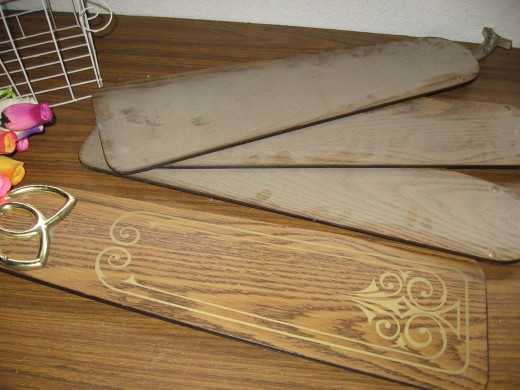
If your anything like me, you've had the same ceiling fan for years...many years. Boring! It's not broken so no reason to replace it. What to do? Start brainstorming!
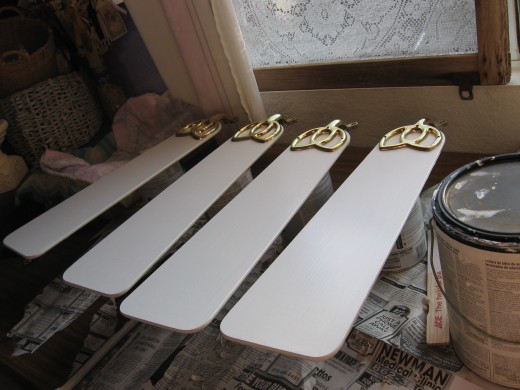
Since I'm on a tight budget and need to be as frugal as possible, I chose to paint the fan blades. When the neighbors moved out next door they sent over any leftover paint they had. Yippee! I decided on semi-gloss white since that is the color of the rest of the accent pieces in this room.
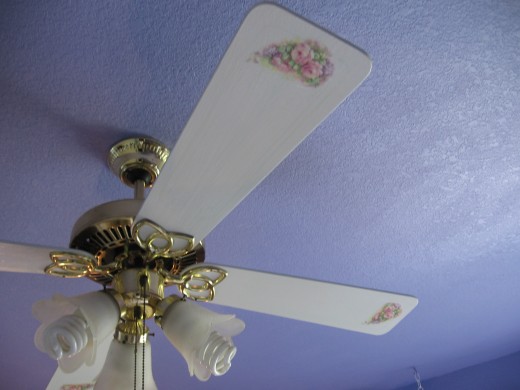
I removed the blades from the motor. Be sure to not lose any of the screws! The blades were pretty dirty on the top so I cleaned them thoroughly, but first I removed the hardware from the blades. I also took the opportunity to clean the whole fan...ick! Once nice and clean I lightly sanded the fan blades to give the paint something to stick to. Let the painting begin! I wanted a real nice layer of paint on the blades. I gave them 3-4 coats of paint, letting the paint dry completely between each coat. I left them alone for 3 days to be sure the paint had fully cured. After replacing the hardware it seemed they needed something. Maybe draw or paint a design on them, decoupage images......I dug through my Treasures and ended up finding some decals I had that were perfect. After adding the decals I sealed the blades with a clear sealer and reattached to the motor. I am so pleased with the way they turned out.
Some Ideas
There are so many ways you can update your ceiling fan blades. Maybe cover them with paper, there are so many designs of scrapbook paper available now. Just trace the fan blade onto the scrapbook paper, cut out and decoupage onto the blade. The same could be done with coordinating fabric that's in the room. How about making copies of your favorite photos, anything that is lightweight and will be flat when finished. Heavier or raised items may put a strain on your fan motor or unbalance the fan.
But just remember your imagination is the limit.


