Using Gel Stain to Update a Banister

If you have yellow oak in your home and you're over it but you're not sure where to begin I can help you out. My home was built in 2004...towards the end of the yellow oak phase but still very much included. All the cabinets in our home as well as the banisters on our stairs are yellow oak. We already updated our master bathroom cabinets using Gel Stain but this time I set my sights on the first thing you see when you open our front door: the banisters. We still had some gel stain left from our last project as well as polyurethane so this project would be cost effective just somewhat time consuming. The perks of using gel stain are that you don't have to sand down to the bare wood like you would with normal stain. While we were updating the banisters I decided to replace the white spindles as well for a more modern iron spindle.
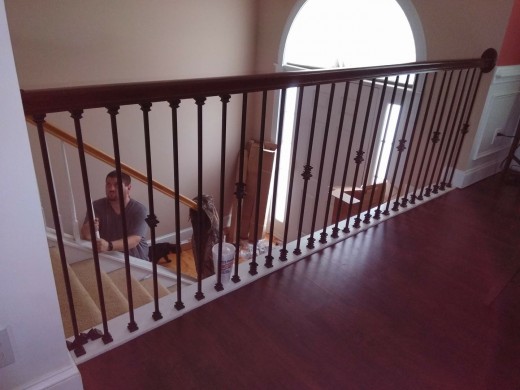
The before (I forgot to take a before but just beyond my aborable 4 year old you can see the banister)

Step one: Prep the Rails
I did a light sanding of the rails after my husband removed the spindles. If you're not removing your spindles and you're just updating the railing then I would recommend using painters tape around the top of the spindles to protect it from the sand paper as well as from the stain. With gel stain you do not have to sand down to bare wood you just need to get the clear coat off. You can also use a liquid sander for this step if you would prefer it.
Make sure to put down drop cloths or plastic to protect your floor or anything else you don't want stain on.
Step 2: Start staining
Now that you've lightly sanded you can get started. Make sure to mix your stain with a paint stirring stick (gel stain is very thick so it will not shake so stirring is required). I used a foam brush to brush the stain on. I have used a rag or paper towel before with this stain on unfinished wood but for wood that has already been stained a brushing it on works best. Brush the stain in on the direction of the grain. DO NOT wipe off! Unlike normal stain you will NOT wipe the stain off. Since you are not staining raw wood if you wipe it will just wipe away all your hard work and you'll have to start over. Once you're done with your first coat let it dry for 24 hours. It took 2 coats to do ours and then before I clear coated it I checked for any spots that didn't look as dark and touched those up (making sure to let set for 24 hours between each coat.
Step 3: Clear Coat
Before you clear coat make sure that your railing is not tacky at all. You may need to wait a few days depending on the humidity to allow it to dry completely. I used a regular paint brush for the polyurethane because foam brushing will leave air bubbles in your finish. Also, do not shake your polyurethane...stir only to prevent air bubbles. Start brushing on your polyurethane in a thin coat making sure not to leave any runs in your finish. Depending on your finish you may need to do 2 coats making sure to let the first coat dry completely first.
Costs for this project
Gel Stain- $13
Polyurethane- $10
Foam Brushes- $1.50
Sanding Blocks- $5
Paint Brush- $5
Painters Tape- $5
Total= $39.50!!!!


