Helpful Hints for the Home Handyman

Hi! I'm "Helpful Homey"...
With over 38 years of experience in the construction field, I have picked up some helpful hints for doing jobs, making jobs easier, and simple ways of fixing something that looked as if it might not be fixable under ordinary conditions. These hints have made many jobs easier and less aggravating. If nothing else, they are downright helpful. Lots of times they are things like, "Why didn't I think of that?" Most are just good old common sense...something that we all need to be reminded of from time to time.
Some may be related to choosing a person or company to do your repairs. Some will be from personal experiences. Not all will be related to home repair and building. From time to time they will be on some totally unrelated topic, but rest assured, all will be helpful. These are not things that you will need an expensive tablesaw/planer system for. They will be things for the typical handyman with a few tools and a project that needs their attention.
Hopefully you will be helped, enlightened and at times entertained by what you read here. Remember, I won't write it if I haven't tried it first.
If you can laugh at yourself and your situation, you are already at the halfway point to completing the job. Proverbs 17:22 says,
"A merry heart does good like a medicine...".
So relax, read on and get some joy in your heart and some hints in your head.
Photo credit google images creative commom domain.
Would You...?
If You Had a Hammer
Did I Get You?
Did you find yourself singing along with Peter, Paul and Mary on that last poll?
Handy Hints - Hammer Time
Driving the "Point" Home - Tools and More: Click on products for details.


The Slipping Hammer Problem
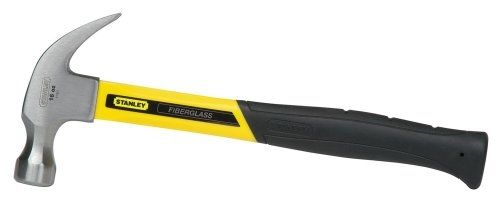
One of the most common problems experienced by both seasoned carpenters and the home handyman alike is that of the "slipping" hammer. When you are driving a nail, it seems as if you are not hitting it squarely and you wind up making "moons" on the wood you are securing.
The problem is not with you or the nail. It is your hammer. Look at the head. Feel the face. It will be mirror shiny and just as smooth. That's the problem.
How do we remedy that? Very simple. Take a piece of coarse sandpaper, and using moderate pressure, scuff the face of the head. Just three or four times up and down, then three or four times side to side (depending on the coarseness of the sandpaper).
No sandpaper available? Then just scrape the face on the concrete to scuff it up alittle. You will be surprised at the difference this little tip will make. Go ahead...try it.
Product photo credit Amazon.
Pick Your Tool
Having the right tool for the job makes it a whole lot easier.
Which Hammer to Chose?
There are dozens of types and styles of hammers out there to choose from. From the itty bitty tack hammer variety to the huge framing hammer.
Basically it is a matter of personal preference. From my observations over the years, let me share some experiences with you that may help you in your selection.
Framing Hammer
The framing hammer was defintely invented by a man who never had to swing one all day. They are long, heavy and cumbersome. I worked alongside carpenters that carried these long handled things and most of them had to "choke up" on the handle. It was too big and heavy to be held near the bottom of the handle. These fellows worked hard at their job and it only took them about three blows to drive a 12 penny nail home once they had it started.
Then I noticed something else. My hammer. For 90% of my construction career I used a normal everyday run of the mill 16 ounce hammer (I preferred a straight claw for framing). I held the hammer near the bottom of the handle and could drive a nail just as fast as they could. The benefits? It cost a whole lot less to buy and at the end of the day I wasn't nearly as tired as I would have been after throwing a 24 ounce hammer at every nail.
It's a matter of personal preference, I know. But part of being a builder or a do-it-yourselfer is to work smart, not hard!


Money Saving Hints
Here is a work and money saving tip. If you are doing a project that requires removal of your wooden baseboard or door and window trim and you plan on re-using that trim, DON'T bang the nails out of it. It would seem logical to just smack them back out the way they went in. However, because finish nails are counter sunk or "punched in" so you can putty over them, the wood closes back over the heads.
So when you do that, the head just rips out the wood around it. When that happens, you may need to replace portions of it or putty the spot and hope to be able to match up the stain when you are finished. Now here is the trick...take a pair of vice grips (or end cutters if you have a good strong grip) clamp down on the nail on the BACKSIDE of the trim as close to the wood as possible, and use the grips for leverage to pry the nail out. It doesn't matter if the back gets roughed up a little bit, no one will ever see it. The main point is that the face of the trim will still look like it did before you took it off. Good trim isn't cheap. Re-use your old stuff, and with today's variety of fillers and finishes, you can make them look like new.
Preventing Wood from Splitting
Have you ever tried nailing a finish nail in a nice piece of trim and have it split the wood? Same with a 2x4 that you need to nail near the end, and it splits too? Here is a tip that will keep you from ruining or weakening that piece of wood without having to pre-drill the nail hole.
Find a good hard surface (concrete, a block of wood with a big old nasty knot in it, just some hard surface that you won't ruin). Take the nail that you are going to use and put the head end on the hard surface. Then while securely holding the nail, gently tap the point a few times to dull it up. As silly as this sounds, it really works. I've been doing it for over 35 years.
My theory on this is now that the nail is flattened out a bit at the point it is closer to the size of the nail shank. Now you are driving a uniform size through the wood rather than small going to big and subsequently splitting out the grain of the wood as the nail sinks in. Doesn't sound very scientifically correct, and seems to defy the laws of physics, but as I said before, it works.
Pliers, Nails & Screws
Pliers in All Sizes for the Project

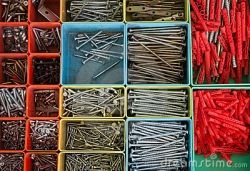
Screws, Fasteners...
and a Few Tricks
Have you ever had a screw loosen up on a cabinet, shelf unit or a hinge and when you went to tighten it, it was stripped out. Your only solution was a larger screw which also meant a larger head which meant it wouldn't match up with the rest of the screws.
Well not if you try this little trick. Take a wooden matchstick (or two depending on the size of the hole), break off the sulfur head and tap the stick into the hole. Once it is all the way in, snap it off, lightly tap down any rough edges with a hammer, then put the old screw back in. Works every time! You can even put a little glue in the hole first if you want to.
Bi Material Groove Joint Pliers

Holes in Concrete
This same principle applies to working with holes in concrete. I was recently called to a veterinary clinic to repair bedding grates that are hinged to the back of each kennel run so they can be folded up out of the way for cleaning. From daily use the hinges had loosened and pulled away from the concrete wall.
To remedy this, I purchased lead anchors from the local lumberyard and put them in the holes. However, the holes were in between normal sizes because of wear and tear. So I took my trusty hammer and flattened out an anchor, then split it in four sections and tapped the sections alongside the new anchors to take up the remaining space. Then I reinstalled the hinges (using the original screws). Worked just like the matchstick trick.
Tight Places for Screws to Fit
Today almost everyone has a cordless drill of some sort, but there are still places that can only be reached with a good old-fashioned screwdriver. It could be that we have gotten spoiled, but it sure seems that when using a hand screwdriver to drive long screws into wood that it is just plain hard. Enter our next tip.
Take a slightly moistened bar of soap and drag the threads of the screw across it so the threads get filled with soap. Then go ahead and tighten it in. It will go in so much easier and your work will not only look good but smell good too! A PS to this: you could use liquid soap, but bar soap works much better.
Make Sure That You Take The Next Poll...
I will be taking the results of the next poll and using them to decide which Helpful Hints to include in future updates. It will be my pleasure to include the tips that you may need for your next project. So let me hear from you!
Your Next Project

What will your next handyman project involve?
Squaring Things Off
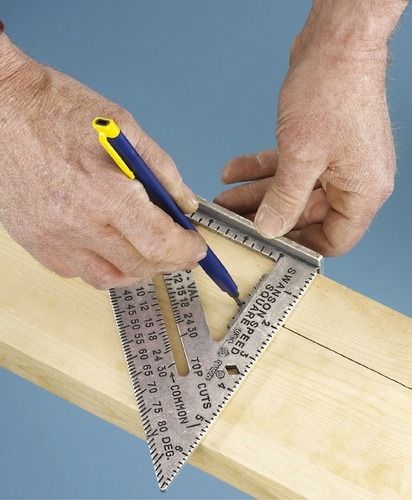

A square, whether it is a framing square, pocket square or a sliding square, is one of the most useful tools ever made. If you want to cut your lumber straight, mark it with a square. If you need to make a set of steps, you need a square. Rafters? You need a square. A versatile and much needed tool. Using it properly takes the guesswork and trial and error phases out of seemingly difficult jobs.
But what if you need to square off a large area like a concrete form for a patio you are going to pour? A two-foot framing square is alright, but you left it at home or loaned it to your brother-in-law. What do you do? Geometry my dear Watson!
From the inside corner of the form, take your tape measure (I hope you didn't loan that to your brother-in-law too!) and measure along the form to the left or right, whatever direction you want to take it, and make a mark at 3 feet. Then go back to the same inside corner and measure off in the other direction and make a mark at 4 feet. Then hold the end of your tape measure on one of the marks and measure to the other one that you made.
If you read 5 feet, you have a square form. If it reads over 5 feet, tap the form in until you get to 5 feet. If it reads under 5, then tap it out until it gets to 5 feet. The 3-4-5 method. Works on small projects as well. Instead of feet, just do it in inches : 3-4-5 inches. The Latin term for this Geometrical principle is "Tapem Squarem Upem". Well, I just made that up because I really have no idea...but it works just the same!

FYI on Handbooks
Oh yeah, and when you buy a framing square, make sure that it comes with an instruction booklet. Stanley Tools always included one with theirs. It was called (are you ready for this?) the Stanley Square Book.
It's pocketsize and full of useful information. A truly indispensable item. In it you will find how to lay out stairways, and roof rafter angles. Top notch info that takes the guesswork out of building.
I'm Helpful Homey saying bye for now. - You all come back real soon.

Give Him Something He'll Need
One thing every new bride wants is her photos hung on the walls. I've used these photograph holders below, and they work just fine. Something I could have used when I first got married.
Neat Ideas For Men
Groom's Shower
Do you know a young guy (or old guy for that matter) that is getting married? How about throwing him a tool shower?
About 15 years ago, my wife came up with this idea for Joey, a young fellow that worked for me. He was getting married in March. He had a few tools, but some time in late January, someone broke into his garage and stole every tool that he owned. Hence (can you believe I actually used the word "hence"?) the tool shower.
Guys from church gathered at our place for the party. Joey got all kinds of hand tools, a good tape measure, a new hammer, etc. All useful items.
Not just for Joey, because he had lost all of his tools, but for any young guy starting out in marriage with a place of their own or a car of their own to work on this will be a great way to get him started on the "Home Handyman, Honey-Do List" way of life.
I made a huge batch of turkey chili. We had lots of cheese, chips, rolls and butter, and soda. Every one had a great time...especially Joey.
This type of "shower" gives all new meaning to the terms, "The bride is registered at Tiffany's, the groom is registered at the local hardware store".
What was that you just said? The boy doesn't even know which end of the hammer is up? Then how about part of your gift being a "Mentoring Session"? Teach him which end is up. Show him how to do a few things around the house or on the car. Being handy has saved you time and money over the years. How about helping this new groom-to-be by showing him that each hand has only one thumb and try not to hit it too often.
Wisdom and knowledge are gifts that keep on giving and can be handed down through generations. The great thing about wisdom and knowledge is that even though you give it away, YOUR supply is never delpleted. In fact the more you give the more you get. Why not give some of yours today.


