For Women,how to wire a UK electrical plug
Diagram for a UK Plug
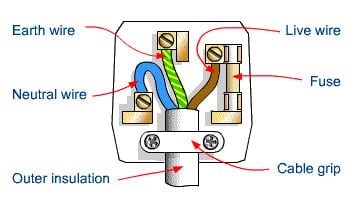
Colour Coding for a UK plug
Brown Live Wire
Blue Neutral Wire
Green/Yellow Earth wire
A Diagram of USA/European 3 pin plug
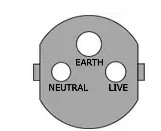
How to for Women, How to fix an electrical UK plug
These days women will find they are single no matter what the reason; be they had a relationship, separated, or a career woman. Woman will find within the home that there are jobs to do. They may not have the knowledge of how to do these jobs if they have not been shown. Many jobs in the home may require a qualified male (electrician) to get round these tricky tasks especially if they are to do with electrics. This is a step by step on how to wire and fix an electrical receptacle causing your appliance to stop working. Wiring a plug is a simple job, as long as you remember where the live/hot and neutral wires goes inside a plug.
Colour Coding for an USA plug
Black Live/Hot wire
White Neutral wire
Green Earth Wire
Colour Coding for European Countries
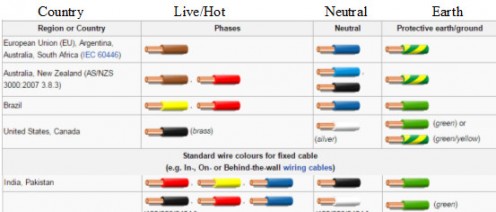
All electrical receptacles be it US, EU or a UK plug, have a Neutral (colour coding blue UK or the colour for your country) and Live wires (colour coding brown or the colour for your country), some will have an earth wire (colour coding green/yellow or the colour for your country); depending on if you have two pinned/three pinned receptacle, that come flat/round pins. We will be looking at the three pinned plug, which has Neutral, Live and Earth wires. Always remember with the electrical plug you are about to rewire, be it damaged or need to be replaced for some other reason. You will need to know the live/hot terminals and neutral terminals inside the plug for your country. This article will demonstrate how to wire the UK electrical receptacle.
When you find that your electrical gadget, be it a kettle, microwave, or any other appliance has stopped working. Do not throw this electrical gizmo away just because you think it has malfunctioned within itself. Always do your basic checks first, check the plug first? Remove the fuse and replace with a new fuse for the required amps of the appliance.
WARNING IF YOU ARE IN DOUBT, DO NOT ATTEMPT OR TOUCH ANYTHING. CALL A QUALIFIED ELECTRICAN OR SOMEONE WHO KNOWS WHAT THEY ARE DOING. ELECTRICY CAN KILL
Picture A showing where screws are.

Tools
Tools you will need to accomplish this task:-
Flat ended head/Philips screwdriver (Crosshead)
Wire Cutters.
Wire Pincers
Step 1
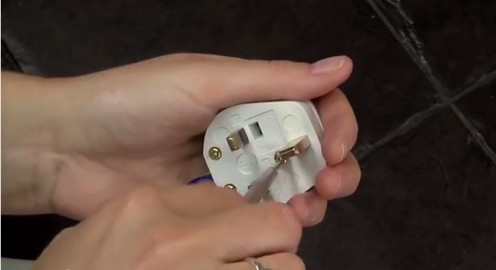
Unscrew the cap of the plug, arrow pointing to this screw Picture A.
Step 2
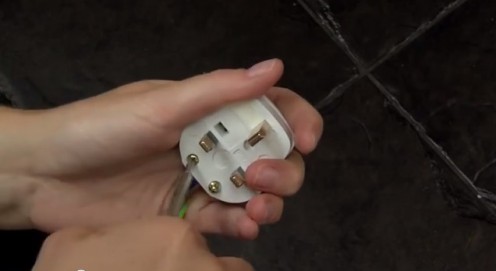
Unscrew one of the screws on the cable grip, arrow pointing to these screws shown in Picture A
The cable grip
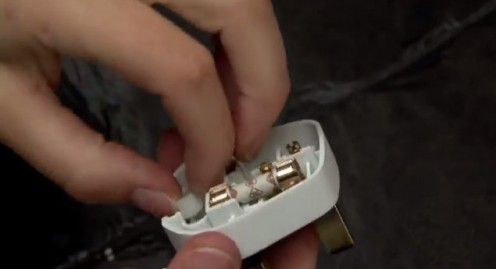
Move the cable grip to one side.
Step 3
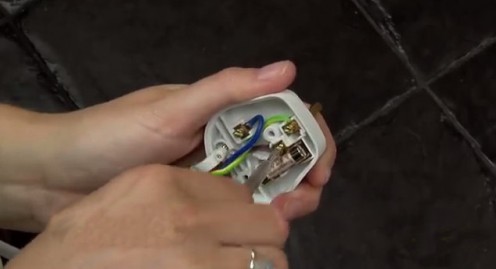
Unscrew the terminals part way.
Step 4
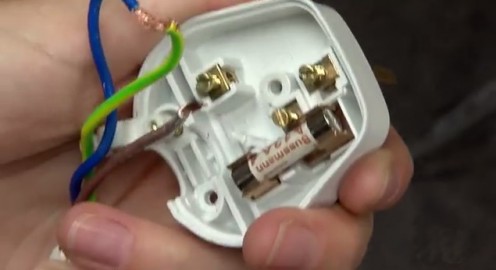
Remove the old cable
Step 5
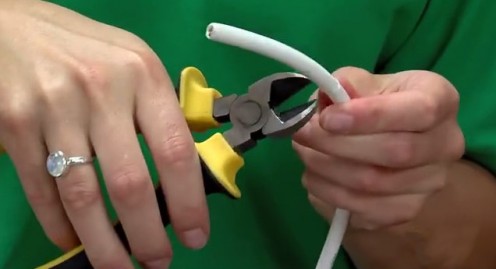
Cut any excess wire off including the inner coloured wires with wire pincers. About one inch and half gently cut the outer casing being careful not to cut the inner coloured wires; pull off the outer casing until the coloured wires are exposed, shown in picture B
Picture B
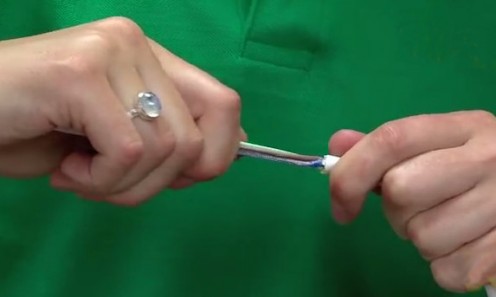
Step 6
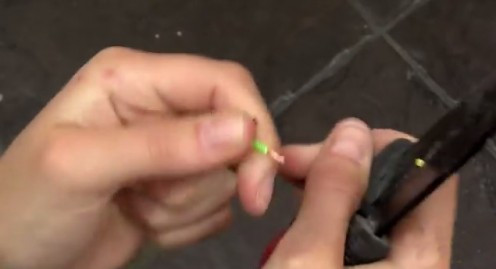
Cut quarter of an inch from the live/hot, neutral and earth wires showing the copper wire in each
Step 7
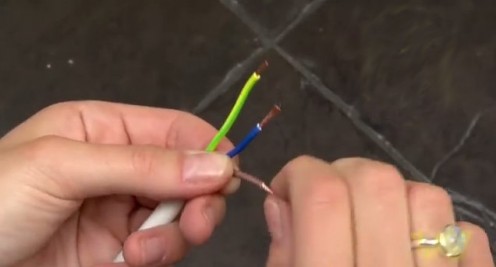
Twist the ends of the copper on the live/hot, neutral and earth wires.
Step 8
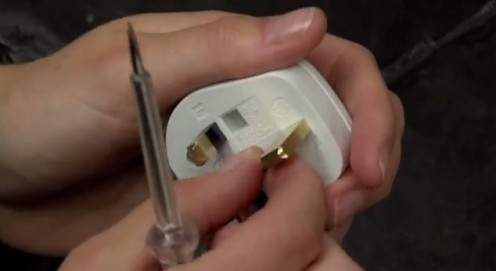
Unscrew the cap on the new plug, arrow shown in picture A
Step 9
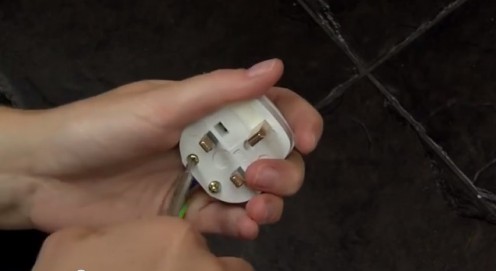
Unscrew one of the screws of the cable grip arrow shown in picture A
Step 10

Install the wire ready for connecting live/hot, neutral and earth wires to the terminals, making sure the live/hot (brown) goes to the terminal for the live and so on.
Step 11
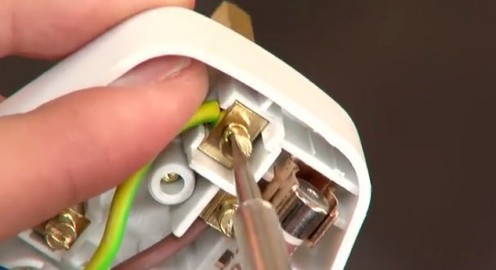
Screw the wires to the plug terminals.
Step 12
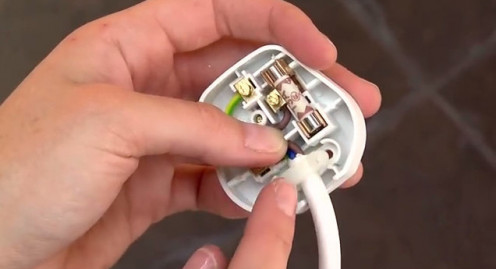
Make sure the cable fits into the grove, screw back the cable grip of the plug.
Step 13
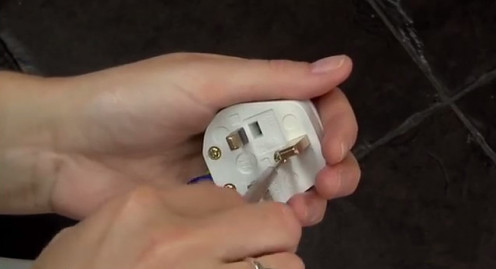
Screw back on the cap of the plug. Job done.


