How to Install a Ceiling Fan

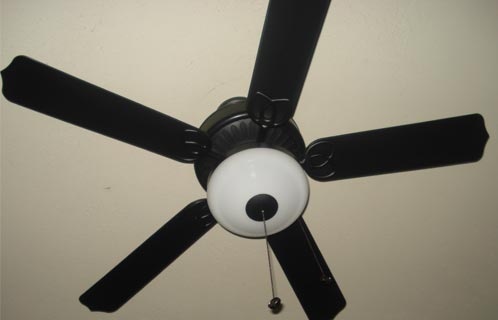
Ceiling Fans
When installing a home ceiling fan you want to make sure that your follow several safety tips and warnings so that you prevent fire hazards, electrical shock, and personal injury. Read carefully when looking over the wiring installation instructions. If you have any questions or concerns, each "new" ceiling fan comes with its own installation guide book that you can refer too, otherwise consult a licenses electrician for further help.
Choosing a Ceiling Fan and Basic Instructions
First choose a fan blade size appropriate for the room size. The common sizes are 52" and 60" 5 blade fans. A standard bedroom, would probably use a 52" blade size. A living room or larger room, would use the more larger 60" blade.
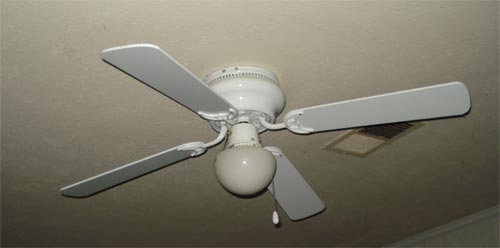
Choose if you want a light fixture or not. More than likely, you do. You will probably be replacing an already existing ceiling light fixture, which makes the installation process much easier.
Once you've picked out your ceiling fan, and you already have a light fixture in the ceiling. You can follow the basic instructions that are below if you already have a light fixture in the ceiling. Just remember to start by turning off the light from the wall switch and removing the current light fixture, leaving the outlet box in the ceiling with 3 wires- black, white, ground (green), and sometimes blue. Open the fan box, and basically go through the instructions. Wiring it to the current wires in the ceiling as the instructions require (basic wiring instructions are below). Assemble the fan per the instructions, and that's about it.
Installing Outlet Box Without Previous Ceiling Outlet Box
Now, if you don't already have a ceiling light or ceiling outlet box, this will be a little more challenging, but very doable.
-
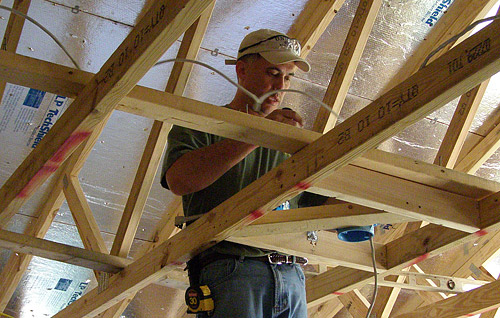
First, find the approximate place you will want to install your new ceiling fan. Once you find this location, you will need to get up in the attic, and locate where your spot is. You want to make sure your location is between 2 trusses, so that you can install the proper hardware and the support will be there to handle the weight of the fan. You can purchase the outlet box with support, so that it can be mounted between the trusses.
-
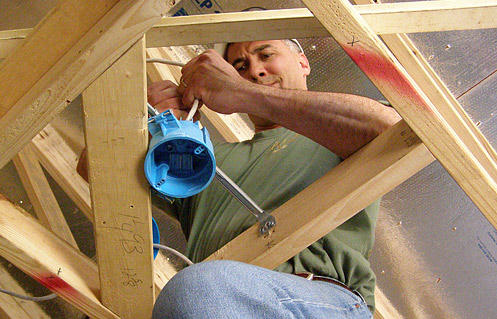
Once you have installed the outlet box, and you have cut the sheetrock so that the outlet box is accessible, you will need to locate some existing household wire in the roof that is hot. You will need to splice onto an existing hot wire, using a junction box, and proper electrical connections. Make sure you have turned off the power to this electrical line working with it.
-
Once you have all your wires connected, you are ready to install the ceiling fan hardware and ceiling fan. The difference from this installation and the installation where you are replacing an already existing ceiling light, is the switch. With the existing ceiling light, you will be able to turn on and off the new ceiling fan/light kit with the wall switch. With a new ceiling fan/light kit install where there was no already ceiling light or fan, you will control the new ceiling fan with the pull chain on the fan kit.
Warnings
- Before installing your ceiling fan, shut off electricity at the main switch or circuit breaker in order to avoid electrical shock.
- To reduce the risk of fire or electric shock, fire, or personal injury, do not bend the blade arms when installing them, balancing the blades, or cleaning the fan.
- Do not insert foreign objects between the rotating fan blades.
- To reduce the risk of fire, electrical shock, or personal injury, wire connectors provided with your ceiling fan are designed to fit specific gauge house wires, so you'll need to make sure that you house wires are larger than the specified wire gauge or you have more than one house wire connected to the 2 fan lead wires, consult an electrician.
- Before using a variable speed switch, check with the guide book that comes with your new ceiling fan to find out if it supports a variable speed switch so to prevent the risk of fire or electrical shock.
- Most outlet boxes commonly used for the support of lighting fixts are not acceptable for fan support and may need to be replaced.
- If you are using the fan in a wet or damp location, the fan must be connected to a supply circuit that is protected by a Ground Fault Circuit Interrupter (GFCI) to reduce the risk of personal injury, electical shock, or death.
- Consult a qualified electrician if you are in doubt.
Ceiling Fan Duster

Safety Information
- Before you begin installing the fan make sure to disconnect the power by removing fuses or turning off circuit breakers.
- Make sure that all electrical connections comply with local codes, ordinances, or the National Electrical Code. Hire a qualified electrician or consult a Do-It-Yourself wiring handbook if you are unfamiliar with installing electrical wiring.
- Make sure the installation site you choose allows a minimum clearance of 7 feet from the blades to the floor and at least 30 inches from the ends of the blades to any obstruction.
- If you are mounting the fan to a ceiling outlet box, use a metal octagonal outlet box. Secure the box directly to the building structure. The outlet box and its support must be able to support the moving weight of the fan (at least 35 lbs). Do not use a plastic outlet box.
- After you install the fan, make sure that all connections are secure to prevent the fan from falling.
- Instructions for supply connections: conductor of a fan identified as a ground conductor to be connected to a grounded conductor of power supply; conductor of a fan identified for equipment grounding to be connected to an equipment-grounding conductor.

Before Installation
- Before beginning assembly and installation of the ceiling fan, make sure that all parts are present. Compare parts with the "Package Contents" list and diagrams in your ceiling fan guide book. If any parts are missing or damaged, don't attempt to assemble, install, or operate the ceiling fan. Contact customer service for replacement parts.
- After opening the top of the carton, remove the mounting hardware package from foam inserts. Remove the motor from the packing and place it on carpet or on foam to avoid damage to the finish.
Carefully check all screws, bolts, and nuts on the fan motor assembly to ensure that they are secured.
Tools required for assembly:
- electrical tape
- screwdriver
- pliers
- safety glasses
- stepladder
- wire strippers
- appropriately sized lightbulbs (check the box or the guidebook)
Initial Installation
- Turn off circuit breakers and wall switch to the fan supply line leads.
- Determine mounting method to use: normal mount or angle mount (if angle mount, make sure the ceiling angle is not steeper than 25º).
- Check to make sure blades are at least 30 inches from any obstruction and check to ensure that the blades are at least 7 feet from the floor.
- Secure the mounting bracket to the outlet box using screws, spring washers, and flat washers provided with the outlet box. It is very important that you use the proper hardware when installing the mounting bracket as this will support the fan. If you are using an angle mount, make sure that the open
- Remove motor screws and loc kwashers from the underside of the motor. If necessary, discard any plastic.
Normal or Angle Style Fan Mounting
- Insert downrod through the canopy and weatherproof yoke cover. Thread wires from motor housing through downrod. Thread one wire through each hole in the weatherproof hanging ball cover. Secure weatherproof hanging ball cover over the hanging ball on the downrod.
- Remove the pen and clip from the motor housing yoke. Slip the downrod into the motor housing yoke, align the holes and re-install the pin and clip. Tighten downrod set screws and then tighten the nuts. Slide the weatherproof yoke cover down until it rests on top of motor housing.
- Install the ball end of downrod into mounting bracket opening. Align the slot in ball with the tab in mounting bracket.
Failure to align the slot in ball with the tab in mounting bracket may result in serious injury or death.
* Also note that downrod style mounting is best suited for ceilings 8 feet high or higher. For taller ceilings you may want to use a longer downrod that one that may be provided. Angle style mounting is best suited for angle vaulted ceilings. A longer downrod is sometimes necessary to ensure proper blade clearance.
Wiring Installation
To reduce risk of fire, electrical shock, or personal injury, make sure that the wire connectors provided with your fan match the specified gauge house wires.
If the house wires are different colors than referred to, stop immediately and call a professional electrician to determine the wiring.
Be sure that the wiring box is properly grounded or that a ground wire (green or be) is present.
Fan and light controlled by a chain:
1.a. Connect the black and blue wire from the fan to the black wire from ceiling with the wire connector provided. Connect the white wire from the fan to the white wire from the ceiling with the wire connector provided. Connect all ground (green) wires together from the fan to the bare/green wire from the ceiling with the wire connector provided.
Fan controlled by chain, light by wall switch.
1b. If you intend to control the fan light with a separate wall switch, wire as indicated in the instructions for 1.a. except connect the blue wire from the fan to the black supply from the independent switch.
Fan and light controlled by separate wall switches.
1.c. If you intend to control the fan and light with separate wall switches, wire as indicated in the instructions for 1.a. except connect the blue wire from the fan to the black supply from the independent wall switch for the light and connect the black wire from the fan to the black supply from the other independent wall switch for the fan.
Note: The black wire is the hot power for the fan. The blue wire is the hot power for the light kit. White wire is common for fan and light kit. Green or bare wire is ground.
2. Connect the green wire from the downrod to the green wire on the mounting bracket.
3. Strip 3/4" of insulation from the ends of the white wire. Twist the stripped ends of each strand of wire within the insulation with pliers. Snip the ends after twisting the strands together. Repeat for the black, blue, and green wires.
4. Screw the wire connectors on in a clockwise direction. Wrap electrical tap around each wire connector down to the wire.
Warning: Make sure that no bare wire or wire strands are visible after making the connections. Place green and white connections on opposite dies of the box from the black and blue connections.
Turn spliced/taped wires upward and gently push the wires and wire connectors into the outlet box.

Final Installation
- If necessarily loosen the two canopy mounting screws, on the bottom of the mounting bracket, that align with the holes in the canopy. Lift the canopy to mounting bracket. Place the rounded part of the holes in the canopy over the loosened screws and push up. Twist the canopy to lock. Tighten both screws.
- Position the blade arm under the blade and attach the blade arm to the blade with the blade screws and blade washers. Do not tighten the blade screws until each blade screw has been started. Then, tighten each blade screw starting with the one in the middle. Repeat this step for the remaining blades.
- Insert only one screw through the blade arm to attach the blade arm to the motor using one of the lock washers and one of the motor screws that were previously removed. Partially tighten the motor screw. Repeat with the remaining blade arms.
- Insert the remaining motor screws along with the lock washers. Tighten all the motor screws securely. (If you're not going to use the light kit- if provided- skip to step 11 to attach the pull chain and the fan installation will be complete.)
- Remove the three screws from the switch housing to remove switch housing cap. Remove the center plug from the switch housing cap with a screwdriver. Locate the blue and white wires in the switch housing labeled "for light" and remove the cardboard label and plastic from the 2 wires.
- Remove the hex nut and lock washer from the threaded rod on the light kit fitter and place the green ground wire in twitch housing. Gently feed the wires from the light kit fitter through the center hole in the switch housing cap, and then screw the switch housing cap onto the threaded rod on the light kit fitter. Now, feed the wires from the light kit fitter through the ring on the end of the green ground wire from the switch housing and then feed the wires through the lock washer and hex nut that you just removed. Tighten the hex nut over the lock washer for a secure fit. Remove the finial and shade plate from the threaded rod on the bottom part of the light kit fitter. Save the finial and shade plate for later use.
- Connect the white wire from switch housing to the white wire from the light kit fitter. Connect the blue wire from the switch housing to the blackwire from the light kit fitter. Make sure that the molex connection are secure.
- To attach the light kit fitter to the fan, align the holes in the switch housing cap with the holes in the switch housing. Make sure to align the gap on the top edge of the switch housing cap with the reverse switch for the proper fit. Re-insert the screws that were removed in Step 5. Use a screwdriver to secure all the screws.
- Install the light bulbs that are recommended for your ceiling fan.
- Align the hole in the glass shad with the threaded rod on the light kit fitter and push up gently on the glass shade. Now, align the hole in the shade plate with the threaded rod and push up. Secure the glass shade with the finial that was removed in Step 6. Do not overtighten the finial as the glass may crack or break.
- Pull the chain extensions supplied in one of the hardware packs or custom pull chain extensions (not included with your ceiling fan) may be attached to the fan and light pull chains.


