Parking Lot Striping Made Easy: Make Money / Save Money!

Line Striping Is Easy When You Know How
A parking area is the first impression made, so it is crucial to have a neat, professional look. Learning how easy parking lot striping is will help you in making that fantastic first impression. Now, if you are a sealcoating business, this is an excellent service to provide. With this capability you will be able to bid on a host of commercial jobs; strip malls, apartment buildings, schools (including athletic fields!), and more. If you're a property manager, or owner, once you see how simple line striping is, you can save money doing it yourself! Easy and money-smart, what could be better?

Before You Start
The Surface Must Be Prepared
The most important thing to know is that the parking lot striping can be erased! Sealcoating will black out any and all paint. So, before you start, it's important to get the sealing done first. This is also the best time to tackle any and all crack repair. This is why line striping is such a great service to add on to a sealcoating equipment business, since painting needs to be redone after. Remember, applying coating spray to your asphalt is recommended every two years, to protect the life of your blacktop.
For both jobs, the surface needs to be thoroughly cleaned first. Skipping this step will result in peeling paint, as it won't be able to adhere to the pavement. Consider using a blower to ensure a dirt free area. It's not just about dirt, oil stains will also compromise a successful job, and need to be removed. Not only that, but these types of spills will eat away at the asphalt and cause it to crumble. Use a high quality degreaser cleaner for those areas.
Remember: Use those traffic cones to direct traffic away from your work area.
What You Need For Line Striping
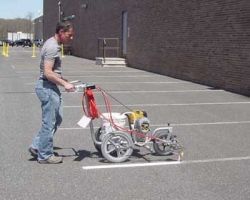
Parking Line Striping Machine
Stencil Sign Kit
Paint
Heavy tool box, with hook or handle
Chalk String Line (100 ft. in length)
Rope (260 ft. in length)
Rope reel
300 ft. tape measure
18 inch orange cones
Caution tape
Parking lot protractor
Sealcoat (for mistakes along the way)
An additional weight with a hook (suggestion: cinder block)

Measuring And Marking
If you're tracing over existing lines, then you are measuring just to calculate how much paint you'll need. 5 gallons of paint will get 1750 linear ft. of a four inch wide strip, which allows you to do 50 standard parking stalls. Basically, a gallon will paint 10 standard parking stalls.

Marking New Lines
The chalk line and measuring tape will be needed for marking new stalls, and that's the most important step in parking lot striping. Each stall should be 9 feet wide and 18 feet long, and your driving lane must be at least 24 feet wide.

Where To Start
Use the measuring tape to measure the lot. Now make sure to divide your lot by 9 feet for the stalls, 18 feet for the length of the stalls, while keeping in mind the lanes of 24 feet. Do some paper work calculations to figure out the best configuration.
Once you've made your decisions, use the chalk line and measuring tape to mark out your first parking lot striping line. Mark all your start and stop points out with a T as shown in the photo. This will make the line striping part as simple as tracing over your chalk lines!

Oops Happen!
Don't sweat it if you put paint where you shouldn't have. That's what the sealcoat is for! Use it with 4 inch roller to cover up where you made your mistake. Allow it to dry before attempting to repaint the area.


 Movie Film Review of A Movie!")


