Eliminating Voltage Loss
Fixing the 1980 VW Rabbit Convertible Project Car Electrical Troubles
This is a very common problem on older Volkswagen cars - actually most older European cars - but it happens to any car eventually. Over time, the electrical system degrades and you may begin to notice significant voltage loss. This particular example is on my 1980 VW Cabriolet project car, but it will happen to any car as it ages. If you're having this problem, first have your electrical system tested. A parts store can easily do this, usually for no charge to you. If you have a Voltmeter, you can do it yourself.
Using your voltmeter, test the voltage across the battery terminals first with the car not running. You should have around 12.5 Volts if the battery is fully charged. Then, start the car. If the alternator is good, the voltage should rise to 13.5 volts or even 14 volts. Some problems I won't address here (like over-charging from a bad Voltage Regulator). Specifically, I want to address under-charging.
If the voltage at the battery does not rise when the car is running, test the voltage at the contacts of the alternator while it is still running (BE CAREFUL!). If the alternator contacts do not have more than 12.5 Volts at them, you're probably reading battery voltage and the alternator may not be working properly. If it is higher than the battery - theres a good chance you have bad wiring between the alternator and the battery / power.
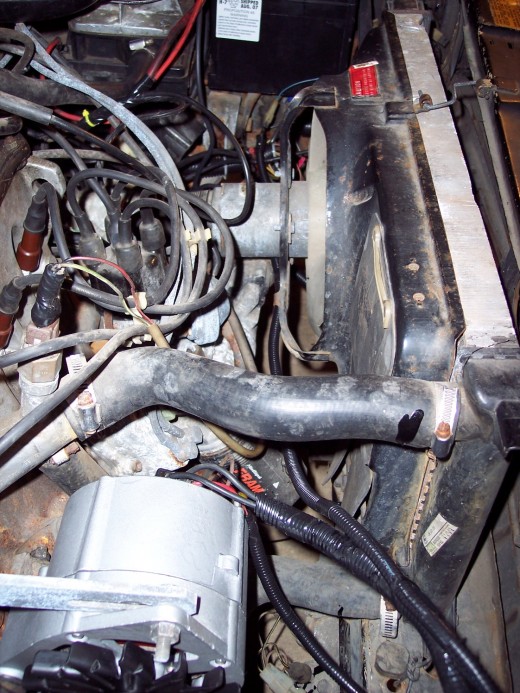
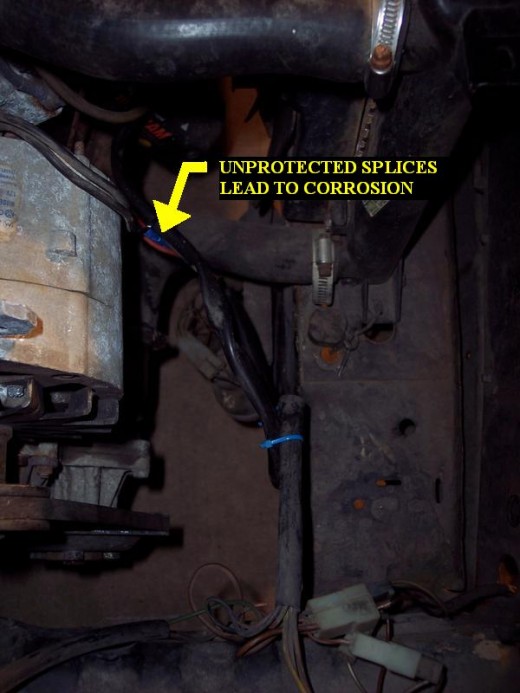
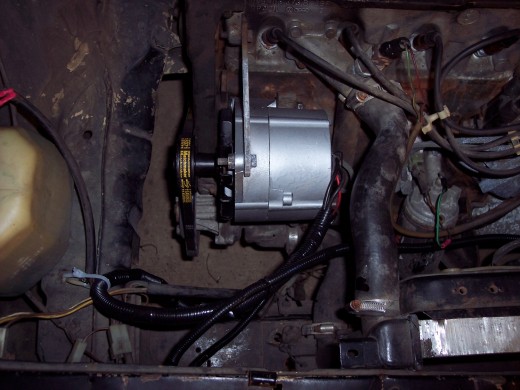
On this particular project VW, the alternator shown here was good (although I had it rebuilt anyway) but I was only getting 10 Volts to the battery (a special tester was used). What I found is that the wiring - eventhough it looked good enough - was corroded internally. This causes too much resistance in the wire and there was significiant voltage loss. These wires were partially damaged by the alternator drive belt and had been repaired in the past, but the crimped connectors were left exposed. This allowed water to get into the connection and the copper eventually corroded - along the entire wire length!
A Sloppy Wire Repair Job
Remove All Corrosion
The solution here is to remove all the corroded wiring. There wasn't much I could do with the wiring from the alternator plug but I cut and removed the entire alternator harness. There were three basic wires from the alternator, plus a ground strap to the engine. The grounding points were wire brushed to restore good contact, then reinstalled.
New wire was then attached to the remnants of the existing wiring. Use a minimum of 8-guage wire for your charging system. Everything electrical in your car draws power from here so you need the largest wire you can make fit. I used 6-guage wire. Wrap your connection in tape at minimum. Better yet, solder the solderless connection to make them permanent - then shrink wrap them or use a liquid "tape" to seal them up. In this case, I used Liquid Tape and then wrapped them in vinyl electrical tape (I didn't have any shrink wrap on hand).
Don't Waste Your Money on Working Parts
Protect Protect Protect
Once you have spliced on new wiring, you need to connect it at both ends. Your application may vary, but in general the power wire from the alternator should reach the battery through the shortest distance possible. In this case I have a Motorola alternator which requires a power wire to get it "excited". One "hot" wire returns directly to the batter + terminal - the other "hot" wire connects to the starter solenoid. The power wire to the fuse block of this car also connects to the starter solenoid so this in effect powers the entire electrical system from the alternator once the car is running. A third "hot" wire connects the + battery terminal to the starter solenoid, completing a "hot" loop.
Be certain to leave enough extra wire to safely route your new harness. In this car, the original harness was routed beneath the radiator. I don't know if there's any truth to it, but I've heard that running wire along a water source like this causes electrolosis to accelerate corrosion. I chose a new route behind the radiator fan. Protect your new wires in a loom and close it up with plenty of electrical (vinyl) tape and/or zip ties.
Tie your new (or repaired) harness away from anything that moves - and make it tight so that the harness won't rub when the car is vibrating. These are simple precautions that will save you much frustation in the years ahead if you keep your car for any length of time.
Choose a Better Route
