How To Build A Simple Rainwater Collection System

What Is A Rainwater Collection System?
A rainwater collection system is simply a devised apparatus that has the capability of trapping the raindrops and depositing them into a container where the water can be stored to be used when needed. The equipment necessary consists of a sizeable flat surface that drains to one point and an eavestrough for the flat surface to drain into and a down pipe from the eavestrough into a storage container.
Rainwater Collection System
What Do You Think?
How Much Rainfall Can This Roof Surface Collect On A 12 Hour Heavy Rain?
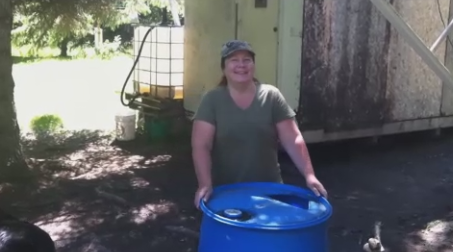
Storage Containers

250 Gallon Plastic Tote

The Economy Of Utilizing Rainwater
In many regions of the world water is a very precious commodity. Even in countries such as Canada there are areas where water is not abundant. In the geographical area where I live deep water wells have been drilled and no good water located. Most of the rural residents such as myself must haul our water from a municipal water fill station at a small cost. Though the price per liter is only pennies the transportation costs and the time spent on hauling the water can add up to a sizeable amount of money during the summer months when gardens are needed to be watered regularly while they are growing. One of the best ways to save money on water for gardening is by collecting all the rainwater that you possibly can when it is raining.
Get books on building rainwater storage systems here!

The Simple Collection System

A Cheap Fix For A Leaky Roof

An Old Section Of Eavestrough

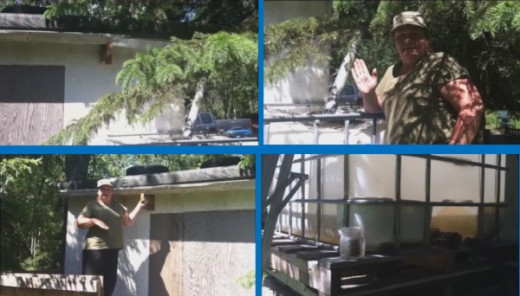
Existing Building Roofs Are Ideal Surfaces
Collecting rainwater requires a suitable surface and to capture lots of rainwater the larger the surface available to be used the better. Though constructing a durable elevated flat surface can get costly if one has to begin from the foundation. As an alternative most people have access to an existing building that has a durable roof surface just waiting to be utilized. Even if the building is a ruin such as my 50 year old shack that I had little use for it can make a very economical rain collecting surface.
With a cheap nylon tarp stretched over a layer of tar paper to protect it from the abrasion of the old roof asphalt shingles and nailed up under the eave on all sides of the building I have created the perfect surface. The tar paper under the tarp protects the tarp from the heavy rain beating down on the tarp laid over the shingles, causing the shingles to wear holes in the tarp. I did not nail the tarp down on the roof surface because I did not want any nail holes in the tarp so I set some old tires on top of the tarp to hold it down to the roof. Wind has a tendency to lift the tarp if it is not held down, causing the fragile tarp fabric to be stressed and easily damaged without some method of fastening it down.
Adding An Eavestrough And Down Pipe
After the flat surface is economically prepared for the rainwater to run off of on the low side then an eavestrough will be required for the water to fall into. Eavestrough is very inexpensive at most hardware suppliers, but I was fortunate to locate an old used section that someone was throwing out in their garbage. The eavestrough section was too short so I added about three feet of galvanized sheet metal that was bent at a right angle to the end of the eavestrough. The sheet metal is a V shape rather than the U shape of the eavestrough, but I fastened the sheet metal piece to the outside of the eavestrough with sheet metal screws and the U shape runs into the V shape allowing for no leakage. I then made two simple wooden support brackets out of some old 2X4 material and a piece of 3/4 inch plywood and then I screwed the two brackets to the building wall through the plywood of the bracket to secure them. Then I added a piece of used galvanized sheet metal pipe, again from the garbage heap, and I fastened it to the V formed trough with more sheet metal screws.
Discover The $avings On Eavestrough and Down Spouts Here!

Simple Collection System
Blocking Up The Tote

Constructing A Tote Stand
Once I had the eavestrough fabricated from scrap sheet metal pieces that I was able to locate and after I had the eavestrough fastened to the building I needed to set my storage container in place. The tote that I am using fits nicely on a regular sized pallet so I thought that if I blocked the pallet up for the tote to sit on that would be adequate. However, remembering that the tote holds 250 gallons of rainwater and water weighs roughly 10 pounds per gallon I realized that the full tote would weigh about 2500 pounds - that is a lot of weight. Therefore, I decided to double up and use two wooden pallets one on the top of the other for extra strength. I also had two concrete blocks another free find that worked quite well under the pallet main beams.
I desired to get the tote as high off the ground as possible so that when draining the water from the tote into a 5 gallon bucket I would have gravity working with me. The tote is only about 16 inches off the ground, but every few inches of elevation helps when using a gravity feed system.
Making The Lid

Old Rubber Makes A Great Lid
After placing the tote on the elevated pallets with the down pipe inside the tote's top opening I needed a cover so that leaves and spruce needles and other wind strewn debris did not enter the tote opening. The down pipe is entering the tote at an angle so the cover would have to have an elliptical hole for the down pipe to pass through. It is much easier to cut such a hole in a malleable type of material because the cuts do not have to match perfectly. I needed a material that would weather well in the outdoors. Rubber I thought would work extremely well and I could get the rubber that I needed from an old floor mat or an old mud flap from an automobile. I am using an old floor mat from a car for my lid and as you can see it works very well.
The System

Questions or Comments?
I welcome all your questions and comments as well as any suggestions or ideas of your own. Please contact me through any of my links with any input that you desire to contribute. I enjoy hearing from everyone.
Thank you
How To Pam