CJ's DIY - Do It Yourself!
Don't Let This Happen To You!
Never In A Thousand Years
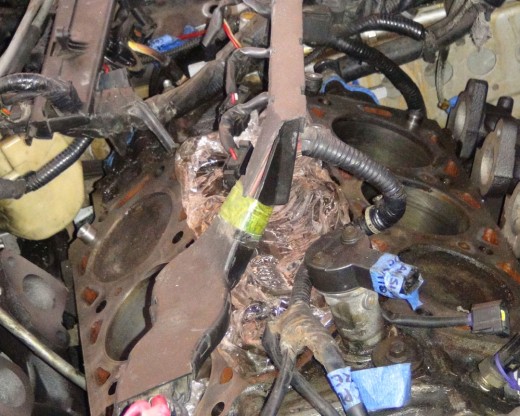
I never in a thousand years would have thought that I would have to take the heads off, the cylinder heads, and other components under the hood. But then again, I should know better than to never say never.
Please note: just because this Hub is about auto repair, I do not claim to be an expert, I just thought it might be fun to share with other's, everything that I did and learned by repairing a car myself.
Also, due to car accident injuries, I no longer have the strength to utilize like I was able to before a car accident, so many times, more than I care to admit, I required help where strength was needed.
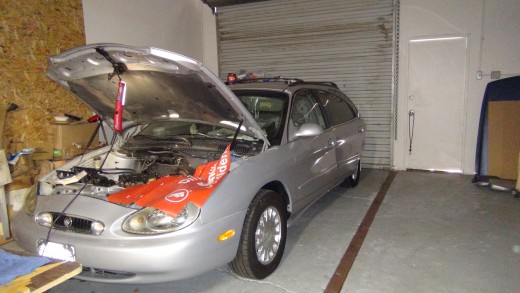
'99 Mercury Sable
When The Trouble Began
Everyone thought the heads were aluminum, like most Ford makes are, but not in this car, at least not anything that is exposed to engine heat! Thank goodness! But this is what happens when you do not take care of your car....
Last year, the car was overheating, so with the help of a couple friends, the waterpump and the thermostat was replaced. Only one thing was overlooked however, flushing the system out! So eventually, those two items would have to be replaced again, if the systems does not get flushed out soon.
Well, a year later, the system still was not flushed out, so, the car began overheating again, and there was abnormal coolant loss, and water loss. Was it possible, that the car got so hot that the water or coolant just evaporated? There were no leaks.
Sudden Heat
We were nearing our destination for our vacation, just a little get-away for some peace and quiet. We were only like 15 minutes away! Just one last big hill to climb, not too long, just big, actually, too big for a problem that had brewed under the hood!
We were more than halfway up the hill, when suddenly the Hot/Cold gauge needle shot up to "H". I pulled over to a little side road, and into a turnout. I heard the car "hissing" and observed smoke coming out from the engine. I knew it was bad news, but didn't realize how bad. I had just installed a new waterpump, but didn't get the chance to install the new thermostat, so, I figured that may have been the problem. I told my friend that I would replace the thermostat the following day, and make sure to get antifreeze. And, the next day I would have to, as my friend Maria is the owner of the car, and she made an appointment to have the car "smogged". Boy, was I hoping the trouble was from the thermostat.
Heating and Cooling Check
Coolant System
- Always check to see if you have sufficient Antifreeze
- Check hoses and check for leaks
- Become familiar with your car. Always be aware of sounds and unusual smells.
- Always carry a bottle of water (gallon) for emergencies
What Is A Cylinder Head?
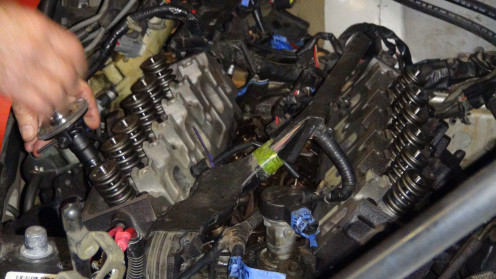
Cylinder Head
Cylinder Head: The detachable portion of the engine, usually fastened to the top of the cylinder block and containing all or most of the combustion chambers. On overhead valve engines, it contains the valves and their operation parts. On overhead cam engines, it contains the camshaft as well.
Cylinder Block
Cylinder Block: The main structural member of an engine in which is found the cylinders, crankshaft and other principal parts. In the cylinder block you see 3 holes on the left or right side of the engine, or depending how your engine sits in the engine compartment, the front or rear. It's inside those cylinder bores that sits the pistons.
Misfire
The "Check Engine" light had been on and off since my friend bought the car. I have noticed that darn light on in many cars, and sometimes there is no reason for that light to be on. However, in this case there was a reason. It meant that one of the cylinders was misfiring, the #5 cylinder. But why? Because the car could only take so much, so eventually it cracked! The heads that is, the cylinder heads!
Photos & Video
I began taking photos and video from the beginning, so in the event that I needed to do some work myself, I would have reference. It never occurred to me to make an auto repair instructional video. Well, with all of the photos and video I took, and all that I have learned, I thought I'd share.
Well, as I was organizing my photos and video, I realized that I lost a whole memory card filled with a lot of other photos and video! But, with all the content I have, I think that will be sufficient enough.
Now, though I have so much content, what is really needed and handy, actually a real life-saver, is an auto repair manual for the make, model, and year of the vehicle I was working on. Some of the repair manuals available, are not an exact match always, but they still help. So, if you ever end up getting stuck somewhere, a manual will be a definite help. It might be a good idea to familiarize yourself with your car. Take your manual and identify each part that is visible, and learn it's function. And women, this includes you as well!
Special Tools
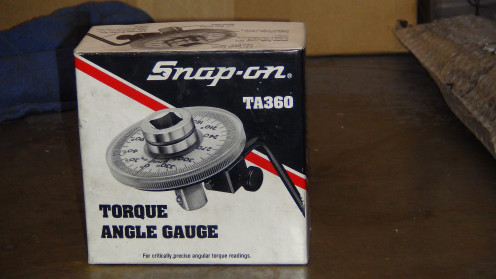
Meanwhile
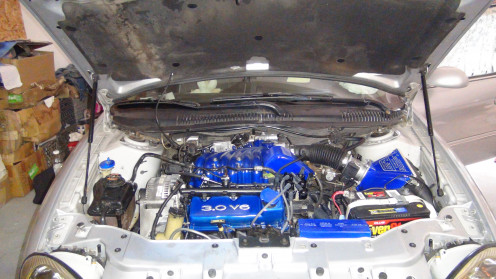
As we were waiting for the new heads to arrive, I began thinking about not just cleaning and polishing under the hood what I could, but I thought about painting some things. Nothing overboard, but just a little something to add a special touch, a little customization. So, the following video shows what I started while we were waiting. I am currently working on a full video for this project.
The "After" Result
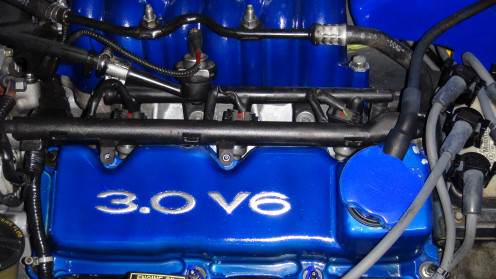
The Whole Picture
Head Removal - Fast Version
Everything for the DIYer
- 1A Auto : Aftermarket Auto Parts, Car Body Parts, Replacement & New Automobile and Truck Parts |
1A Auto is a National Auto Parts retailer offering a No Hassle Return Policy, Secure online ordering, Same day Shipping and the highest quality auto parts. Buy replacement aftermarket car and truck parts, for most makes and models. - AutoZone | Auto Parts & Accessories | Repair Guides & More
AutoZone is the leading auto parts retailer. You'll always find the best car parts, great customer service and the right prices at AutoZone. - Home Page | O'Reilly Auto Parts
Better parts... better prices, everyday on auto parts and accessories. Plus find a store, check out our current ad, get information on racing events, contact us, and more. - NAPA AUTO PARTS - Home
National Automotive Parts Association was created to meet America's growing need for an effective auto parts distribution system.
Brake Light / Backup Light Troubleshooting
Backup Light Troubleshoothing
I thought I would add this light problem I'm having to this Hub, being that it's all about DIY! As I go through the steps, I will add them all accordingly.
Well, as of this past week. my friend who drives the '99 Mercury Sable wagon, which is the car you see on this Hub, has brake lights and backup lights that went out last week. The tail lights on the side of the car work...thank goodness! But the lights in the trunk lid, or the third brake light do not.
So far, here is what I did...
Replaced all fuses, except for the 5 Amps, as the packages did not contain any 5 Amps. Result: Issue not solved.
Replaced the bulbs - Issue not solved.
Checked for voltage and continuity. I was getting a reading from the meter that there is voltage and continuity in the wires leading to the lights. The sockets seem to be working.
Replaced the backup light switch. Problem not solved.
If you have previously seen the videos on Brake-light and Back-up light troubleshooting, but can't seem to find them now, that's because I was forced to delete them! I was having too many issues with YouTube on copyright claims due to the background music I was using in my videos.
The music I was using was purchased through Videoblocks.com, through a subscription, and had also obtained a License Agreement. Upon YouTube's request, I had submitted that license agreement, numerous times, but was still unable to satisfy them.
Personally I was dissatisfied with my videos, as they were a bit too dramatic! I had planned to redo them, so despite having reached over 4,000 views on each video, I am forced to redo them, however, the new videos will be much better!
In addition, I will also have another video on wire troubleshooting, and of course other DIY projects.
My apologies in case you were searching for them, but I assure you, the new videos will be much better!
Electrical Troubleshooting
I've decided to get a bit off track here, as of course, I'm sure you've seen the video above. I should be working on my Cylinder Heads Part 3 video, but I'm sure you've heard of Murphy's Law!
There are two lessons to this hub, and I have learned this years ago in college, but I never give in to it. I always look for an easy way out, and two, I never "read" the whole thing. I"ll explain later.
One of my talents is troubleshooting. I have an education in electronics. I have learned that it is best to be patient. Yet without fail, I am always looking for easy street. I have become too complacent in my life, and I of all people should know better.
Anyway, I knew there would be a follow-up video to the one above, I just didn't realize how soon. Had I been patient, I would have had this video up much sooner!
I asked for help everywhere I could, when I knew darn well that I could have had the answer to my problem, had I done things the right way. Watch the video, and hopefully you'll understand.
The video below will also soon be deleted and will be redone.
Electrical Troubleshooting
Conclusions
Ok, I'm sure you watched the above video. Did you read the last part?
While in college, one of my instructors in the English class, told us to "read everything" including the "small print".
One of my majors in college was electronics. I've had jobs involved in electronics. One of my natural skills is as a troubleshooter. Yet, Ive had a problem of wanting the easy way out, because sometimes, I just don't have any patience!
So, what does that have to do with electronics troubleshooting? Allow me to explain...
While troubleshooting electrical problems in a car, (or any issues), like in this case where the brake lights and back up lights in the trunk lid went out, yet the tail lights on the side of the car worked. I assumed that it was due to a blown fuse. I purchased two packages of mini-fuses. I replaced about 10 fuses, I used all the new fuses, except for 5 amp fuses, as the package did not contain those. If it was the 5 amp fuses that I needed, I was out of luck.
Well, after replacing all the fuses I could, the problem was still unsolved. So my next step was to replace the bulbs. Problem remained unsolved.
Ok, after replacing the fuses that I could, and replacing the bulbs, the issue remained unsolved. So, at this point, I asked a friend if I could borrow his meter.
I tested the fuses...all fuses were working.
I tested the wires in the light sockets for voltage and continuity. I was getting a reading on one side of the wires but not the other side. In other words, I was getting a reading on the wires that led to the car, but the part of the wires that led to the sockets...there was nothing! Strange huh? Now what could possibly be the problem?
The next step now was to check the wires in the trunk hinges for any breaks or fraying...(freying?). On visual inspection, the wires appeared intact!
Now I was at the point of total frustration! But I had one last place to correct the problem...
Next step was to replace the brake light switch, so I ordered a new one. When the new one arrived, I replaced it...but the problem remained unsolved! I was beyond frustrated at this point!
So, I got online, checked out YouTube, found some videos on troubleshooting brake light problems, but nothing even close this the make of the car I needed...some were pretty close. I managed to get some comments on what the possible problems could be. That was a start.
I asked for help in forums, including here on HP. If you ever have any questions, you can be certain a few people will respond to your questions, and offer some possible answers!
I wasn't getting anywhere. Then one gentleman from HP, responded with..it could be a switch in the transmission!! Oh, now I really felt good! That's just what I needed, and that would be just our luck! So, I had to think. I had to solve this problem.
So, my next step was to start from square one, just to make certain that I didn't miss anything. As it turned out, I did miss something...not one, but 5 broken wires!!
Had I checked those wires thouroughly, I would have fixed the problem on the first day! Instead of "reading the whole thing", actually completely visually inspecting the wires thouroughly, pushing the cover all the way up or down to see the wires the proper way, instead of just glancing at them, I missed the problem.
Now that I finally found the trouble, I had no way of getting to the store to get the supplies and tools I needed, but it turned out a friend of ours had everything! My plan was to fix the wires by soldering them and placing shrink tubes on them, otherwise, being that the wires are located in the trunk lid hinges, the wires will break again! However, the way I fixed them with the connectors, that should last until I can fix them the proper way!
My point here?
- Check things thouroughly, don't just "glance through" it.
- Be patient!
How's that for a good lesson??
How To Repair Broken Wires
Well, here it is finally, fixing the wires. Now for my situation, this was only a temporary fix. At the time I had no additional wires to add to the existing one's, which was necessary, as there was no slack in the original wires. Many car makers do this on purpose, so you will take your car in to one of their dealerships! So, with that said, here are some of the things you will need for the job...
- Wire Cutter
- Wire Stripper
- Wire Crimper
- Butt Connectors (Yes, that's the name!)
- Electrical tape, or Shrink Tube, and
- You may need some needle nose pliers to grab the wires that are tight.
- Extra Wire to add to existing wires, of the proper gauge.
So, here's a video I hope may be of benefit for you...
Update Status
My intentions were to continue with the cylinder head removal and installations, but much has happened. I am currently working on putting more information together however, and hope to be in the next few months. My apologies for not keeping up with this hub.
Preparation Is Key
Removing the cylinder heads in any vehicle is no easy job, and it certainly will not be done in a day, especially with someone who had no experience, or has physical limitations like me. However, the job can be a lot quicker if you have all the necessary tools, equipment and supplies available.
One of the first things that should be done before performing a job such as this, is to give the engine bay a good cleaning. I experienced this first hand. I was unable to find the bolts that needed to be removed because they were caked with thick grime!
Of course, safety is another is another thing that must be considered as well as preparation.
The following video covers both topics.
Preparing For Cylinder Head Removal
Expansion Tank
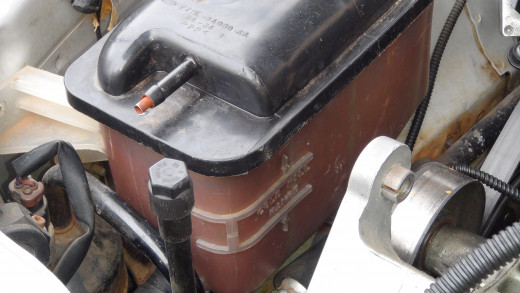
Vehicle History
I thought I would include a bit of history about this particular car, in an effort to help those who use to be in my situation. I think I'll begin with a little explanation though first.
The vehicle covered here is a 1999 Mercury Sable, 3.0L, V6 OHV (Overhead valve), and has a history of over-heating. A problem such as over-heating can be overlooked by the owner, if they know nothing about a car such as this. The Mercury Sable and the Ford Taurus, 1998 to 2005, do not have the traditional pressure caps on the radiators. Instead, these models use an expansion tank, like the photo above. Many owner's manuals may refer to the expansion tank as an overflow reservoir. The overflow reservoir is more than a traditional overflow reservoir. In short, you don't want the expansion tank empty, or full of rust, rather full of coolant, at least to the fill line. If you see rust in it, it's time to have the cooling system chemically cleaned.
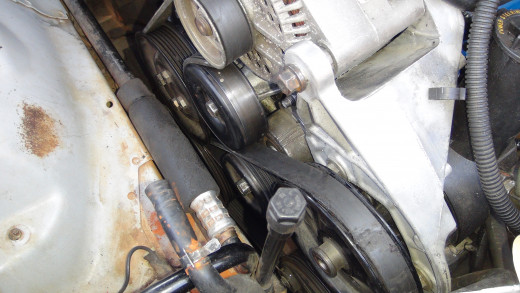
How it Started
I replaced the water in this vehicle the first time in about 2011. When the water pump was taken out, there was hardly anything left of the part, as rust had eaten most of it away! There is not much to the pump to begin with. I also found out that it is a common problem with the water pumps rusting out in these models. However, I believe that that is a problem that can be avoided, if the owner becomes familiar with the vehicle.
When this pump was replaced, so was the thermostat, but the systems was never flushed out, nor was antifreeze kept in it, but water most of the time!
So how can you tell if the water pump is bad?
There is a small hole located on the top of the snout of the pump, or below the snout. If you see any coolant leaking from that hole, it's time to replace it, along with the thermostat.
Change In Plans
I had been working on my Mom's 1999 Mercury Sable, and had planned to make a video series on it. I still plan on doing so, however, I have run into a few issues.
I began work on the car in February of 2014, and was done by April 20 of that same year. It was quite difficult as the heat we have in Bakersfield, California is intolerable! I get very ill in the heat. I also find it difficult to do such detailed work with my spine condition, which is from a car accident in February 2008, which left me with a broken back, 2 bulging disks, scoliosis, disk degenerative disease, and recently, an MRI revealed I have a tumor on my spine! My pain is triple from what it was.
There are still a few things I have to work on, like drop the gas tank to clean it out, and clean the fuel injectors. After much thought, I decided to work on the videos, one subject at a time, as the original plan became too difficult. In other words, instead of making hour long videos, I plan on breaking them down, such as, How to Remove the Alternator, How to Remove the Spark Plugs and Plug Wires, and so on.
To make matters even more difficult, my Mom and I were assaulted by a former friend and neighbor, for which he will serve time in prison, and my computer was hit with malware! My hands have just been so full. After the assault, our property management has begun to harass us. We don't get a moments peace! I'll be adding to my other blog / hub, which will go into detail on what we have had to endure, during our two years here.
So, to break it down, I still plan on making the videos on cylinder head removal, just shorter videos.
How to Easily Find Auto Part Numbers
Excellent Performance

Stanley 15" / 380mm Sharptooth Saw
I should have named this hub a different name. Since most of my projects are really on DIY, I should have named it accordingly. I still will.
Since my specialty is DIY, here is my first tool review on the Stanley 15" / 380mm 8 TPI Sharptooth saw.
Stanley 15" / 380mm Sharptooth
