Crafternoon Projects for a Rustic Wedding

Why do your own wedding craft?
Weddings can be a huge expense. Sometimes, because of the temptation for people to pay someone else to do so much of the preparation, I think they can get a little bit impersonal too, or at least start to look like a lot of other weddings. In 2012 I was married and planned my own wedding, which cost less than $4500 AUD. Part of how we achieved this was crafting many of our own items, and holding social events at which to do this. Having a hand in so many of the small touches made it feel more personalised and unique to us. In this hub I'd like to share how to do some of the craft projects we did, and to try to convince you that this kind of DIY is not a time-consuming nuisance that will stress you out but rather an experience which can create stronger bonds with friends and family, develop new and exciting skills, leave you with personalised items you can keep and remember the occasion by, and make you feel like you enjoyed every part of the process of getting married including the preparation.

Here are some of the items we made ourselves with the help of friends
- Ring bearer's moss basket
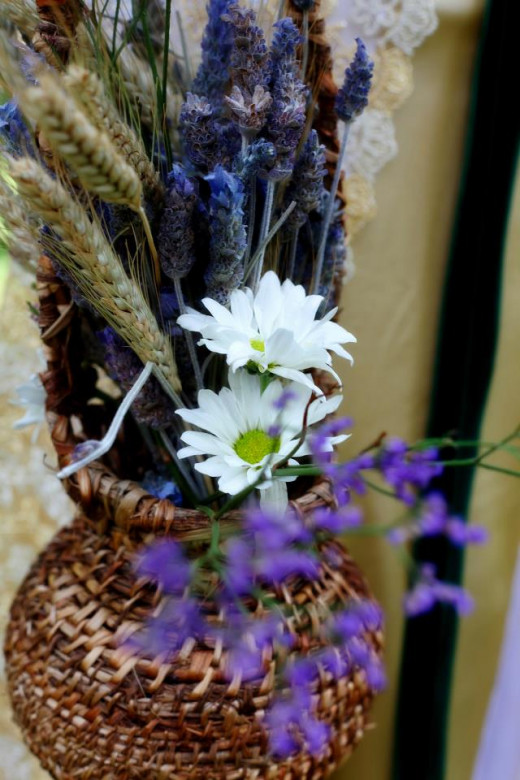
- Flower basket for Bride's bouquet
- Chains of paper cranes in our theme colours with beads for a photobooth backdrop
- Fabric leaves for guests to write a message on for our message tree, later sewn into a wall hanging/quilt by a family member
- Coiled baskets for centerpieces for each picnic rug
- Spray-painted pinecones in our theme colours to go in the centerpiece baskets and in chains as decorations
- Bouquets of dried lavender, wheat and everlasting for wedding party to carry and as decoration
- Other origami decorations to hang
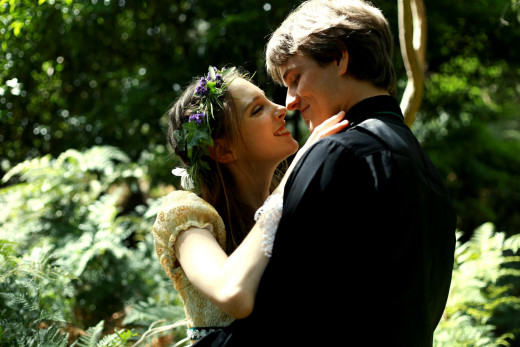
- Bride and bridesmaid garlands
- Signs and chalkboards
- Leaf-shaped gingerbread
- Hand-fasting cords
- Fingerprint tree
- Bio-degradable pots for rosemary cutting favours

Making crafting a social bonding time
When people think about doing a lot of DIY projects towards a wedding, I imagine that some think that it will take up too much of their time, stop them getting out to social occasions, or not fit in around their work and hobbies. Now I'm going to tell you that it can be the opposite of all those things. To work on our crafting projects, we scheduled social crafternoons where we provided afternoon tea to our bridal party, family members and other close friends while we all sat around and worked on the crafting projects together. This provided a unique chance for people who would be at our wedding who might not previously have known one another well to interact and become familiar with each other before the day. My bridesmaids all came from different parts of my life, so the crafting days provided the common ground for them to become friends, and our DIY projects a topic for conversation, or activity to fall back on anytime I gathered them together. Many of those involved developed an interest in one of the craft hobbies involved and have continued with them to some extent beyond the wedding. From our experience I would argue that you can use DIY wedding projects to bring people together. Why not get the in-laws working with your family on a joint project, or your bridemaids and groomsmen doing different sections of an important wedding item? Having the people involved in your wedding work together not only takes some of the time and work pressure off of you, but gives you extra opportunities to socialise with those you want involved in your special day, and encourages them to develop bonds prior to the wedding, which can save a lot of awkwardness when everyone comes together for the event. Encouraging your friends and family to take part in and contribute ideas for your wedding preparation also makes everyone feel more involved and as though they have a stake in what the wedding is like. This can make them feel more involved on the day and more excited and invested in the event.
Do you have experience with working on a collective craft or art project with family/friends?
What do you think?
Have you ever found that you formed a stronger connection with friends or family when working on a craft project together for a special event? Or is your experience that you argue when working on projects like these?


Woven baskets as centerpieces, containers or ring-bearing receptacles.
If you've looked through Pinterest or Etsy seeking rustic wedding ideas chances are you found a ring-bearer pillow that looked like a nest, with moss or leaves inside, like the one pictured right. When I was planning my wedding I was enthralled by these. But why spend money on one when similar things are easy to create yourself? One option is to find and keep a fallen bird's nest and use a real one, but this is unreliable if you care about birds and don't want to be stealing an existing nest. So instead what I did was learn how to construct a little basket from natural materials that looks a lot like a nest and is a little more durable. We still have a number of these in our home with items stored in them. Once I'd made one I got really inspired by these and decided to make a whole series to use as centerpieces by filling them with coloured pinecones and dried flowers. A few key points make this task much easier, especially if you want to make a large number of baskets:
- Get friends and family involved - everyone will make their baskets a little different-looking, which is fine if you are going for a natural, rustic feel, and this is a project that many people who like crafts enjoy learning how to do and will carry on for their own future projects
- Try using a natural-coloured twine made from natural materials as your 'thread' rather than a thin reed, as it breaks far less often, looks very similar and speeds up the process hugely
- Make sure you have plenty of natural materials ready to go before you start that are flexible enough and not toxic. Do some research on the plants you are thinking of using, especially if you want to put food in your baskets.
- Get plenty of suitable needles, so that lots of people can have a go at helping with the task and you have spares if you lose them (this can happen easily in big buckets of reeds or rushes)
What you need:
- A large amount of long, reed-like leaves or rushes - the natural material you use needs to be very flexible when soaked in water. It sometimes helps to put a bit of shampoo in the water to help get your materials bendy.
- A big bucket with water in the bottom to soak your materials
- Some old towels to put under the bucket and your feet/over your knees to catch the drips of water and bits of plant that will invariably drop
- Some thinner reeds or twine to use as thread
- Big needles that you can thread your thick twine or thin reeds through easily
- Something creative to fill the bottom of the completed baskets with that suits your wedding colours and theme
Instructions:
Getting started is the hardest part. Once you have a few coils on the base of your basket, you will find it gets easier to continue and shape it the way you want.
- Thread your needle with either your twine or your long, thin, bendy reed.
- Take a fairly long bunch of your reeds or other basket material in the other hand, trying to make the bunch about the width you want the coils of your basket
- Hold one end of your bunch, and wrap the tail around in a spiral so that it is coiled around once
- Thread your needle through the centre, and then grab the end so it can't pull all the way through
- Using your needle wrap your thread material around the outside of the coil, then back through the centre, making you way around the circle of the coil until that layer of the coil is secured
- Wrap the tail around in a second coil and repeat, this time only threading your thread material back through the second coil, then around your new coil
- Continue until you have a flat base the size you want, then add your next coil slightly on top of the previous coil instead of out to the side, and continue in this manner until your basket is as high as you want it
- If you run out of coil material, try to add more in gradually before the previous lot runs out, so that your thread is wrapping around it multiple times before the join.
- To finish off, go around the end point of your coil material several times with your thread material, then go a bit further along with your thread, and cut your thread, tucking it into or tying the end off onto another previously 'stitched' section of thread.
- If adding moss or other plant material, wait until the day before so it doesn't dry out. Try to remove moss from an area where it will bring some of the wood or bark it is attached to with it, and therefore not fall apart.


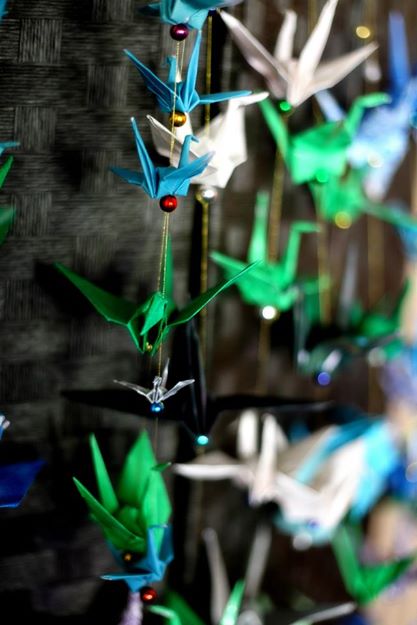

Paper cranes and other origami wonders
A lot of your friends and family members are bound to know a few origami tricks already. Origami ornaments are great because they can make your wedding venue look spectacular with nothing but scraps of paper in your theme colours and some thread to hang them. We folded as many cranes as we could in different shades of our wedding colours, with the help of lots of friends and family who knew or learned how to make them. We then threaded them onto some strong, shiny thread by making a small hole in the back of the crane and passing the needle through the bottom. To stop the cranes sitting on top of each other, we added beads below each crane to stop it sliding and then another bead at the next point on the thread where we wanted a crane to sit. If you or your friends don't know how to fold a paper crane, there is a good tutorial here: http://www.wikihow.com/Fold-a-Paper-Crane
Some of my friends also got right into the spirit of the crafternoons by learning to fold other pretty origami items to hang around our wedding venue. I let them make all kinds of flowers or other decorations as long as they were in our wedding colours. A popular project was the origami flower ball which I had mastered when making Christmas gifts the previous year. You can learn how to make this modular origami ball on the folding trees website (link at bottom of section) A helpful hint is to have lots of bobby pins on hand to hold the edges you are gluing together while you move on to making the next petal or gluing the next flower.
An origami flower ball tutorial can be found here: http://foldingtrees.com/2008/11/kusudama-tutorial-part-1/


Drying your own flowers for longevity as bouquets and displays
One item we saved a lot of money on at our wedding was flowers. This is because we mainly used flowers grown by family members or friends, and then dried to last. The major component in our dried bouquets was sweet-smelling lavender, and we accompanied it with rustic wheat, some dried everlasting contributed by friends, and a few fresh daisies added on the day.
Another budget-saver and rustic-looking element can be added through the use of recycled receptacles for flowers. We stored jars and bottles in the months leading up to the wedding and the dried arrangements were set up in these in advance for quick and easy placement on the day. Recycled bottles and jars can be dressed up, too, by adding dipped paint in wedding colours or ribbons. We also put some of our floral arrangements in teapots from Grandma's extensive teapot collection, as our families have a love of tea in common. Why not use recycled wine bottles if your family love wine, or old watering cans if your family are gardeners? It's good to think about the kinds of containers you will use to set things up at the wedding and whether your family has a particular type that would both suit them and save you buying vases or using delicate breakables.


Guest book alternatives: the wedding tree, fingerprint tree and other ideas from other sources
Traditional guest books do allow for lovely long messages and easy safe-keeping, and we did have one at our wedding, which we continue to write in on anniversaries. However, many people find writing long messages difficult, and many couples seek unusual alternatives which will get guests interested. When searching for a nature-themed idea I came across pictures of a couple who had added a lovely touch to their Autumn-themed wedding with a guest book made from paper cut-out Autumn leaves which guests signed and glued on to a tree sketch to make a finished product that wasn't just a guest book but an artwork they could keep in their home. We wanted lots of room on our guest tree, and we also wanted it to be usable in our household, so we decided to make ours from fabric, and have the leaves sewn on later by a family member to create a cloth artwork that could be used as a quilt and/or wall hanging. We have also used it as a photo backdrop at our first anniversary celebration, and as a couch cover. Here are the steps we went through:
- Obtain some cloth in leaf colours or in your wedding colours
- Print out good leaf pictures in the kinds of shapes you want
- Cut out and use your leaf pictures to trace around to draw the leaf shapes on your fabric
- Get your friends and family at crafternoons cutting out lots of leaves!
- Put your leaves in a box, and buy some fabric markers to go with them
- Draw a tree trunk and branches on some brown fabric
- Convince a seamstress in your circle of family and friends (or if you are lucky enough to know how to applique, do it yourself!) to sew your tree trunk onto a background piece of fabric, making sure the space around it is large enough for all your guests to add a leaf to the tree
- Write a sign to your guests explaining how it works
- Hang your tree trunk in your venue, with the box of leaves and sign nearby, and some safety pins for guests to attach their leaf (this way you can arrange the leaves yourself later as you'd like them before have someone sew them on)
- After the wedding, contact your sewing expert again to attach the leaves
The basic idea of this could be used with different themes. For example, you could use a blue background with a ship or coral and get your guests to write on fish, or a background of waves to which your guests add little surfboards, or a sky with birds or kites or balloons. Whatever your interests, you can make a collage-like guestbook that fits in with them, in either quilt form, like we did, or in paper form as an artwork to keep in your home.
There are many other amazing ideas for unconventional guestbooks that you can create yourself with a bit of crafting. A common and lovely one is the fingerprint tree or other fingerprint art, which we also used. I would recommend choosing a friend who you know who draws really well to draw the trunk or other background details if you aren't an expert yourself, because my drawing spoiled ours a bit. Some examples from Pinterest are shown on the right.
Another idea I have now seen in several places is that of collecting stones or shells or other thematic items such as corks, and having guests sign these to be placed in a glass bowl for display in your home. (For some Pinterest links, see http://www.pinterest.com/pin/58828338856272206/, http://www.pinterest.com/pin/2603712258171818/ or http://www.pinterest.com/pin/135600638752652609/).
Alternatively, choose a relevant possession you would be happy to have messages written on, write your own decorative message or wedding date, and give guests appropriate markers to sign the object. Examples I've encountered include surfboards, benches, slabs of wood later turned into rustic counters, bikes, plates, or chessboards.