Weddings on a Budget: DIY How to Make Wedding Invitations Step-by-Step Instructions Part Two


I made my own invitations. I am the kind of person who isn't very satisfied with the ordinary, and when I went looking for invitation kits in my colors (blue and orange), I found very little. So, I started browsing the internet for ideas. Surprisingly, I found very little. I took what I had seen and began to sketch. Here is part two of my step-by-step instructions on how to make this invitation. See part one:
- Weddings on a Budget: DIY Wedding Invitations Step-by-Step Instructions Part One
How to make a beautiful wedding invitation from scratch, costing far less than ordering invitations, part one.
Now that you have everything you will need, you will have one decision to make. As this is a very time consuming project, I have included notes to make this a bit simpler. This will leave out the embossing, and the dual color cover. I will make notes marked with an asterisk * to let you know what you can do for the simple version.
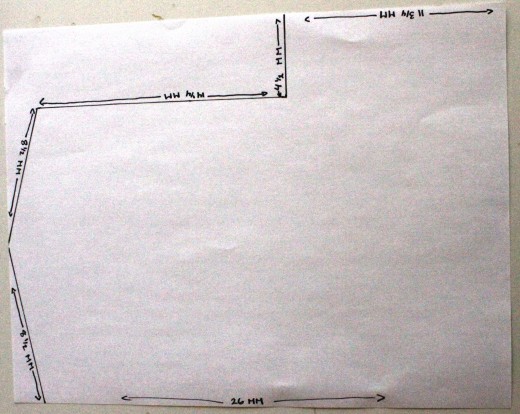
Step One: Make your template out of scrap 8.5x11 cardstock.The above photo will make your template. **For the simplified version, use 12x12 paper and you won't have to Emboss. This removes a lot of time. The dimensions are a bit hard to see, so I will list them here, beginning with the top right dimension and working counter-clockwise:
- 11 3/4 mm
- 4 1/2 mm is that little short vertical line
- 14 1/4 mm **If you are making the simplified version make this 15 1/4 mm
- 8 1/2 mm
- 8 1/2 mm to the peak
- 8 1/2 mm back down the peak
- 26 mm
- For those of you using the 12x12 paper, the width of the unmarked right edge is 8.5 inches.
Step Two: Trace and cut out your invites. If you can, use a paper cutter. This lets you be more precise and your cuts become straighter, i.e. more professional.
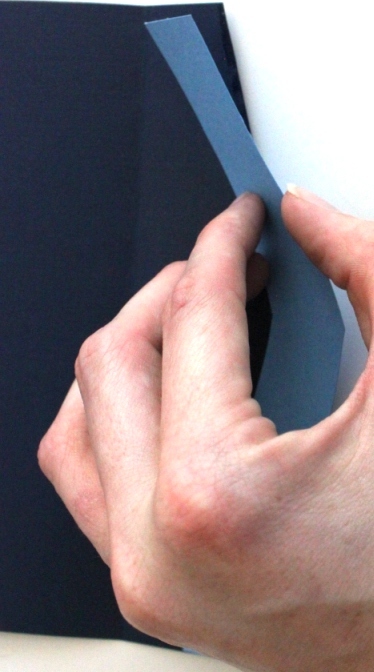
Step Three: Fold your invitations. I used a ruler to help guide straight folds, then used the edge of the ruler to help crease the paper flat.
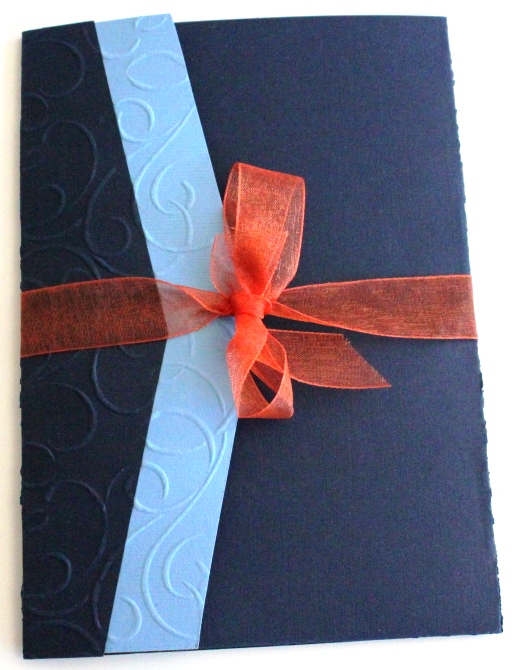
Step Four: **you will NOT do this step if you are using the simplified version** Make the accent color flap attachments (the light blue v-looking thing in above photo) . I don't have photos of this, so bear with me on the instructions. Take the peak of your invitation and trace it on a sheet of blue card stock, measure up 1 inch, then trace it again. You can fit eleven of these to an 8.5x11 sheet of paper. I took a ruler and marked off each inch up one side, then up the other side (only at the width of the flap) then was able to just slide the flap up, trace, slide up, trace, etc.) you might try it out on scratch paper first until you get it right. You need one for each invite. Cut these out.
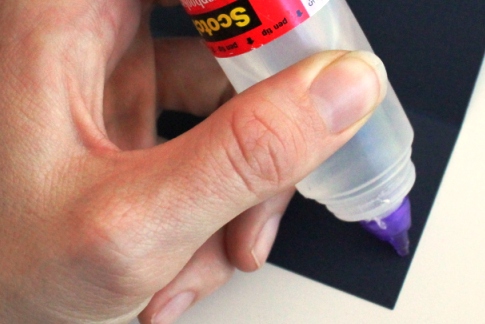
Step Five: Gluing barely along the edge of your flap attachments on the TOP side, attach it to the UNDERSIDE of the flap. This is the part that will be on the inside of the invite. Wipe away extra glue. Repeat on all invites.
Step Six: Here is the most complicated part, the embossing. If you use a lighter color, this will be MUCH easier, just saying. To learn about dry embossing, go here. You can order these online, but I found mine in a stamping store (inquire at scrapbook stores) for a bit less than online.
You will want to be sure the glue is completely dry, then emboss on the entire front flap. The stencil is smaller than the flap, just do one end, then turn the stencil around and match up the the design the best you can. Some of mine didn't match up perfectly but it was not noticeable when it was all finished. Then, on the inside pocket flap I embossed "with love" in the very center.
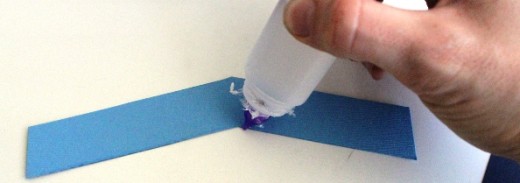
Step Six: Glue the pocket. Use only a very thin line of glue.
Step Seven: Now you will need to do some printing on the vellum. Here is a Microsoft Word 2007 document that has the settings already done, you just need to add your own information.
Your paper goes in the printer the usual way, then you will only need to cut it.
Step Eight: I decided it would be best to put a photo underneath the vellum where I could perfectly center it. Then I just traced around the photo with a pencil. I did this for each, then cut with the paper cutter.
Step Nine: Now you need to cut your matting paper. Take sheets of your accent color and measure 4 1/4 inch by 6 1/4 rectangles of paper. you will need one for each invite. You can fit three of these to a sheet, two along the top (short) side and one sideways underneath them.
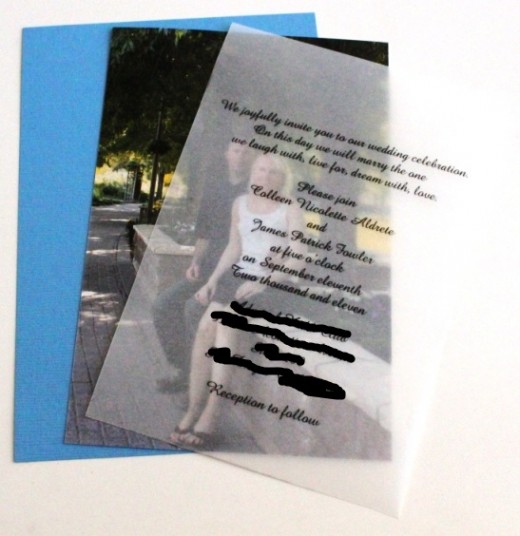
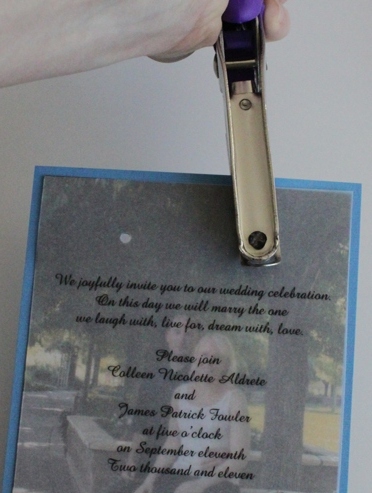
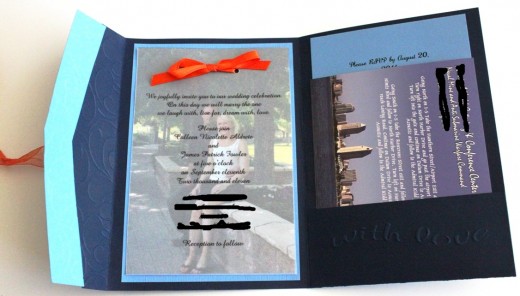
Step Ten: Now it is time to build your invites. Place your vellum paper over your photo and line up perfectly. You may need to trim it with scissors to be exact. Then place those centered on the card stock mat. With your hole punch, punch two holes through all three papers.
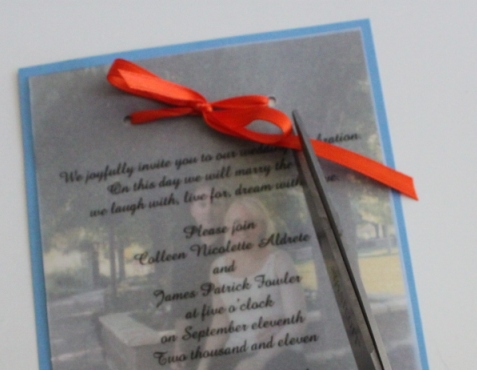
Step Eleven: Cut your skinny ribbon into 14 inch lengths. You need one for each invite. Coming up through the back on both ends, thread it through the holes and tie into a bow. Cut off excess ribbon.DO NOT GLUE THIS INTO YOUR INVITE YET!
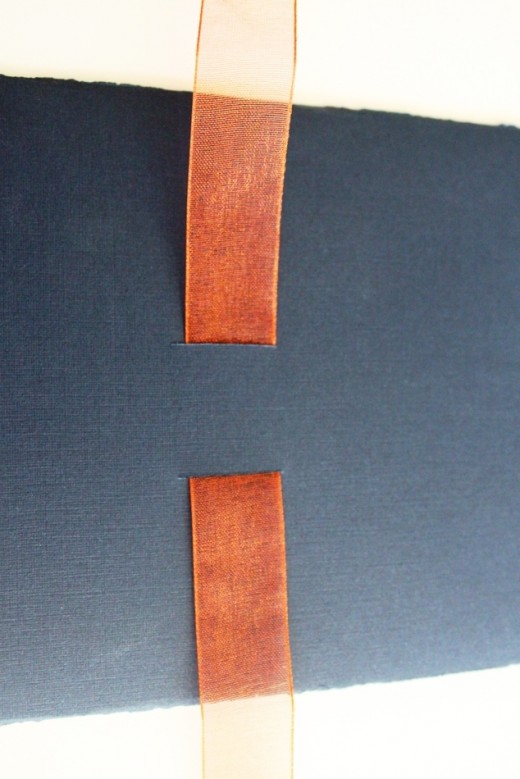
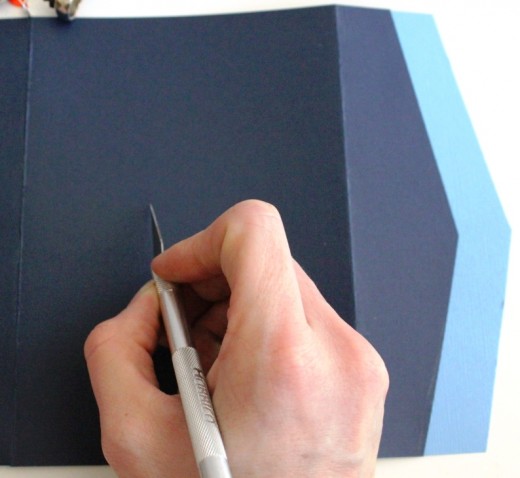
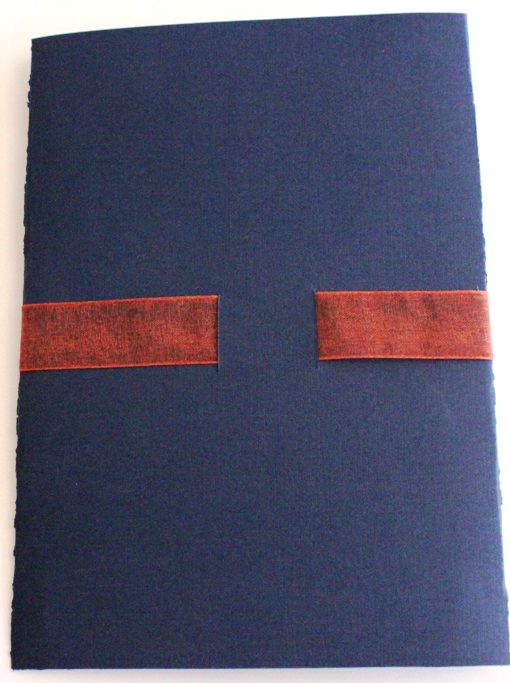
Step Twelve: Now, you need to cut slits for your wider ribbon. With your exacto knife, centered to the peak of your invitation, cut two slits, roughly and inch each, about an inch apart from each other. Thread your sheer ribbon through this.
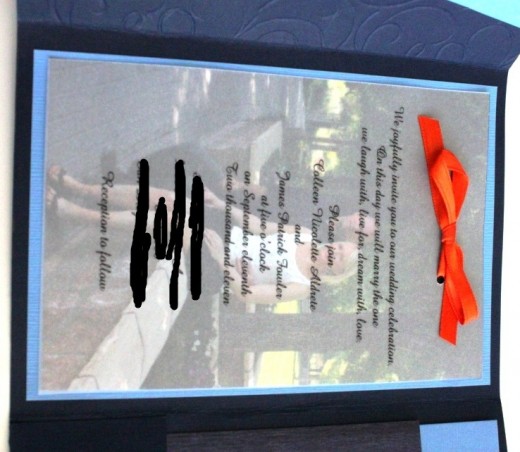
Step Thirteen: NOW we can glue our vellum/photo/mat stack inside the invite. Put thin lines of glue only around the edges and press centered on the inside of the invitation. You don't want to glue in the middle or that will stop the threaded ribbon from moving.
Step Fourteen: Now you need to print your instruction cards. This will hold your RSVP information and whatever else you want to tell your guests. You can go here to download the Microsoft Word template I used.
Cut your accent papers to 4x6 inch rectangles. You can make three from one 8.5x11 sheet of card stock.
Load these in your printer according to your printers instructions. When you print your instruction cards, set your printer settings to 4x6 paper size (photo). You may want to do some test prints on scrap paper first.
Stuff your pockets, fold up your invites, tie the ribbon in a bow, and you are done! Our venue gave us the directions cards, but you could print your own on smaller pieces of your accent color. These invites fit in A7 envelopes, I found mine in a party store for 3.50/50 pcs. Amazon also carries them. It takes two stamps to mail these, get the wedding stamps from the post office!