How to Plan a Weekend Camping Menu

Overview
If you want to have great food that's easy to prepare, easy to eat and doesn't leave you toting huge amounts of trash out of the woods, I can give you a few pointers. Over the years I've learned what works for keeping campers fed with a minimal amount of hassle. That's not to say the meals I prepare are mediocre. Great food doesn't correlate with great effort. It does correlate with planning and preparation. Following the menu below, (with your own flair, of course), will get you through a weekend of camping with no headaches:
Super-Easy Weekend Camping Trip Menu
Friday Dinner: Foil Dinners, (Hamburger or Pork Chop)
Saturday Breakfast: Bacon and Pancakes
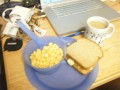
Saturday Lunch: Sandwiches and Pringles
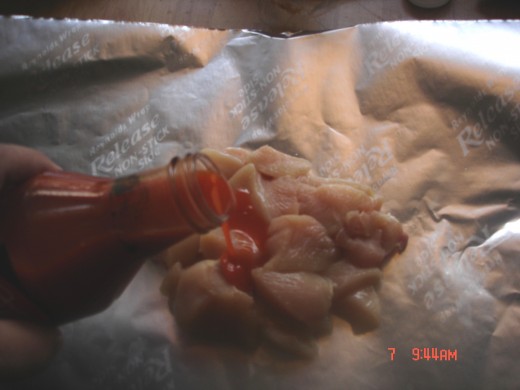
Saturday Dinner: Foil Dinners, (Chicken Breast with Wing Sauce)
Sunday Breakfast: Pop Tarts
Sunday Lunch: McDonalds Dollar Menu on the drive home
Foil Dinner Assembly
I've modified the Foil Dinner Recipe I learned long ago in Boy Scouts. (When I first heard we would be having "Foil Dinners" I thought we'd have to eat foil). The ingredients can vary, but here's what I like:
1/2 pound of hamburger, chicken breast, or pork chops
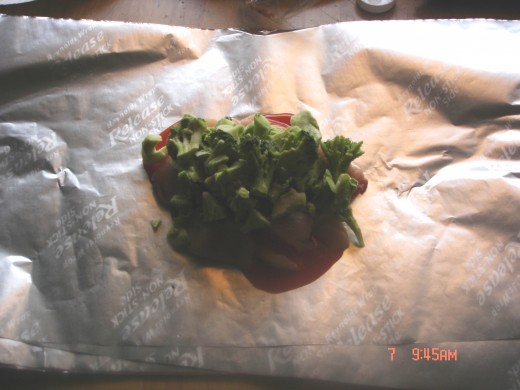
1 cup frozen vegetables, (peas, broccoli, cauliflower, lima beans, green beans, corn, etc.)
Seasonings and/or sauces
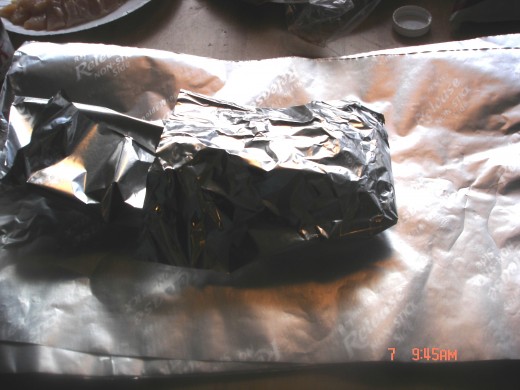
Make the Foil Dinners in the comfort and cleanliiness of your kitchen before going camping. If I'm making several Foil Dinners, I tear a sheet of foil off the roll, about 18 inches long. I set it on the counter and tear another, and set it right on top of the first. I do this several times until I have one sheet for each Foil Dinner I plan to assemble.
Take I/2 pound of meat and put it on the center of the top sheet of foil. Press it down until it forms a patty about the size of a large hamburger. It doesn't matter if its round. Season it with salt and pepper, (enough so you don't have to salt and pepper it while you're eating it out in the woods).
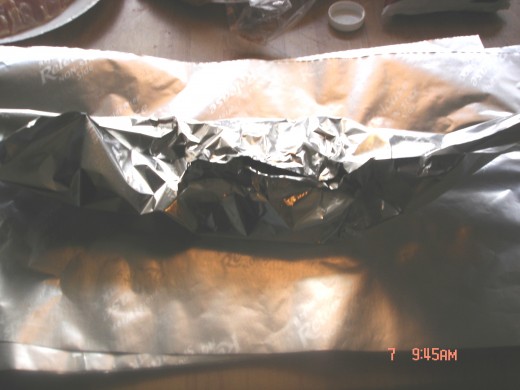
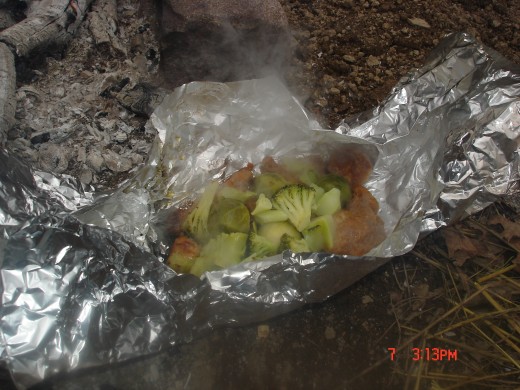
Pile the frozen veggies on top of the meat, add a pat of butter, season to taste with salt and pepper. Fold the foil over the meat and vegetables to make a packet, (see photos below). Fold it so ashes can't get in and juices can't get out.
Make several Foil Dinners while your ingredients are out on the counter, one right after the other. If kids will be camping with you, get them to make their own. The excitement of the camping trip begins with this preparation.
With Pork Chops and Chicken Breasts, cut them into bite size pieces. I don't recommend Drumsticks or Thighs because the bone slows down the cooking and then the veggies turn out mushy.
With Chicken I like to pour on Wing Sauce. Bring along the Wing Sauce because it soaks into the chicken and I like to add some more when its finished cooking.
With Pork I like Shake N Bake. The foil keeps the Skake N Bake from forming a crisp crust, but it still makes it taste great.
Foil Dinner Assembly
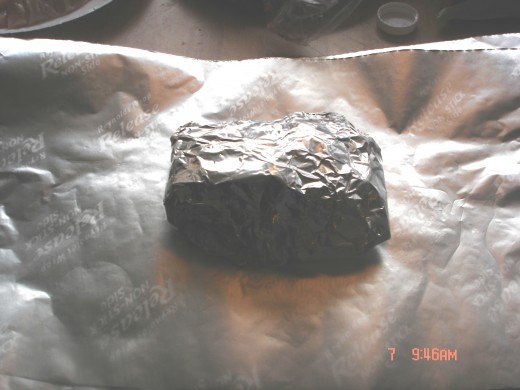
Test Them Beforehand
Put your finished Foil Dinners in a plastic grocery bag and put them in the freezer so they'll be ready to go camping when you are.
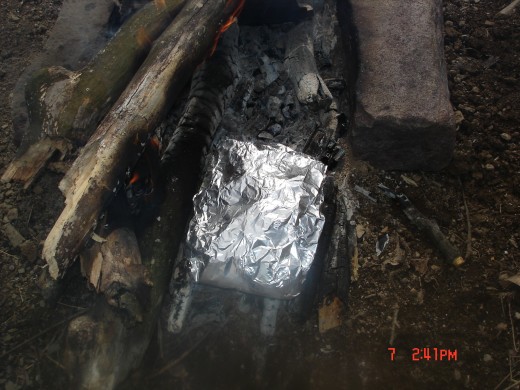
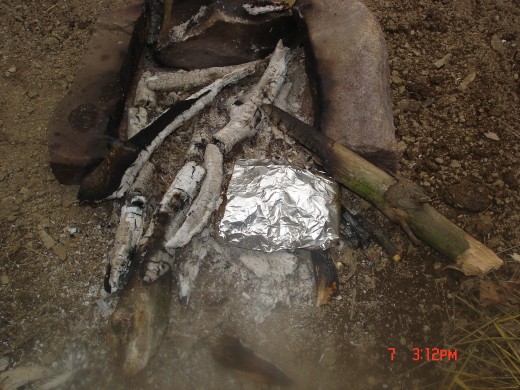
I like to test one first. Recently I switched to non-stick foil, which slowed down the cooking a lot. I had to cook a Pork Chop Foil Dinner at 350 degrees for over an hour. It would have taken about 45 minutes with regular, inexpensive foil. (You don't need to grease foil that isn't non-stick because the meat is on the bottom and the juices keep it from sticking.)
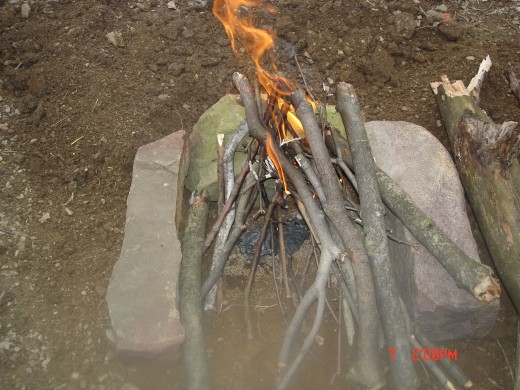
(You can see the pics below show the Pork Chop Foil Dinner cooked from 2:41 to 3:12. I didn't move the dinner or adjust the fire. You can see it cooked well. One piece got too well done but I ate it anyway.)
You'll have to use these times and temperatures as guidelines because the amount of food you put in a Foil Dinner, the temperature of your fire or oven, the thickness of the foil and the layers of foil wrapped around the food all affect the cooking time. When you get out in the woods, have a flashlight ready to check the meat, which is difficult to see by the light of a campfire.
Kids especially like to test their Foil Dinners in the oven at home. They'll also make S'Mores over the front burner on the stove if you let them. "Almost Camping" is almost as fun as camping. Make sure you supervise the little nippers.
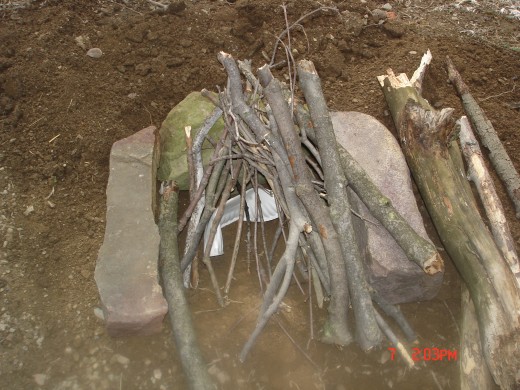
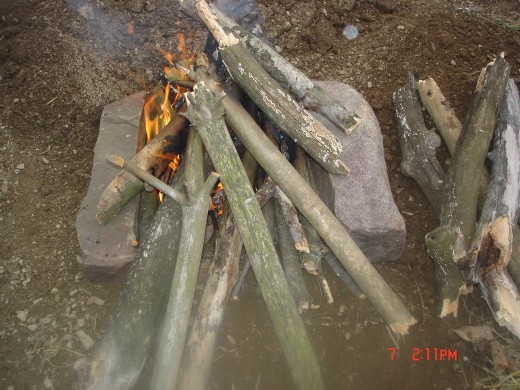
Around the Campfire
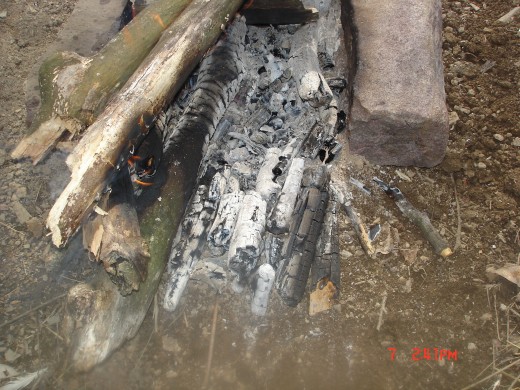
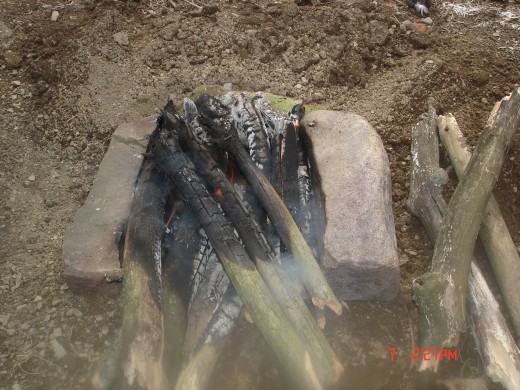
When camping, make a fire and let it burn long enough to get some coals. Use a stick to rake these coals away from the rest of the fire, just to the side. That way you can control the heat your Foil Dinners will be exposed to. Set each Foil Dinner on a bed of coals, meat side down. You can pile some coals on top if you like, but I usually place my coals close enough to the main fire that I don't need to. Since the size of a campfire varies, the cooking time will too. Try not to open the foil for the first half hour because the foil is hard to crimp back into a tight seal if you need to cook it longer.
When your Foil Dinner is ready, use the foil as a plate. If I can wash my hands I don't usually use a fork, I just pick up the meat and veggies. That's why its good to have the meat already cut into bite size pieces. The foil doesn't make a good cutting board.
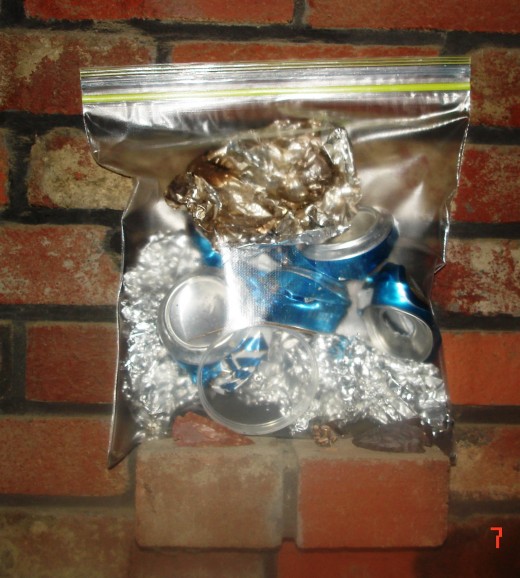
When dinner is over, pour the juice and any leftovers from your Foil Dinner into the flames of your fire, then wad up the foil and put it in a large Ziploc bag. If you're camping in bear country, you should keep your food away from your tent, or bears might show up looking for a meal and try to barge right into your tent. You can put your food and items that smell like food, (such as your Ziploc bag with trash in it), in a bag. Tie a rope to the bag, throw it over a tree branch, hoist the food up at least 10 feet in the air, and tie it off. That should deter bears, but if not, at least you're only losing your food. Keeping food or trash in the tent can be dangerous.

Saturday Morning
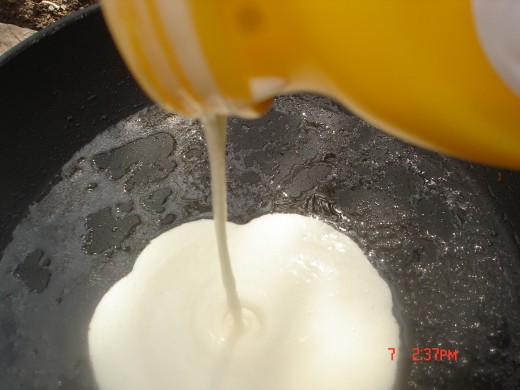
Making pancakes over a campfire is tricky because the heat of the frying pan is difficult to control, and pancakes have a narrow window when it comes to temperature. Too hot and the oil burns, too cold and they soak up the oil and take forever to cook. But if you want to hone your skills at campfire cooking, pancakes are a good challenge.
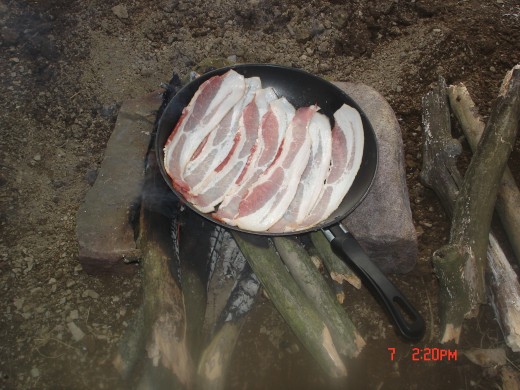
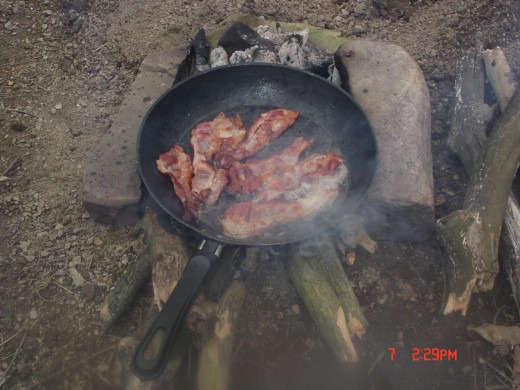
Cook the bacon first, though. Put it in a cold frying pan, since adding it to a hot pan makes it curl up, which makes it cook unevenly and its hard to turn over really curly bacon. Fry the bacon and place it on a paper towel. I take an empty coffee can with me so I can save the bacon fat. (I use bacon fat to season green beans, as a frying oil, and to get a fire going by putting a spoonful on a paper plate. I crumple the plate up. Check it out in the pic of the fire above. It burns great. Bears love it too, so keep it in your food bag.) Drain it all from the pan into the can, then wipe out the bacon 'crispies' with a paper towel. If you leave them in, the pancakes will tend to stick.
I used to mix the dry ingredients for pancake batter at home in a Ziploc bag, then add water and a fresh egg when I was ready to cook them. Now there's an easier way: Shake N Pour. It might be handy in the kitchen but its perfect in the woods. Just add the right amount of water and shake the bottle to mix it.
Pour some grease back into the pan, about a tablespoon or two. Swirl it around and put the pan over the fire to get it hot. Then pour in some batter. If you're a rookie, make your first pancakes small, because large ones are harder to turn.
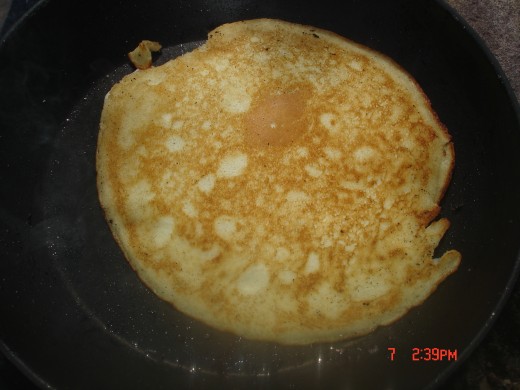
When bubbles come to the top of the pancake, pop, and stay opened, the pancake is ready to flip. Hope you brought a spatula. When the flipped pancake stops steaming, its completely cooked.
Next time you're having a fast-food breakfast, get a couple of extra syrup packs. I make my own Maple syrup, so I'm spoiled on the good stuff, and I take some when I go camping in a little squirter bottle.
When the pan cools off, don't wash it. Wait til you're in your kitchen where it will be much easier. Just wipe it out with a paper towel and put it in a plastic bag. (The outside of the pan will have soot all over it). Stick the spatula in there too.


Saturday Afternoon and Evening
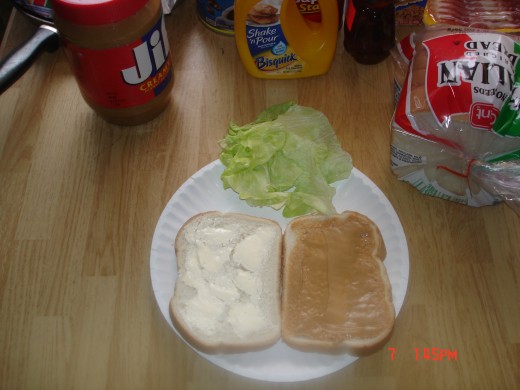
Sandwiches can be made at home beforehand and make for an easy, mess-free lunch. I avoid tuna, chicken and egg salads because these ingredients soak the bread, unless eaten soon after assembly. I like Peanut Butter and Jelly, but the jelly often does the same thing. So even though I'm not much for strange recipes, I use my Dad's recipe for Peanut Butter Sandwiches when camping. It consists of butter or margarine on one piece of bread, peanut butter on the other, and a piece of iceberg lettuce in between them.
You wouldn't think a Peanut Butter, Lettuce and Butter sandwich would be good, but it is. Keep in mind that it tastes better in the wild than in your kitchen. Also, it doesn't have any synergy when eaten with potato chips as does a Turkey Sandwich with Mayo or a BLT.
I think you should try a PLB, with chips, to see if I know what I'm talking about.
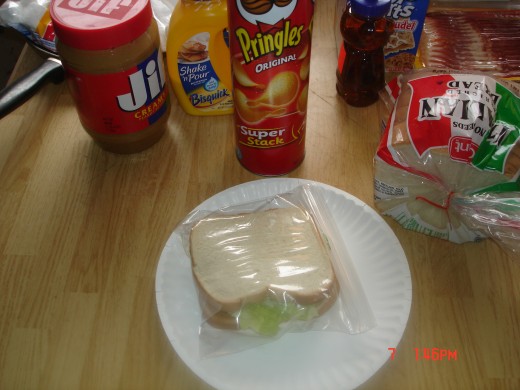
If you'd rather not, a Bologna Sandwich doesn't get too soggy, unless you put mustard or mayo on when you're making it at home. Freeze your sandwiches in their baggies with the Foil Dinners before you leave, and if you use mayo, keep that sandwich in the cooler so you don't poison yourself or anyone else.
Chips are handy to have while camping, if you like them. They're lightweight, which is great for backpacking, but they'll get crushed in your pack unless they're Pringles. The cannister will burn, but the plastic cover should be added to your Ziplock bag.
I'm not being overly-environmental. Why leave your junk out in the woods and along the trail when you can plan to have a lightweight, minuscule bag of junk to take home? By the time you get it home to dispose of it properly, it has become your trophy. (Dispose of it anyway.)
I've seen tons of beer bottles left out in the woods over the years. They're usually in a pile near a burned out campfire. The people that left them didn't pack them out because they were probably hung-over and didn't feel up to it. Beer bottles are heavy and fragile. If they'd made the job of packing out their trash easier, (like buying beer in cans that can be crushed and are lightweight), they could have held their heads high when leaving the woods.
Sunday Morning and Heading Home
Pop Tarts make a fine breakfast. There's a time for fussing around a campfire and cooking an elaborate breakfast, and that time is Saturday morning. Sunday is for packing up and heading home. You don't need a toaster, just wrap a Pop Tart in foil if you want to warm it up in the fire. But by now you've made it through a weekend of camping and you are tough enough to eat a cold Pop Tart.
Hit McDonalds on the drive home for an inexpensive hot meal with no dishes to wash. You've made it!
I hope this article shows you that camping can be easy with a little planning and preparation.
<script data-ad-client="ca-pub-5082991250696503" async src="https://pagead2.googlesyndication.com/pagead/js/adsbygoogle.js"></script>