How to Replace a Bicycle Chain: A Repair Guide
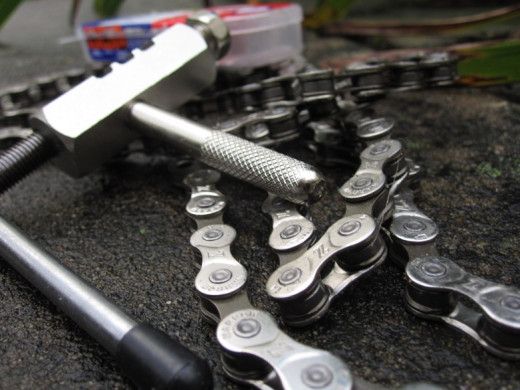
Bicycle Chain Repair, Tools, & Replacement
Owning a bicycle is really rewarding. Whether you ride for exercise, transportation, fun, or all of the above, they're a great investment. However, little stuff can make a ride less enjoyable, and a broken or faulty chain can really hinder you.
You could take it to a bike shop and pay a surcharge to let someone fix it. But wouldn't it be nice to learn how to tune your bicycle all by yourself? Learning how to remove and replace a bicycle chain isn't terribly difficult. Anyone can do it!
With just a few basic tools and a bit of know-how, you'll be ready to fix your bike's chain at a moment's notice. This article will offer a detailed walk-through on how to replace that bike chain, and some useful tips that many 'DIY' instructions won't tell you.
If you have any specific questions or concerns, please don't hesitate to ask. Let's get started!

The Signs: What Your Chain Is Telling You
Probably the most common thing I hear is, "I had no idea my chain needed replacement". If you take the time to stop, check and listen, you'll know exactly when to replace your bicycle chain. Here are a few signs to keep your eyes and ears open for:
My Bike Chain Is Making Noise:
If your chain is making noise, it's telling you one of two things: it either needs to be maintained, or it needs to be replaced. Bike chains are not supposed to 'squeak', they should run in virtual silence. If yours is making a bunch of noise whenever you pedal, it's time to hop off and take a look.
Chain noise is caused by metal rubbing against metal. It happens for two reasons. First, if there isn't enough lubrication, or if the chain is rusted, it will squeak. Regular oiling will prevent rust and noise.
Secondly, if a chain is worn out, it will move from side to side a lot more freely, causing rubbing and noise. No amount of lubrication will cause a worn out chain to be completely silent.
My Chain Looks Strange:
Bicycle chains shouldn't look strange. They should be fairly taut and straight. If you've got one that's sagging down, it's probably stretched, and that's a sign that your bicycle chain could need replacement.
Other things to look out for visually are excessive space between links, rust anywhere on the length, cracks in the metal of the outer link plates, or pins that seem to be coming out, it's time to learn how to remove your bicycle chain and get a new one on there.
My Bike Feels Strange When I Pedal:
When in doubt, check the chain. If you're getting a sense of resistance or 'crunch' when you pedal, there can be numerous causes, but the most common culprit is often the drivetrain, and a rusty or worn out bike chain needing replacement or repair is the obvious first place to look.
Symptoms such as skipping or jumping gears, clicking while you pedal, excessive noise, difficulty pedaling, all of these can be the result of a chain that's past its lifespan.
How To Check for Chain Wear:
Over time, a chain will stretch. That's a natural thing, but once it reaches a certain amount of stretch, it's no good anymore.
A stretched chain will no longer fit perfectly into the chainring and gears. What's more, you'll get a lot of 'side to side' chain movement, which wears out your components and causes noise, gear skipping and other issues.
How Can I Tell?
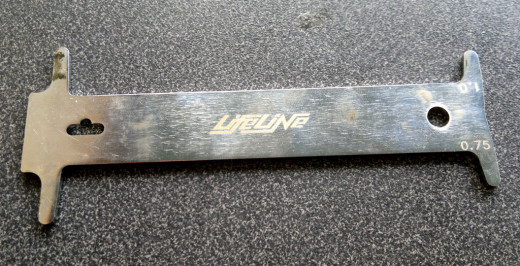
To figure out whether your bicycle chain is stretched to the point of replacement, you'll need to use a chain wear indicator tool (see above image). They're really simple to use.
First, slip the 'hook' or 'pin' end of the indicator into a point along your bicycle chain (you don't have to remove the chain to check it). Then, let it drop down. The 'tooth' on the other end should fall into a gap between two links.
You can see how much wear your bicycle chain has by how far the 'tooth' slips between the link. There will typically be a '0.75' side and a '1.0' side. If the 0.75 side slips between the links, your chain is 75% stretched, and it's nearly time to replace it. If the 1.0 side slips, your chain is toast, time to replace it!
Be sure to measure in multiple places along the chain, since stretch isn't usually uniform.
Some are simpler than others, but they all work fairly reliably. If you're unsure, take it in to your local bike shop and they can measure the stretch for you.
How To Remove / Replace A Bicycle Chain
Now that you've learned how to determine whether or not your chain needs replacement, let's tackle the next step: changing the bike chain itself.
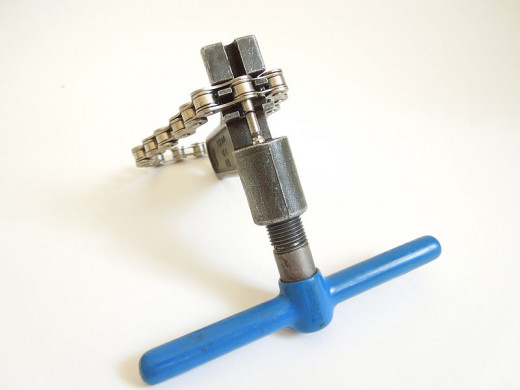
To do this, you'll need a bicycle chain tool. There's no way to do it without one, and I'm not going to offer any 'home brew' advice to get around it. If you don't have a chain tool, don't try to take your chain apart.
You can get a bicycle chain tool at some hardware shops, any any bike shop worth its salt will carry a good selection. I'd opt for the more expensive one with a bigger, rubberized handle, it offers more leverage.
This will get messy. Replacing a bicycle chain will require work clothes, since getting grease on your hands is inevitable.
Removing Your Bicycle Chain:
- Start by cleaning off the chain. You can use bicycle chain cleaner, that's the best solution. Then wipe it down with a rag. This isn't strictly required, but it will make removal a lot more pleasant, and you'll be able to see what you're doing.
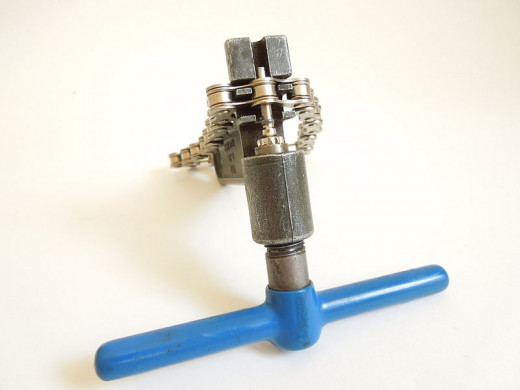
- Place the chain in the chain tool, refer to the first of the two images above for reference. You'll note that there are two positions where the chain can fit. You'll want to use the second position, farthest from the screw portion (We'll use the middle position later).
- Turn the screw handle so that the pin moves inward. Be careful that the pin of the tool is directly against the pin in the middle of the chain link.
- Now you'll need to use some force. Continue to turn the screw, and the pin will slowly work its way out.
- Do NOT let the pin fall out of the link if you plan to re-use this chain. You'll want to stop when its about 3/4 of the way out.
- With your hands, gently twist and pull the chain apart, and it should detach. Thread it carefully out of the drivetrain.
There! You have successfully removed a bicycle chain!
Replacing Your Bicycle Chain:
If you're planning to replace the worn out chain with a fresh one, you can follow the same process in reverse.
- First, make sure that your new chain has the same number of links as the old one. You can do this by laying the new chain next to the old one and counting. The lengths should be the same.
- Make the chains the same length by breaking the new chain as described above. Remember, be sure to keep the pin sticking out of the side, you'll need it to reattach!
- Thread the new chain back through the drivetrain and derailleurs.
- Pro Tip: If you leave a tiny bit of pin sticking out from the inside of the outer plate, then the two sides of the chain will snap together, rather than you having to hold them while you reattach it.
- Pro Tip: Make sure that the sticking out pin is facing outwards, or reattachment will be tricky!
- With your hands, click the two sides of the chain together again. If you've left that millimetre of pin on the inside of the plate, it should snap together. Then place the chain inside the chain tool as before. Slowly tighten the screw, and push the pin back into place.
Stretch The Chain:
There's one last thing to do before you're finished. Where you reattached the chain, it will likely be quite stiff due to the compression. You'll want to stretch out the chain to loosen it up.
You can do this in two ways. You can grab the chain in both hands and just twist it laterally a few times until it loosens up.
Alternatively, you can use the middle position in that chain tool. Place it in the position closest to the screw. Turn the screw very gently to stretch the chain. Flip it, and repeat on the other side. This should loosen it up.
Test the link by hand to make sure it moves freely.
Then lubricate the chain, and you're off!
Other Information on Chain Replacement and Repair
This is a basic overview of a basic type of chain, and it might not be relevant to what you're trying to do. Here are a few more pieces of information that could be helpful to you.
Other Types of Chains:
What I've described is the replacement process for a basic, industry standard bicycle chain. There are other types, such as a Campagnolo type chain that requires a different process. If you have a specialized chain, feel free to comment and I'll try to help.
Master Links:
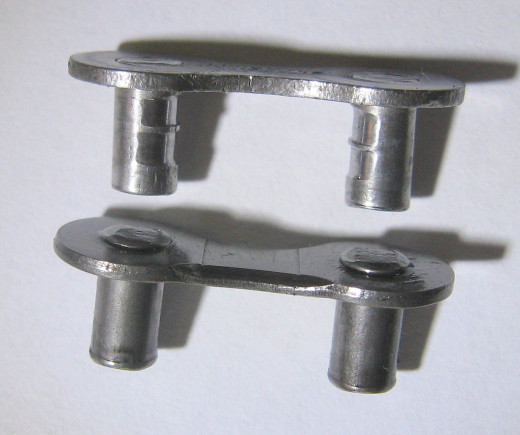
A master link is commonly included with a new bicycle chain. It's an easy way to attach or detach a chain without having to go through the process I just described. Not all chains have master links.
The master link can be easily removed with a flathead screwdriver. Just push the removable outer lock to the side and up, and it should pop off. Then fit the screwdriver in between the outer plates and pop it off. Then, just pull the chain apart.
If you want to remove your chain frequently, I highly recommend using a master link.
Bicycle Chain Repair:
It is possible to repair, rather than replace, a bicycle chain. Sometimes a brand new chain will get a damaged link. In that scenario, you can remove it from the bicycle, remove the damaged bit, add a fresh link, stretch and reattach. That saves you the hassle and expense of replacing the whole thing.
However, I'm not an advocate of trying to repair chains that are worn out. On the whole, riding a bicycle is very inexpensive, and it's worth it to do basic maintenance.
If your chain has considerable rust, I'd recommend replacement rather than cleaning it up. Its integrity will never be the same if it rusted out, and it will probably squeak and cause wear issues.
Thank you for reading, I hope this is helpful. If you have questions, comments, or just want to say hello, please do so!


