Bonding With My Sons While Building a Canoe
Long Winters Make You Eager To Get Outdoors, Don't They?
Once the decision was made to build a canoe, it's like time slows down when the cold keeps you holed up indoors. My boys and I were anxious to get on with the process.
This was a dream of mine since I was a youngster in Boy Scouts. One of my fondest memories was attending a massive gathering of scout troops from surrounding areas, meeting at a nearby lake. We learned to start campfires, put out campfires, paddle a canoe, and flip an overturned one, and other cool stuff boys love to do. I never lost the love of paddling that elongated boat silently through the water, while fish jumped beside you in the water. By the time Spring arrived, my engine was running up, full throttle and ready to begin.
Winter Seemed Forever
But Finally, The Claustrophobic Winter Was Over
Time had come to begin the canoe project. I had never imagined building a boat of any kind, thinking it was beyond my scope of expertise.
We poured over plans, coming across unfamiliar terminology like strongback, gunwales, portage, keels, etc. It was all very confusing. I had to keep a dictionary nearby since the internet was barely coming into use back then. Working at a job and coming home tired from a long day made it hard to get excited about spending 2-3 hours in the garage. In the beginning, we needed to construct devices that don't look anything like a canoe. It seems a lot more like some sort of elongated rib-cage from a skeleton. It's hard to keep the motivation of teenage boys whose desire to be playing with friends outweighed working on something no one could yet understand.
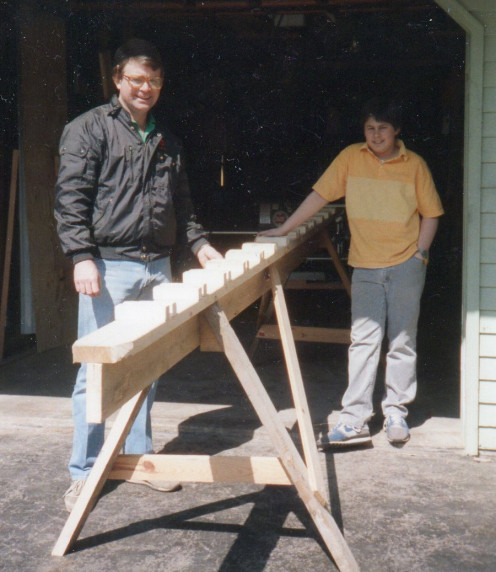
What Ia a Strongback?
It had taken me several tries to build this contraption. The best description I can give is that it resembled two wooden sawhorses about 15 feet apart connected by a long wooden board attached to another longboard that, when viewed from the end, looked like the letter "T"....a very long letter "T." When I began to ponder the name given to it, "strongback," it started to make more sense. Atop the T-shaped part of the strongback were placed the ribs, or forms, that create the canoe's distinctive curves. Structures that are narrow at each end and wide in the middle. It did look a bit like ribs attached to a spine, or backbone.
The Start Of Building Your Own Canoe.....The Strongback
Before You Begin
Make sure you have plenty of space (like one half of a two-car garage). When you set up the strongback with forms and start attaching the wooden strips, it"s
awkward (but not impossible) to move it around.
I used Western Cedar, 3/4 inch thick, by 18 foot long, by 6 inch wide boards for the strips, from which I cut the wooden strips for the canoe shell.
Try to buy all of the cedar at the same time from the same batch. The wood grain will usually be a better match.
The Strongback With Forms In Place
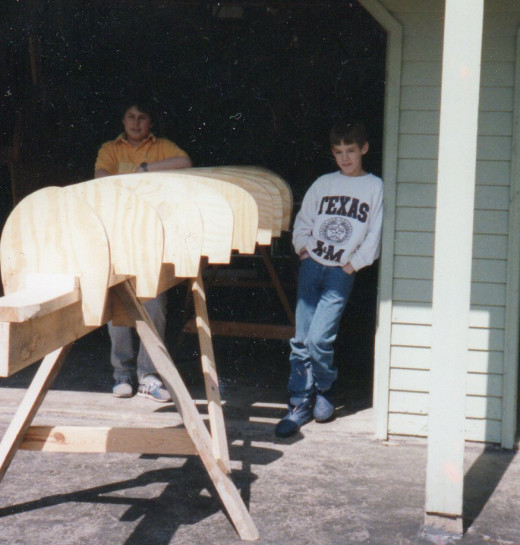
With Setup Complete, It's Time to Begin Building a Canoe
When looking at the forms setting on the strongback, you're looking at the shape of an upside-down canoe. Simply put, there are 50 to 75 wooden strips of Cedar, 1/4 inch thick by 3/4 inch wide that make up the outer shell of the canoe. They are glued and stapled to the rib-forms to give the boat it's shaping. The first strip is attached to the bottom of the rib-forms, which is the top of the canoe, just under where the gunwales (pronounced gunnels) will be. It is advisable to rub a coat of wax onto the outer edges of the forms to prevent the cedar strips from sticking to the rib-forms. You could also use masking tape or regular Scotch tape to cover the rib-form edges. These strips are going to be stacked edge to edge, one on top of the other, using glue to bind them together. Use a staple gun to secure the strips to each one of the forms. Apply a thin bead of glue on top of the first cedar strip, place the next cedar strip on top of the first strip, and just keep repeating that process. It won't take long to see the canoe take shape. This is the fun part -- so much fun that it's hard to stop working on it. My dream of canoeing from the days of being a Boy Scout was coming to life.
Cedar strips can be purchased, already milled.
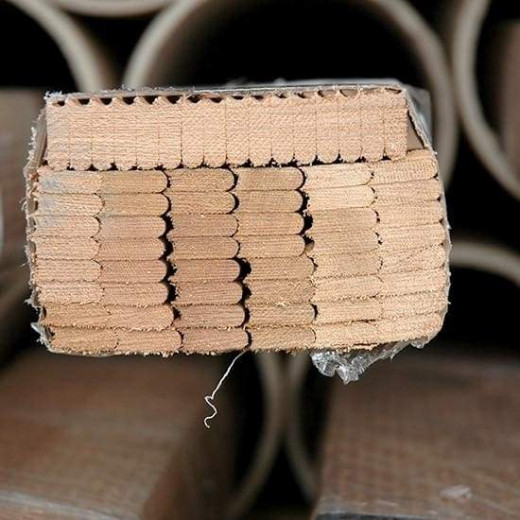
Where to Buy Western Red Cedar Strips.
- Bear Mountain Boat Shop - Us Shop - Canoe Strips
All the strips measure 1/4" x 13/16"; all are clear Western Red Cedar, vertical grain, full length and milled so that the 8 strips from any one board are packaged together exactly as they lay in the original plank which allows for symmetrical pattern
A Wooden Boat Will Always Float
Wood will always be my first choice for a canoe. Aluminum boats are noisy, heavy, and just plain ugly. Plastic ones aren't much better, and both must have some sort of floatation device built-in to keep them from sinking, in the event, they fill with water.
Not so with wood. I like the quotation I read from a wooden boat builder, which said, "A wooden boat will always float."
From Staples to Epoxy, Wooden Boat Building is Full of Challenges
Every step in this process adds another level of detail and expertise that I often didn't have and needed to enlist others that did. I knew that after the glue that held the strips in place dried, I would need to remove every staple. There was one staple through every cedar strip into every form (around ten forms in all). Multiply that by roughly 50 wooden strips, and that's a lot of staples. If I had been thinking ahead, I would have inserted some type of durable cloth of thin plastic pieces on the staple location to make removal of each staple easier. Instead, I had to pry each staple up before I could grab them with pliers. Fortunately, the marring didn't detract much from the beauty of the finished canoe.
Applying The Fiberglass Cloth Over The Canoe
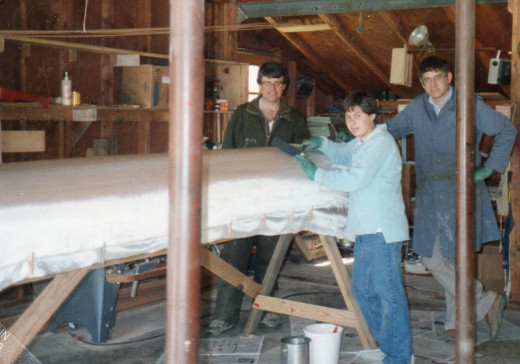
We Needed Help With The Fiberglass And Epoxy Application
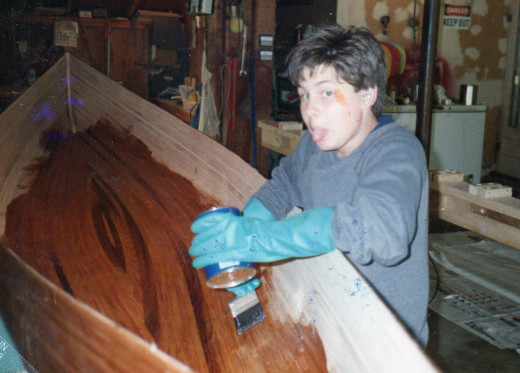
With the glue dry and staples removed, it was time to begin applying fiberglass cloth and epoxy to the outside of the canoe. I was unfamiliar with this part of the process, but luckily, I had a friend named Will, who had experience with doing this. With the cloth draped over the canoe, it was just a matter of mixing up the 2-part epoxy resin and pouring it over the fabric. We spread the liquid all over the top and down the sides with paint rollers and plastic paddles called squeegees, covering the entire surface and allowing it to dry.
The next step is to carefully lift the canoe off the strongback and forms and flip it over onto something soft, like blankets or foam pad on the floor. Now you can remove the rib-forms from the strongback and move all of that out of the way. The rest of the project will be done with the canoe resting upright.
Buying Fiberglass Cloth
- Amazon.com: Fantasycart Fiberglass Cloth Plain Weave 4.12 Oz 40" wide in 16.6 yards long: I
Amazon.com: Fantasycart Fiberglass Cloth Plain Weave 4.12 Oz 40" wide in 16.6 yards long: Industrial & Scientific
Where To Buy Epoxy
- Amazon.com : TotalBoat 5:1 Epoxy Resin Kits : Industrial & Scientific
Amazon.com : TotalBoat 5:1 Epoxy Resin Kits : Industrial & Scientific
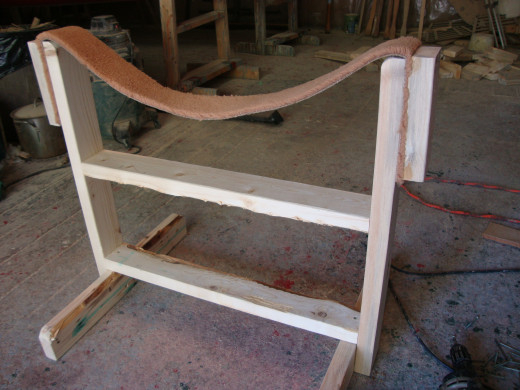
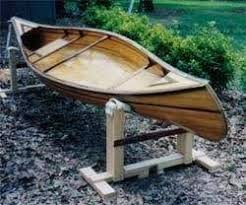
Why A Canoe Cradle?
I built a cradle, or sling, to support the boat while we were applying epoxy to the inside. See the pictures above. We also had to install the gunwales, seats, and decks on each end. For all these operations, it's best to have the canoe at a comfortable working height.
The Cradle Used To Put The Finishing Touches On The Canoe
Spreading The Epoxy Mixture On The Inside Of The Canoe
Noah's Marine Has Just About Everything You'll Need
- Boating Supplies & Marine Products by Noahs Marine
Noahs Marine is your one stop shop for boat supplies, canoe building kits, and more. Click to visit our online store and shop today!
Finished Canoe
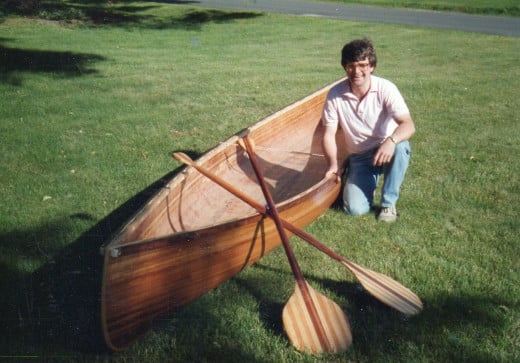
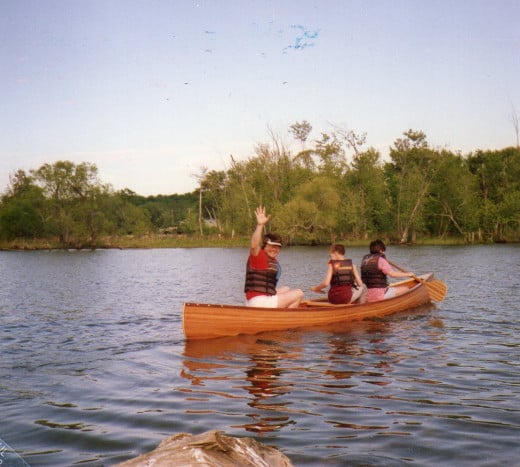
Pictures below are the finished product, which took us well into summer to complete. I was the one occupying the back seat -- my favorite spot in a canoe. Once my good friend and neighbor saw it, he persuaded me to build another one for him. With his dedicated help, we were able to finish the second one in about half the time and half the mistakes as the first one. Soon after that, he found a dilapidated wooden sailboat, which became the next project. But that's another story.
