Skateboard

How To Make a Skateboard
When I was a kid skateboarding was becoming very popular where I lived. Unfortunately skateboards were pretty expensive and we did not have a lot of money. Luckily in grade seven and eight we were required to take an Industrial Arts class (otherwise known as Shop class). We could chose to make whatever we wanted, so I made myself a skateboard.
A skateboard then became very affordable as the school would provide the plastic for the deck, the screws, and bolts required for attaching the trucks. All I would need to provide was the trucks, wheels, and some elbow grease. Luckily my cousin had just outgrown his roller skates so he no longer needed the wheels on them. While this wouldn't be any skateboarders first choice for trucks, they were free so they worked for me.
Heather Christensen [CC-BY-SA-3.0-us], via Wikimedia Commons
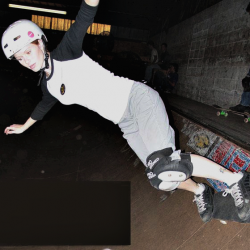
Best Skateboarding Tricks Video
Blue Print For A Skateboard

Photo is of a Blue Print Made in Excel By: whatsittoyou
Above is a drawing (blue print) that I made of the finished dimensions for a skateboard.
Cut a Rectangle
My first step was to cut a rectangle from the large pieces of plastic that were in the shop. You need to make sure it is longer and wider than the planned finish size. As you will need to shape and smooth the outside of the board. You will also be puuting a bend in it which will affect the length of the board.
The Table Saw

Rough Out The Shape of the Deck
The next step was to draw a template onto the plastic rectangle that would be the shape of the deck. Then I used a jig saw to cut close to that shape.
Drill Out Holes For the Trucks
I had to also make the marks for where to drill the holes to be able to screw on the trucks (what holds the wheels). Once they were drawn on I took the deck over to the drill press. I had to drill a hole through for the screw and a counterbore to prevent the screw head from sticking out.
Finish Shaping the Deck
Now that I have my basic rectangle piece of plastic it is time to shape the board. The front of a skateboard will typically have a rounded front. I would draw/etch the shape I wanted onto the front of the board. Then you set the router to follow the shape that you want. The router will also provide a nicer finish to the sides which will make it easier to finish polish.
Bending The Board
Next step I had to put a bend into the board. You need to bend the deck to an approximately 10 degree angle for the tail. Place a mark where you want the bend to begin. Then slowly heat the area, being careful not to melt or burn the plastic. Once it is warmed up you can use the shear brake to bend the tail onto the deck.
Installing the Trucks
Now that the deck is complete all I had left to do was to screw on the trucks. You want to make sure that the screws you choose are long enough to hold the trucks in place. I used the old trucks and wheels that were on my cousins roller skates. If you need to you can use them as well, but if you can afford it I would recommend going out and buying proper trucks for the skateboard that you build.
You may want to add some grip tape to your board if you plan on doing tricks. I was using mine more for getting around quicker and having some fun.
Finishing the Deck

Photo of the skateboard that I made By: whatsittoyou
Now that I have the shape I wanted, I needed to create a smooth finish. Time to head over to the buffer. Hold the board and slowly go over all the sides and edges with the buffer. This will get rid of any edges and create a nice finish.
Go Skateboarding

By Corster686 (Own work) [CC0], via Wikimedia Commons
Now that your skateboard is complete it is time to go out, show it off, and ride it.
How to Make a Skateboard With Wood
I made mine from plastic. However if you are interested in doing tricks a wood based board is a more popular choice. This video will show you how to make one using wood instead of plastic.
A wood based board.


