5 Quick and Easy Tips for Self Tanning at Home
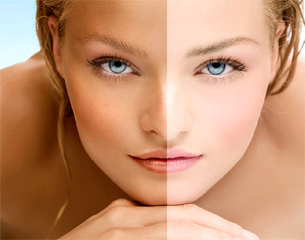
How do you achieve the perfect at home self tan?
Summer might be far around the corner but grey skies are no excuse for pale, dull skin, if anything they’re a reason for you to be a little ray of sunshine amidst the cloudy skies. At home self tanning has come a long way over the years; it’s not all day old biscuit smelling fake-bake and two shades – orange vs orange-er! With the knowledge surrounding the use of tanning beds and sunbathing on the rise, people looking for a healthy glow are more likely to reach for the safety of the tan in a bottle than ever before.
There are not only a variety of shades to choose from, but an array of application methods too. From creams to gels, sprays, mousse and even show gel. Picking the the right method is just the first step in the self tanning process. If you fail to apply it properly you'll be walking the streets like a slice of streaky-tanned bacon!
Should you exfoliate before you use self tan?
When it comes to self tanning it’s all about the pre-tan prep work that really makes your self tan look natural and flawless. Self tans always work and look their best when applied to smooth, freshly cleaned skin. Exfoliating in the shower will remove any dead skin cells on the surface and boost circulation below the surface, giving your skin a smoother and already more glowing appearance. If you don’t exfoliate before applying the self tanner then your tan will mostly likely start to flake, peel and congeal in places where the skin is rough or flaking off. This is most common on your elbows and knees, so be sure to give them an extra going over when exfoliating!
You’re going to want to exfoliate no less than 24 hours before applying your tan. Use a pre-made scrub with added moisturises to hydrate your skin and lock in moisture. Look for oil-free exfoliators. The oil can create a barrier between the tan and your skin, which means the tan won’t last as long and could go on paler and patchy in some places. Invest in a body brush and dry-exfoliate before showering to help remove stubborn rough patches of skin. Body brushes are a great beauty tool, they'll help improve your circulation which in turn boosts cell turn over rate and the regeneration of new skin cells to the surface. Some studies also show a reduced appearance in cellulite after prolonged use of a body brush.
Should you do a patch test before you apply a self tan?
It is always worth test driving any self tanning product before you apply it to your entire body. Not only do you need to know the colour develops to a shade you are happy with, but you want to avoid any adverse allergic reactions. Most self tanners can be bought in a trial size, and some companies will offer sample sachets on their websites.
Apply a test swatch to the back of your hand or up your forearm (if you’re going for the arm test you might want to wear a long sleeved top for a few days as the tans develop). You need to give the self tan 24 – 48 hours to fully develop and for any adverse reactions to rear their ugly head!
Asking your friends or beautician for recommendations is a great place to start but remember everyone has different skin, from tone to sensitivity. What works for them might not work for you. Once you've found your perfect self tan (and it can take some time!) you might want to stock up, just keep an eye on expiry dates. Out of date self tans are known to become really smelly and often cause itchiness and rashes.
Should you use a moisturiser before applying self tan?
If you've got really dry skin, or the odd dry patch here and there (elbows and knees especially) then you’re going to want to apply a light moisturiser before you self tan. Don’t overdo it and only apply it where needed. Too much and you’ll create a barrier between your skin and the self tan and end up with a patchy tan. Do not use any oil based moisturisers. Use something light and easily absorbed. Give the moisturiser plenty of time to dry into your skin before applying your self tan.
If you can get away with it, don’t moisturise at all. Make sure your skin is dry and avoid wearing any clingy clothing until the self tan has had time to dry.
Remember: There are some great moisturisers available to buy that double up as self tan. Most of these are gradual self tanning products, so you can build up to the desired colour and coverage over several days, without drying out your skin.
Are gradual self tans the best?
If you’re looking for something more subtle and that you can have much more control over, why not opt for a gradual self tanner? I find moisturisers with a gradual tanner in are great for an even, all over glow, than can be darker when you need it to be or lighter when you’re keeping it more natural and casual. They’re also great pre-summer holiday if you don’t want to be the palest booty on the beach at the start of your trip!
Gradual self-tans are brilliant for the face too, as they have a lighter consistency which can reduce the risk of clogged pores and acne breakouts.
How do you apply self tan at home?
Start at your feet and work your way up, using smooth circular consistent motions. Keep your hands moving to ensure an even and smooth application. I’d suggest wearing some vinyl gloves or purchase a tanning mitt so you don’t over tan your hands. It helps to have a friend on hand who can do your back too if you are wanting an all over body tan.
Self tanners can develop differently on different parts of the body, especially between your body, neck and face. Make sure you are using a specific face self tan or, use colour changing drops to darken your usual foundation. It's rare for your face and body to tan at the same rate naturally, so expect some variation. However, the variation should be subtle and easily blended with make-up.
Do you self-tan at home?
This content is accurate and true to the best of the author’s knowledge and is not meant to substitute for formal and individualized advice from a qualified professional.
© 2013 Sarah Campbell

