Hairstyles for School Girls: Quick and Easy Styles for Great Hair

If your house is anywhere near as busy as mine, you know it's hard to find time to style your daughter's hair. From years of experience I can attest to the fact that finding time to just run a brush through her hair is tantamount to a miracle! Over time I have discovered some cute hairstyles for school girls that are easy, will stay put throughout the day, and some that can even be done the night before. If you play your cards right, some of these will even continue to look great for a couple of days. Most require hair styling tools you most likely already have, too.
When my girls were much younger, they had little patience when I was attempting to style their hair. One has a very sensitive scalp and the other was just too energetic to sit still for long periods of time. Never fear, I've got this squirmy type in mind. I'm also going to show you some more intricate styles for fancy occasions or middle school girls who will happily spend hours in front of a mirror! So, there's something for everyone here.
Hairstyles for School Girls- Quick and Easy
Okay, this section is hereby dedicated to the squirmy, impatient kids AND their harried moms (or dads, God bless your hearts)! You can create some really simple styles in just a few minutes, I promise. So, without further ado, I will highlight my favorites for those mornings you just don't have enough time or you have an uncooperative kid on your hands.
Twisted Ponytail
Okay, so if you don't know what a twisted ponytail is or you haven't a clue how to make one, you're missing out on perhaps the best of the easy girls hairstyles. Right off the bat, let me say this will be easier if you have one of my favorite tools, a Topsy Tail... but never fear it's not mandatory. The Topsy Tail is a simple tool; it's basically just a plastic loop with a pointed handle on it. They are pretty easy to find, many drugstores or beauty supply stores have them. There are two in a package, a big one and a small one. For the twisted ponytail I'm going to show you today, you will need the large one. I will also show you how to twist the hair without one. Watch the video for my demonstration!
Essentially you're going to put your hair in a regular ponytail, but make sure it's not too close to the head. You will part the hair just above the elastic band, with either a comb, a Topsy Tail or with your fingers. Then just gather the ponytail and pull it through the part you've made. Alternatively, you can pull it only part way through, leaving a bit of hair sticking out of the top. Use pins to secure.
Twisted Hairstyles: The Twisted Headband
One of the advantages of this hairstyle is that it's easiest to do when the hair is wet. So, it's fantastic for the mornings when your daughter has taken a shower and there's no time to dry the hair. It's the ultimate wash-and-go hairstyle! There are two types of twists you can make, one is just taking a piece of hair and winding it through to the end, the other involves picking up pieces as you go and twisting one over the other. Let's start with the simple twist... Make sure to watch the video for the demonstration!
Simple Twist (See Video Demonstration)
- Part your daughter's hair where it naturally parts. It can be in the middle, or on either side.
- Take a comb and part your hair from the top of the scalp to the top of one ear.
- Take the section and just twist it towards the back.
- Either have your daughter hold the finished piece, or pin it with bobby pins using the criss-cross method.
- Repeat on the other side.
- Take both twisted strands and secure with a ponytail holder.
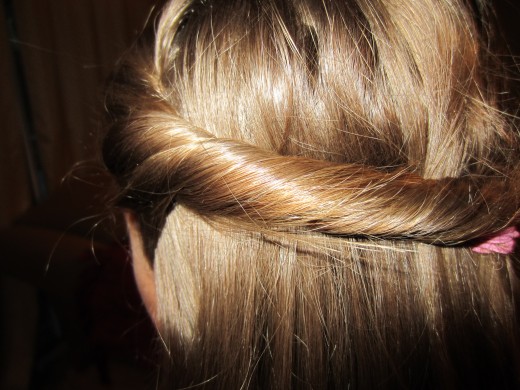
Twist by Picking Up Hair (See Video Demonstration)
This one's a little more complicated, but still very simple.
- Again, part the hair where it wants to naturally part.
- Take a small strand of hair from the front, about an inch to an inch and 1/2 wide.
- Divide that piece into two equal sections.
- Wrap the bottom piece around the top piece and pick up additional pieces and add them into the bottom section as you go around. The video will be much easier to understand.
- Stop when you get to the middle of the back of the head (or wherever you want!).
- Secure both twisted sections with an elastic band or a clip.
Waterfall (Cascade) Braid
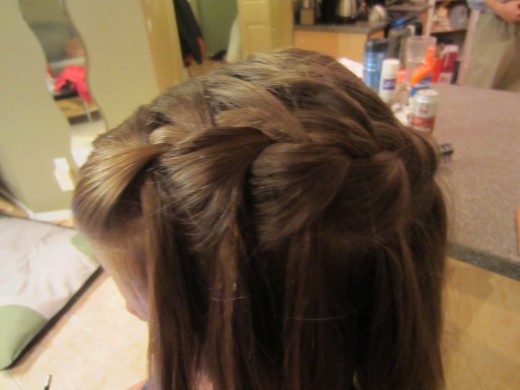
How to Do a Waterfall/Cascading Braid
Hairstyles for School Girls: All About Braids
Of all the hairstyles on this page, this is definitely the most difficult. However, it look harder than it really is. If you know how to french braid, it will be a snap since you already have the basics. I will give you step by step directions here, but it will be much easier to understand if you watch the video.
- Take a strand of hair, approximately 1" to 1 1/2" and divide it evenly into three sections.
- Braid the sections just as you would start a french braid. Start with the piece in the back, cross that over the middle, then cross over the piece in the front.
- Now that you have one braid segment, begin the second one by crossing over the back piece over the middle.
- Here's where it gets different from a french braid... When you get to the front piece, don't pull that one in. Instead grab ANOTHER front piece just beside it and braid that one in.
- Continue braiding all around the head, making a crown. End with a braid on the opposite side of the head from where you began. Or, you can do the waterfall braid to the halfway point at the back of the head, secure with a clip or braid and fasten with an elastic band. You can either have the braid only on the one side, or begin a new one on the opposite side.