How to Apply Blush According to Face Shape

Find out how to apply blush according to your face shape, how to decide between cream and powder blush, and which colors and tools you need for flawless results.
How to Decide Between Cream and Powder Blush
There’s a little more to consider than personal preference when deciding between cream and powder blush.
When to Use Powder Blush
Use powder blush when you wear foundation.
Before applying, it’s important that you fix your foundation with powder. This allows your blush to go on evenly.
Always blend with a brush—a kabuki brush is ideal for this—and finish off with a further dusting of powder for a perfect finish.
Powder Blush for Mature and Problem Skin
Unless you're using the right products, applying powder blush to mature or problem skin can prove difficult.
Powder Blush for Mature Skin
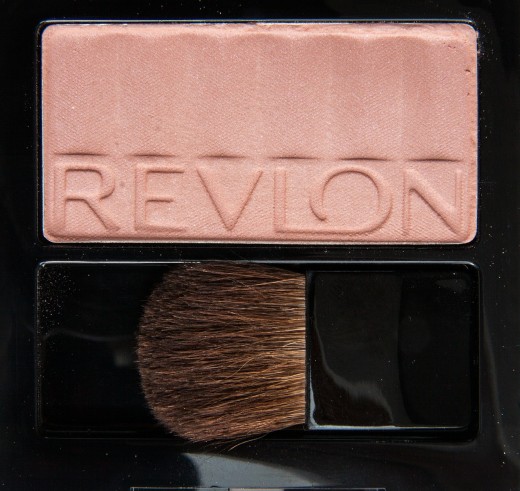
The trouble with powder blush is that it settles into lines and wrinkles. To minimize this, use a very light textured product. Revlon’s Matte Powder Blush is among the best for mature skin. Or, depending on the effect you want, you can use a pressed powder that’s one or two shades darker than your complexion.
Powder Blush for Problem Skin
If you have problem skin, you may find that powder blush tends to collect in enlarged pores. To prevent this, wear a cream to powder foundation.
When to Use Cream Blush
As a rule, you shouldn’t apply cream blush over foundation. On the other hand, it can work well if applied beneath foundation for a subtle glow, or over a very light liquid foundation.
It’s best, however, to wear cream blush when you’re wearing tinted moisturizer or an alphabet cream (BB, CC, DD), or nothing at all.
Apply cream blush with your ring finger and blend with a wedge shaped foundation sponge.
Can You Use Lipstick as Cream Blush?
There are some very good multi-purpose products formulated for lips and cheeks, like Boomstick Color by Cindy Joseph, Color Pinch Cream Blusher by Beauty Counter or Benetint by Benefit (a lip and cheek stain), but it’s not usually a great idea to use actual lipstick on your cheeks.
Because cheeks are of a warmer temperature than lips, its pigment may separate from its base substances which can cause unwelcome alterations of color and texture; you may have noticed how some lipsticks change color in warm weather.
If you do find the need to apply lipstick as blush, use a matte or satin finish product and always fix with powder.
Blush Color
Select blush colors that correspond with your lipstick and skin tone. A cool pink blush, for example, won’t look good on a warm beige complexion.
Beige Complexions
For a beige complexion, natural browns, amber and sienna are a good choice for the daytime when all you want is a healthy glow. But because artificial light swallows color, you need something more vibrant for the nighttime. Try shades like salmon, coral, cinnamon and terracotta—these are easily blended to create a soft effect while standing up to nightlight.
Cool Complexions
For a cool, porcelain complexion, choose bluish or cool pink tones like fuchsia and rosewood.
DARK COMPLEXIONS
Strong reds are superb for very dark complexions. Try hibiscus and tomato.

Color Intensity
How intense your blush turns out depends on brush size and how much pressure you apply. To create a soft, natural look, use a large blush or powder brush—the latter is also the one to use for bronzer applied over the whole face. The smaller the brush, the more intense the effect.
Apply Blush According to Face Shape
There’s more to putting on blush than simply dabbing color on your cheeks. Blush should be applied according to face shape.
Unless otherwise stated, the following techniques are most easily implemented using a powder product and a tapered blush brush. Depending on the desired effect, you may use blush, bronzer or a pressed powder one or two shades darker than your complexion.
If you’re not using a powder product, use a wedge-shaped foundation sponge and either cream blush or a liquid or cream foundation one or two shades darker than your complexion.
The Oval Face
You’re very lucky if your face is oval. Because it’s considered the perfect face shape, there’s no need for corrective shading.
During the day, simply sweep over your cheeks with a large powder brush. The lighter the color, the fresher and dewier the effect will be.
For the nighttime, apply a more vibrant blush at a slant from the point where your cheekbones begin to slope. This creates a defined, chiseled look. Use an angled brush for a more dramatic effect.
Additionally, you can veil your cheeks with a translucent shimmer product using a powder brush, but this will only look good if your complexion is flawless and your face doesn’t tend to roundness. It’s also worth pointing out here that you can’t shade or form contours with shimmer products—only matte products can do that.
The Heart Face
If your forehead is broad and your chin somewhat pointy, you have a heart face or, as it's also less flatteringly referred to, a "triangle" shaped face. Using blush or another shading product, you can soften its contours to make it seem more balanced.
With a tapered brush, start at the top of the outermost point of your cheekbones and work the color downwardly and inwardly towards the center of your face, but no further than at a vertical level with your outer eye corner.
Without reloading the brush, go back to where you started and work the product upwardly into your temples and the corners of your forehead. Lastly, shade the tip of your chin with what is left on the brush.

The Square Face
The Round Face
Even if you’re applying blush for purely decorative rather than corrective purposes, it’s most important that you avoid products with shimmer particles or a glossy sheen—these accentuate roundness. Only matte products are suitable for a round face. You’ll get best results with brown and natural tones.
With a tapered brush, work along the lower contour of your cheekbones from ear to mouth corner. Quick, short strokes ensure good blending. Don’t load your brush with too much product—the color should fade out completely at the nasolabial fold.
Apply color to the narrowest area between your eyebrows and hairline with what is left on the brush.
Photo Credits
First image by Stux (https://pixabay.com/en/rouge-structure-fund-brush-reddish-186757/)
Second image by PurpleGillian (https://pixabay.com/en/blusher-makeup-cosmetics-mac-450958/) [modified]
Third image by Stux (https://pixabay.com/en/cosmetics-makeup-make-up-brush-259181/) [cropped]
© 2010 Jayne Lancer


