How to: Black Smokey Eye

Now I know what you're thinking: A smokey eye? How could I possibly do that when I haven't even put on red lipstick yet. Believe me, I was the same way when I was just starting out with makeup but I was completely obsessed with black. Not to mention that almost every Beauty Guru that I watched online had made the makeup look that much more enticing. Now I do have to notify you that doing a smokey eye is definitely a trial-and-error situation. Especially since not every eyelid is the same and not every shade of black is the same. But now, that trial and error time will be significantly reduced and you can be walking out the house with your beautiful smokey eye and no time stay tuned! Psst... I included a video tutorial as well!
What Make-Up Challenge Scares You The Most?
What You Need
One of the best ways to a successful smokey eye is the right materials. Now don't get me wrong I want expensive products just as much as the next person but in reality, not many people can afford to have the best quality (aka me). Not only that but sometimes the most expensive items just don't have the black that you need. If you're fairly new to makeup you might be thinking: “wait a minute there are different shades of black in makeup?”. Well, yes, but I'm not really referring to the shade of black but more so the pigmentation. That is one of the key factors of whether or not you're going to have a successful smokey eye. If your black is too thin, all you're going to do is get a foggy mess on your eyelid. You also need to pay attention to the blend-ability. If you get a black that's too hard to blend( smooth out around the edges), then you're going to end up looking like a raccoon. That is why I suggest testing all the blacks that you have on your hand to see the blend-ability and pigmentation. But don't worry, you can definitely find an amazing black from a drugstore product. Your next mission is to get a blending brush. Now, most beauty girls will tell you a specific type of brush that you need to get in order to blend and a lot of companies will have blending brushes labeled for you buy them. But over time I've learned that brushes can be used for many things. However, I suggest for your first time doing a smokey eye, you invest in a blending brush. Psst… you can get an elf blending brush at Target for $1-$3. In complete honesty, this is really all you need to make a successful smokey eye. The materials only start getting technical once you start adding glitter or jewelry. I would suggest, for your first time, to stick to the basics.
Which is Better?
Check out the video tutorial at the end!
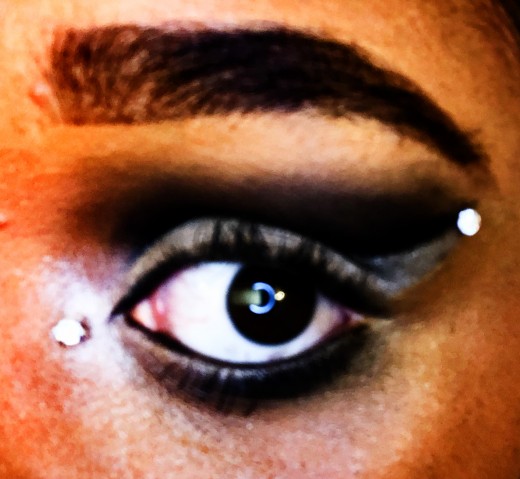
The Process
Okay and now it's time for the moment you all been waiting for! Contrary to popular belief, the smokey eye is actually pretty easy once you get the hang of it. The first thing you want to do is add primer to your eyelid. This will improve the blend-ability and give an overall smooth canvas. To be honest I don't always put on primer but I figured I'd add in it. Next, you're going to find the perfect black (or something close) and place it on the base of your lid. DO NOT cross over your crease, just simply place the black all over the base of your lid. You can do this by using either a flat brush or your finger. Next, you are going to take your beautiful blending brush and move in a circular motion across the crease of your lid. This is the blending portion of your smokey eye and, I'm not going to lie, it can take a minute. Your goal is to get the smoked out effect by pushing the shadow you have on your eyelid out towards your eyebrows. WARNING do not reapply any more black than you already have on your lid or forcefully push the shadow out. If too much of the shadow gets past your crease, you will once again look like a raccoon. Simply take your time until you're satisfied with the smokey effect. And that is it! I told you that the smokey eye is very simple. It just takes a bit of practice before you realize what you're perfect smoke is.
You Read It, Now Watch It!
© 2019 Patricia Weathersby


