How to Paint Easter Bunny Nails

Peeps Nail Art

Nail Art Ideas
Looking for a nail art idea for Easter? Do you just like bunnies? How about Easter bunny nail art! This is a cute idea for the young or the young-at-heart and does not take too much skill in order to master. Check out my template bunny art and practice ahead of time to get the hang of painting the bunny faces.
Easter Colors
To enhance your Easter bunny nails, you can incorporate other designs onto your digits, like Easter eggs and of course, pastel Easter colors. You can mix and match designs, or paint just your thumb nails with an Easter bunny, and use a solid pastel color for your remaining nails. Feel free to experiment!
An Homage to Peeps
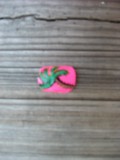
Since the Peeps marshmallow bunny is perhaps the most recognizeable Easter bunny ever, I thought I'd focus on painting Peeps-inspired bunnies on my nails. In this tutorial, you'll see how I did it, plus I'll give you tips on doing other Easter bunny designs as well.
Materials for Peeps Nails

Materials
To paint Peeps inspired nails, you will need:
- Yellow nail polish (opaque color, like Maybelline Fierce 'n Tangy, or OPI Need Sunglasses)
- Black nail art pen (opaque color)
- Clear top coat
- Nail polish remover
- Cotton swabs, paper towels
Peeps Bunny Template

Tip: Try Other Colors
Peeps marshmallow bunnies come in pink, blue, yellow and white. Experiment with color!
How to Make Peeps Bunny Nails
Since your nails offer limited "real estate" for painting a bunny, I focused primarily on the bunny's face and ears.
Step 1: Clean Nails
It's important to start with clean nails so that the polish goes on smoothly with good coverage. Use a good nail polish remover to remove old polish and to condition your nails.
Step 2: Mix Polish
If your nail polish has been sitting for some time, be sure to mix it up before you begin so that you are able to get sufficient pigment onto the nail brush.
Step 3: Draw Bunny Face
Following the template, draw the bunny's face on each nail and allow the polish to dry completely. Once dry, check your work. If you haven't gotten sufficient pigment onto each nail, do a second coat of polish on top of the polish you previously put down. You want each bunny face to be completely filled in and glossy looking.
Step 4: Draw Bunny Ears
Following the template, draw each bunny's ears onto each nail. Allow the polish to dry completely. Do a second coat if needed. Allow your work to dry completely
Step 5: Draw Bunny Eyes and Nose
Following the template and using a black nail art pen, dot eyes and nose onto each bunny face. Allow to dry completely.
Step 6: Coat With Clear Coat
When bunnies are completely dry, coat with clear polish. You may need 2-3 coats to get the shine you're looking for.
Enjoy your new Easter Bunny Nails!
White Bunny Template

Black Bunny Face Template

Easy White Bunny Nail Art

Black Bunny Faces on Polished Nails

Easy Bunny Nail Art
If you're looking for an easy and quick way to get bunny nails, try using a nail art pen to do the complete design. It will not have the smooth glossy look of bottled polish, but working with a nail art pen is very quick and easier to control than a brush from a small bottle of polish.
White Bunny Nails
To get the look of the white bunny nails, use a white nail art pen to draw the outline of the bunny face and ears. Color in the outline using the nail art pen and allow to dry. Dot on eyes and nose and allow to dry. Coat and protect with clear polish.
Black Bunny Faces on Nails
Another easy approach is to use the nail art pen to draw a bunny face onto polished nails. Follow the template to draw fun bunny faces onto your nails. Coat and protect with clear polish.