Lightening Your Hair Without Frying It

It can be done!

Getting your hair healthy!
Before lightening your hair you want to make sure it is as healthy as possible. This means make sure it is hydrated and repaired. Quick note, it is better to get your hair lightened by a professional, seeing as my wallet isn't overflowing with money this is never the path I choose. If you have darker hair it may need to be done in stages to get your desired lightness/ Now this repair process is going to be done before and after you bleach. Now if you are working from natural hair you won't need to do much, if you have already processed your hair or attempted to bleach it you are going to do a bit more repair.
Note of warning, if you hair is already at the stage of breaking at the slightest pull then your hair is now over-processed. Bad news, that stage is not getting better. Go to a hairdresser and see how much can be saved. If you are lucky it is just the ends.
Now, there is so many different products out there that claim repair work and hydration. NOT ALL REPAIR PRODUCTS ARE EQUAL. There is many products that claim Argon Oil to repair and don't cost much. While these products don't cost as much as others they don't actually contain enough to do anything noticeable. I personally like the L'OREAL Paris Total Repair 5 combo, look up reviews so you don't throw money at a useless product. This needs to be used regularly for a week to a month depending on the severity of the damage. Your hair shouldn't be crinkling or straw-like. On natural hair I would give it a week run through to repair regular problems.
Coconut Oil or Olive Oil is also your friend, yes, the one you get for cooking. Just cover your hair, brush it through to make sure each strand is covered, and wrap your hair in a shower cap, plastic wrap, or even a plastic grocery bag. Let it sit for an hour or leave it overnight. Wash it out and your hair should be noticeably better.
Be patient, you don't want to do so much damage that you have to cut it all off to your natural hair length!
About L'Oreal Total Repair 5
This product is probably the most reasonably priced repair set you can find on Amazon and other common retail stores that works. Yes, there is cheaper but often they are false advertising. The shampoo and conditioner helps if you have naturally dry hair or when you have been recovering from a bad dye job the balm works wonders. When it comes to trying to lighten hair and you go cheap, say $4 or less per package....or any under $10 really, you are likely going to do more damage than better products. If you went that path already and try to do more after, that is where the balm comes in. Use it, let it sit, I honestly go longer than the 3-5 minutes recommended. For a nice deep condition an hour works. One good wash and repair balm and my hair went from dry and crackling to its old perkiness. So much better than all the products claiming the same.
REMEMBER YOU CAN'T SKIMP ON REPAIR BUT YOU DON'T HAVE TO GO BROKE EITHER! RESEARCH AND COMPARE!
My first session of hair-lightening I used a cheap kit and did a lot of damage, next session I am using better. That is why repair has been so important.
Don't Lighten Right After Washing
When you wash your hair you strip it of it's natural oils, even when using hydrating treatments. Wait a day, two at the most if your hair doesn't produce a lot of oils(lucky you). Then you may lighten your hair. Your natural oils help provide a protective barrier that keeps the hydration in your hair, it is free and it is your friend.
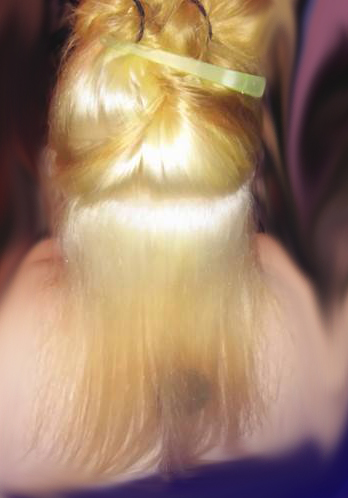
Hair Ready For Another Lightening Stage

Lighten In Stages!
Don't expect to go from a dark brown to platinum blonde in one go. You will only lighten a few levels, measures of change, per time. You will need to repair your hair between each time. Some advertise only a couple levels, some advertise 8 or more. Either way, don't rush progress.
NEVER LEAVE PRODUCT ON LONGER THAN MAX RECOMMENDED FOR MORE EFFECT.
If you go the max allotted time and it isn't at the stage you want, repair, wait, and go again. Strand test in an unnoticeable spot is recommended though I personally don't because I don't worry about it.
If you have naturally dark hair be prepared for a lot of long term work when you have new growth. While fresh hair won't be damaged as easy as treated hair don't abuse it!
Stages are important! Don't expect to get to platinum in one go with dark hair!

Choosing A Lightener
There is so many different brands out there for lighteners. Yes, there is cheap brands. These brands don't do as much but they are also more damaging in your hair. Also, don't go for a liquid and powder dye, Not only are they not as effective they are a pain to control. Cream lighteners are your friend. These lighteners are mixed with a developer, those come in 10, 20, 30, and 40. For at home these roughly depict levels they will lighten.
My preferred choice is Anti-aging Creme Lightener from AGEBeautiful at Sally's Beauty Supply with a 30 vol. Cream Developer. Be aware that the majority of hair has red undertones, we will discuss this later. Just don't panic if your hair is orange or yellow. That is fixable.
From my experience this is the best bang for your buck!
Apply Your Lightener!
Remember to check regularly for progress and hair health, don't exceed the max time, and don't panic if your hair is yellow or orange. If that is all that is showing up after everything then it is time for the next stage.
- Mix your cream and developer in a designated bowl, plastic or glass.
- Grab an applicator brush and begin applying to your hair, starting from the back. A helping friend will save much frustration here.
- After working from the back of your scalp, move forward targeting your roots before you target the rest. Always start each section at the roots.
- Make sure you move your hair at all different angles to check that each strand is saturated.
- Wrap hair in shower cap, plastic wrap, or the good old favorite, a shopping bag. If you let lightener dry it stops working.
- Wait the allotted time with frequent checks.
- Wash out and condition!
Seperate hair out and start from the back, working in layers eliminates missed patches.
Tone It Down
Well, it lightened up. Now most likely you are left with super yellow or super orange hair. Don't panic, this is normal. Now comes toner to target the brassy or coppery residue.
If you got lucky and don't have this, skip this section! I used an ash blonde dye to kill my red tones myself some and am dying over it all right after anyway with fashion colors(non-natural colors) so I am not worried about doing this myself for a greater color change. An ash blonde with help get out red and many swear by purple shampoo to get rid of the yellow tones. After this process you should be lefter with a much nicer shade of blonde. If you are just dying over it again be aware with many you don't need to get it perfectly platinum.
Repeat the toner process just like the lightener process! Be sure to read specialized product instructions!
For Visual Learners!
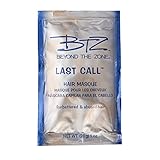
Final Repair Note
I conditioned my hair like usual after bleaching with my repair balm, then I used the Last Call masque on my towel-dried hair. With how much processing I put my hair through it left it better than I began with. While you may not need it at the $0.99 it is worth it anyway.
Excellent quick fix for damaged hair!
Rock It!
Rock your new color, repeat the process to get the desired shade, or dye it your new color! Happy coloring!
Happy coloring!


")


