Nails are nice with nail art - How to - nice and easy!

Basic nail care tools
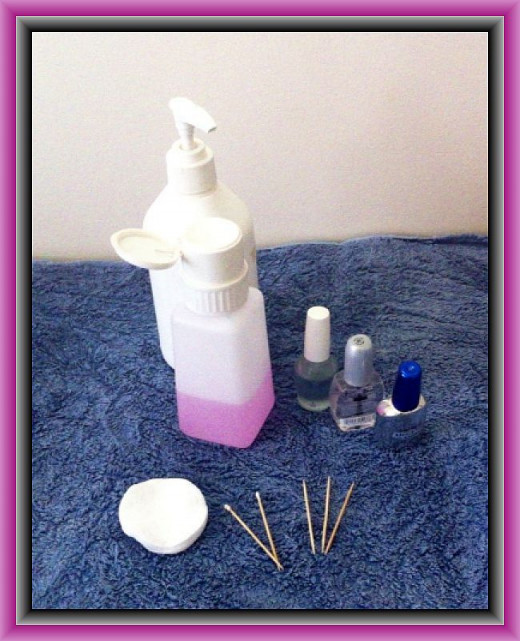
Basic tools
© frangipanni 2013. All rights reserved.
There are a few basic items you need for nail art.
1. Nail polish remover - use non-acetone nail polish remover. (No need to buy the expensive ones.) It is usually much gentler on the skin and nails. When using it for clean up jobs it doesn't ruin the nail art as much.
2. Base coat - Base coat helps the art on top of it adhere to the nail and reduces flaking, peeling and early signs of wear. Base coat also acts as protective coat for your nails so vitamin enriched base coats are an added bonus. Clear base coats are the most popular and used for all types of nail art especially if you want part of the natural nail exposed. You can also get more opaque/ milky looking base coats or ridge fillers. These are ideal if you are covering the nails with colored paint etc and you want the colors to pop!
3. Top coats - Top coats provided protection for the nail art, sealing it in. Top coat makes the nail art stand out and gives the nail a glossy, finished, very professional look like you see coming out of salons. The secret to a top coat for nail art is NOT to buy the super fast drying top coats. These tend to contract while drying so quickly that the nail art bubbles or cracks under the contraction of the speed drying top coat.
4. Toothpicks and cotton wool - wrap the smallest amount of cotton wool tightly around the end of a toothpick and dip in polish remover. This is used for your clean up stick to remove or rub away and nail art or polish that has run onto the surrounding skin. Toothpicks also make a great dotting and drawing tool.
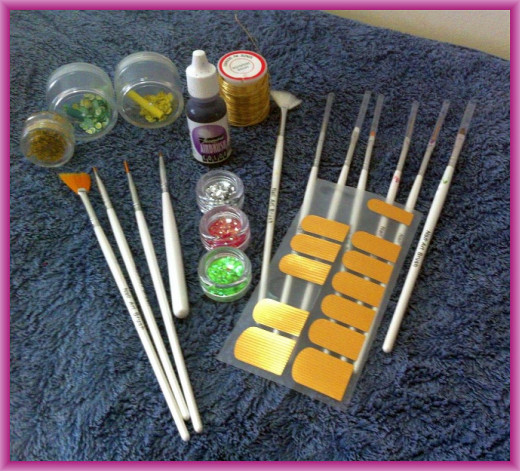
5. Anything that will make shapes or patterns on the nails - for example a sponge, confetti flakes, glitter, acrylic paints, old toothbrush, stickers, piece of tulle, colored cotton etc. If you want to spend a few dollars look at the huge array of nail art items on Ebay, Amazon, google : nail art stores or have a browse at your local $2.00 store in the art and craft area.
6.Nail oil and hand cream - This of course is optional and not necessary to make nail art but if you're into your nails enough to do nail art you may as well look after them and your hands while your at it.

How to do basic nail art and preparation.
Doing nail art is easy once you get the basic steps down pat then let you imagination run wild. And don't forget dry, dry, dry. This is most important to nearly every step of nail art as I will explain below.
Before beginning the nail art, always go and scrub your nails with soap and water using an old toothbrush- clean of course - or nail brush. This cleans the nails of debris, excess oils (so the nail polish and art stick well) and any germs to prevent cross contamination into all your nail products.
Next is to dry the nails and surrounding skin thoroughly. Give each nail a nice coating of base coat and let it dry completely.
Now the fun part - get creative! Apply nail polish, acrylic paint or other nail art items and let it dry thoroughly.
To finish off apply the top coat. For a professional salon look apply two coats of top coat. This gives that really shiny wet look and seals the nail art well.
Basic nail art tools
Basic Nail art ideas.
Okay so now we know how to do nail art lets spark your imagination with some simple ideas.
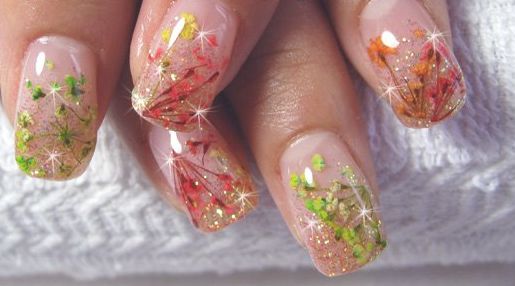
Embedded nail art - this nail art is where you coat the nail with a second layer of base coat and lay things on the nail before the base coat dries. You can embed dried flowers and fauna, colored twine twirled in patterns, hundreds and thousands, beach sand, glitter, tiny confetti shapes, stickers etc or mix it up and use a few different items. Small flat items that can bend to shape the nail are best. Push the items int the sticky base coat and let dry. To finish off cover entire nail liberally with 1-2 layers of top coat. Clean up outer area with a cotton wool wrapped toothpick.
Embedded nail art
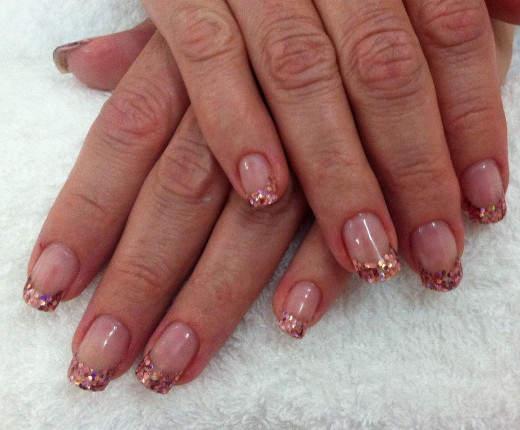
Simple large glitter nails
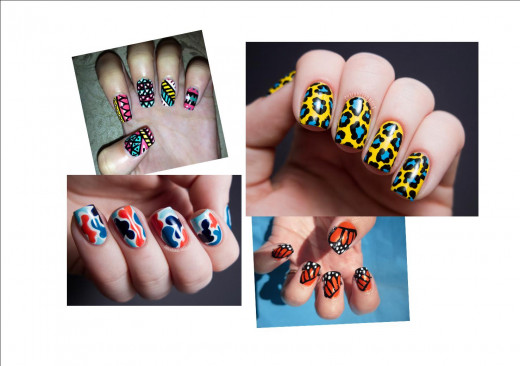
Painted nail art
Painted nail art can be done with the acrylic paints you get for kids art at the discounts store with paint brushes, colored, glitter, fluro, crackle, matt, or velvet nail polishes and design tools such as dotting tools and striping brushes or whatever you can find around the house to do the job.
After your fully dried base coat apply dots, stripes, designs or create picture using your paints, polishes and tools. Let the design dry fully and then apply 2 coats of top coat, letting the first top coat dry well before applying the next layer.
Painted nail art
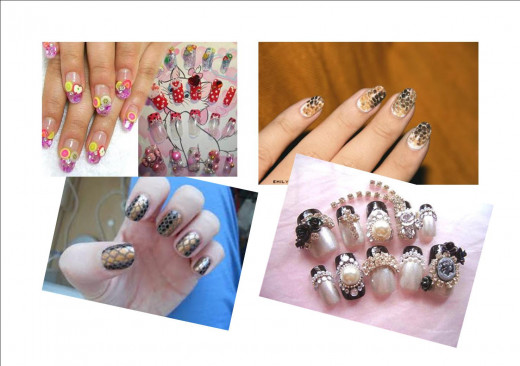
Stencilling and Gluing
This is one on the easiest ways to do nail art with a friend. Choose a base color polish / paint or leave clear. Let this dry then using something with a shape or pattern ( a small piece of tulle is great for a snake scale look) pull tightly over nail then paint on top color. Wait a few seconds then remove the item used for the stencil and let remaining pattern/shape dry. Apply 2 coats of top coat. Voila!
Alternatively for a 3d effect you can glue on the tulle or other items such as lace, cord, jewels, pearls etc. Use base coat to glue or nail glue but ensure at least 2 coats of base coat before using a nail glue to avoid nail damage.
Stencilling and 3D nail art
Enjoyment and sources for inspiration.
So now you know how and what to use you can become a nail art connoisseur. For those days where inspiration is flagging don't give up as ideas will come to you soon. Search Google images for nail art. The possibilities are endless with just stuff from around the house. You'll save yourself some money too. We nail techs charge around $3 - $5 per nail for nail art. If you buy a few nail art items the possibilities rise to infinite. Share items and ideas with your friends and enjoy a night in being nail artists. Most of all you'll have yourself a lot of FUN. Play, create and ENJOY!!!
Check out my other hubs on beauty, nails care, nail art and skin care
Waxing - how to wax your arm hair free like a pro.
Manicure how to DIY for the Man.
Pedicure how to - easy to follow steps as good as any salon.
If you enjoyed my hub please check out my other hubs, comment, share and email the link to friends and checkout the items printed in blue for my recommendations and links.
 Way to Use And Store Nail Polish Remover")