Proper French Manicures at Home

Proper French Manicure
For the Price of A French Manicure…
You can buy all of your supplies at the local beauty supply store. I know you think you can’t do it but I did my own nails for the better part of a decade. It really isn’t that complicated and you can have the look of professionally French manicured nails for the price of one French manicure about $25 USD.
How Do I Get Start?
First you will need to buy your supplies. I will list them here. Go cheap as they are all really the same.
1- Buffer board
2- Base Coat Nail Polish (Sometimes there are brands that are sold as both base coat and top coat finishers, if you see it buy it. It should be clear.)
3- Light pink nail polish or if you are African American use tan.
4- White nail polish for the tops of the nail.
5- Good paint brush for fine detail work.
6- Find about 40 minutes in your day where you don’t use your fingers for cooking, picking up the telephone or typing or texting. That is almost impossible!!
You can also do this in stages through the day although I never had much success at it.
How to Begin.
First files are for jail breakouts and not for fingernails. So only buffer out the edges of your nails so you don’t have any cracks or tears. Try to clip them all about the same length. Rarely have all my nails been the same length unless they were short so it is okay to have a bit of variety in length here.
Buff the top of your nails to get ridges out and to smooth out the surface of your nails. Again don’t file the edges of your nails as that almost inevitably leads to them breaking. When you are done completely buffing, wash you nails and hands well. Make certain underneath your nails is completely clean. You can use a nail brush. Manually push back your cuticles so you don’t hurt yourself. Dry you hands well and the clear base coat and let it dry. It takes about ten minutes.
Second, apply the pink or tan nail polish complete on your nails. If you get a little on the side of your finger us a Q-tip dipped in a bit of nail polish remover and clean it off. Then let that layer dry completely.
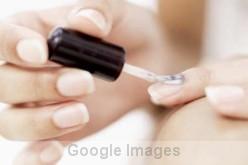
In the Third step take your good fine paint brush and dip it in the white nail polish and just draw a straight line across the top of your nail. Later one when you have mastered painting the white top line of the French manicure you can put a small curve in it. But that takes a bit of practice so to start with just put a medium line across the top. Let it dry. You will not here that your left hand doesn’t paint as well as your right hand or vice versa but again you will master this technique in time. When you like what you have painted, let it dry about ten minutes.
Fourthly, paint a clear top coat onto your nails. This protects your paint nails from being chipped. I always believed what was worse than no manicure was chipped nails. So put that final coat on to protect your nail paint. You will also get a longer lasting manicure out of this procedure. Be certain to let this layer dry completely as well. I can’t tell you how many times I have messed up my nails by not allowing the top coat to dry completely. You have to start over entirely.
But if you follow these steps you will love the way your nails look and you will notice they grow very long.
Maintenance
Depending on how hard you are on your nails, your nail polish shoud last about a week. Repeat the process as necessary and enjoy your beautiful French Manicure.


