- HubPages»
- Fashion and Beauty»
- Clothing»
- Bridal Fashion
How to Make A Wedding Tissue & Lipstick Pouch

Accessories for the Bride or Wedding Party
Thinking back on my own wedding day is what caused me to create wedding tissue and lipstick pouches. I can remember stuffing my handkerchief up my sleeve only to have it fall out throughout the day. When it came time for photos my lipstick was totally gone, and I never got to re-apply it during the reception.
With the designs of the modern day bridal gowns, there isnt a place to keep a hankie, so carrying something around your wrist really makes sense. The key is to manufacture a small pouch that will blend in with the attire and look pretty as well.
Id like to share with you DIY instructions for a simple satin pouch that you can make for weddings or any special function in which you wouldnt be carrying a purse.
Photo by Favored1
Copyrighted Material by Favored1. Do not copy. Photo credit byFavored1 or Amazon unless otherwise noted. This artwork is licensed under the Creative Commons Attribution-ShareAlike 3.0 License. When used: Animation by www.glitter-graphics.com, www.picgifts.com, www.photobucket.com and www.animateit.net
Poll: Wedding Accessories
Have you ever heard of my wedding tissue pouches?
DIY Wedding Tissue/Handkerchief & Lipstick Pouches - For handkerchief, tissue or lipstick.

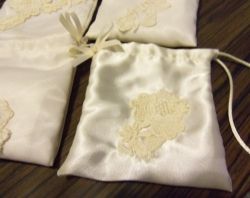
These pouches were used on April 13th, 2013 for the bridal party and the mother of the bride. They were a special order where the mother of the bride's train was incorporated into the design of the pouches.
The bride's gown was strapless so this worked perfectly for her. She slipped it on the wrist of the arm she carried her bouquet. It was barely seen and matched her ivory colored dress.
The one with the purple was the bride's and the others were for her family. The first layer was satin with an outer material and applique' from her mother's wedding train that was about 40 years old. The bottom right pouch is only one layer of satin (it doesn't have the mother's train material, but does have the applique').
Photo by Favored1
Satin Fabric by the Yard
I used satin for this project and purchased 3 yards to make other items as well. Keep in mind that satin does fray and will run if you aren't careful when working with it. That is another reason why I purchase a little extra for special projects such as wedding items.


1: Select A Size - This is a 5" wide x 11" length piece of material.

Double the size in length and add one inch for the size pouch you actually want. I used 11 inches of material in length for an approximate 4-5 inch pouch. You will be folding the material in half and have to add in the extra material for the cord hem. That accounts for the extra one inch. Use sharp scissors.
Note: I used a ruler to show you the size, but use a tape measure when you cut for accurate sizing.
Photo by Favored1
Best Scissors for Dressmakers
You will need really good scissors for this project. I have selected the ones that have been rated the best in dressmaker scissors. Remember regular scissors are not like material scissors and can cut unevenly. For quality work, you need the right tools for the job.
2: Fasten Outer Material to Satin

If you want an outer layer such as taffeta fasten it with pins to what will be the outside of the pouch.
Pins and Accessories - These are the tools you will need for this project.


3: Sew Outer Material to the Satin - Before and After Photos

If you are using a single layer of material, skip this step.
After you have pinned the outer material on, you will need to sew it together leaving about 1/4 inch hem on the sides. Make sure that you sew inside any manufactured stitching. It will need to be cut off anyway. Don't worry about cutting the excess material away until after it is sewed in place like the photo on the right demonstrates..
Photo by Favored1
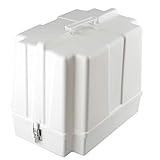
Brother Sewing Machine & Carrying Case - Case purchased seperately.
There are some really expensive sewing machines on the market, and they may be needed in other projects, but this is the one I used for making the wedding pouches. It is a good machine for quick and simple sewing items.
This Brother sewing machine is really good for young sewers or beginners, and for those wishing to learn to sew without all the complications of a big machine. Plus the price is right. I like that it is lightweight and portable, but still does some pretty amazing sewing.
There is a dial for pattern and automatic stitch length selections with a built in sewing light. Has auto bobbin wind and is easy to set up. You can do simple projects like this one, or some really fancy DIY creations. If you get stuck it comes with a DVD that will guide you through learning to use this sewing machine.

4: Fold Back to Make A Hem on the End Pieces

Now that the sides are sown in place and you have trimmed off the excess material, you will need to make a place for the cord. Fold back top end about 1/2 inch. Pin in place and sew it like a hem. Now do the same with the bottom so each end has a hem.
Photo by Favored1
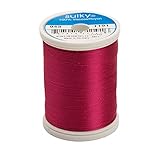
Sulky RayonThread (40 Weight) - A better product for your money.
This is the thread I bought three years ago and that I used on some other wedding items. I started with another brand on this project, but it kept breaking, so I switched back to this thread. It's shiny, silky and really lasts a long time.
Don't use cheap thread or it will break in your sewing machines. It may be a little more money, but in the long run it comes out less expensive. Although the photo is showing rose thread, I used ivory or off white.
5: Fold Back Again to Make A Hem for the Cord

So that the cord section looks finished fold back the sections you just hemmed about 1/2 inch. Pin it in place. You will create a tube-like area for the cord to be threaded through.
Photo by Favored1
6: Sew Along the Hem You Already Made

See the first hem I sewed? Sew along that same hem (or as close as you can). It will leave a space for the cord to be threaded through it. On the right of the hem you can see where you will thread the cord.Photo by Favored1
Sewing on an applique'?
Applique' Placement - If you are not doing this, skip this step.

If you want to sew something on the pouch it's easiest to do it now. If you wait, it takes a lot of patience to fit your hand inside the pouch and get things sown properly.
Fold your pouch in half as if it were already finished. Pin the applique' in place before sewing it. Make sure it isn't near the bottom or it will look out of place when the project is complete. You can hand sew it or use the sewing machine, but go very slowly.
Photo by Favored1
7: Sew the Sides but Not the Top Part

Bring the sides up evenly. Your material should still be inside out. Sew up the sides, but not the top part that you made for the cord. Sew along the seams that you made when you first sewed the two pieces together.
Trim off the frayed parts, especially where the cord will be threaded.
Photo by Favored1
8: Turn Inside Out & Thread the Cord Using A Pin - I used a 1/8th inch decorative trim nylon ivory cord. It cost $1.99 for 24 feet.

Turn the pouch inside out so that the finished side is shown. With a very small safety pin, pierce the end of the cord, close the pin and thread it through beginning with the left side of the pouch. Make sure to thread it through both parts so it comes out the other side opposite of where you started. The right side of the pouch will have the cord going through it but not coming out that side. Look at the photo to see what I mean.
Cut the cord and sew the ends together by hand. Pull the cord on the opposite end so the knot is tight to the open end. Sew it in place and the ends together so the knot cannot move. You can do this on either side. Trim off any fraying. The cord I used looks and has the feel of satin, but is stronger.
Photo by Favored1
Fray Preventers: Use with Caution
Satin material does fray, a lot!
I know that these items work on other materials,
but DO NOT KNOW if they will work on satin.
Satin is tricky material and many things will stain and spread,
so I would check before using it.
However, if it does, that's great.
9: Add Bow Ribbon to Knot End

Make a small bow out of 1/2 or 1/4 inch satin ribbon. Sew it to the side that has the knot.
Photo by Favored1
10: Add Crystal Bead to Bow

If you like, sew a crystal bead to the bow before sewing it on the pouch or hot glue it on. I sewed mine.
Photo by Favored1
Final Product on You Tube - Sorry about the shadow of my hair and my husband in the background. He didn't know I was taping.
Finished Tissue & Lipstick Wedding Pouch - You can see the bride carrying her wedding tissue/handkerchief/lipstick pouch.

Photo by Art Life Photography courtesy of the bride.
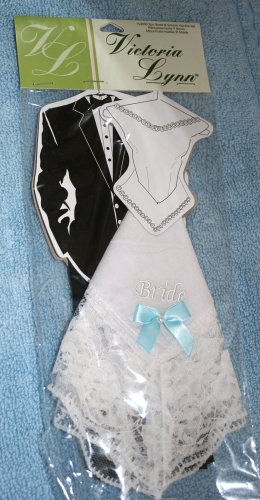
Wedding Handkerchiefs - Handkerchiefs for the bride, groom, parents and wedding party.
I had a beautiful handkerchief on my wedding day and have added several to my collection. For this wedding (the couple above), the mother's were given a special handkerchief to mark the occasion.
Choose from a lacey hankie or from the vintage line. They are all beautiful and would fit nicely in the wedding pouch.

Poll: Wedding Handkerchiefs
Did you carry a wedding handkerchief on your special day?
Beautiful Wedding Song for A Bride - Francesca Battistelli - Hundred More Years Lyrics
Francesca Battistelli - Hundred More Years Lyrics: https://www.youtube.com/watch?v=W0ED0dsABRI
Wedding song for a bride and daddy.
Lyrics to Hundred more years.
- How to Make A Lily of the Valley Bridal Bouquet
Spring flower wedding ideas. - How to Arrange Flowers- A Cascading Wedding Bouquet!
Learn how to make a cascading flower with crystal glittering. - How to Arrange Flowers- Create Submerged Flower Arrangements!
Using different flowers and vases learn how to submerge flowers for arrangements underwater. - Avon Beauty & Home Products
Today's specials. See it here.
This week's challenge on my: Daily Favor Blog


