- HubPages»
- Technology»
- Computers & Software»
- Computer How-Tos & Tutorials
Beginner's Guide to TortoiseGit
Introduction
Git is a version control system for large software projects. Version control is a method by which versions of software are uploaded to a remote server, which can then be accessed by other team members. People who are working on the project can upload their chances, and download the changes made by other people. It is a fast and convenient way of multiple people working on a project on multiple machines, and most large software companies use version control. Git is one of the most popular, but other version control systems include Subversion and Vesta (among others).
Common Terminology
Below is a list of words that you will hear when discussing version control and using version control software - it is best you familiarize yourself with them so that you are not left stumbling over the right words to use!
Checkout - to create a working copy on your local machine from the version online; to take changes from the server
Commit - to put changes onto the server
Merge - to apply two or more sets of changes to one file, e.g. if two people have edited the same file
Trunk - the main 'branch' of development. You can 'branch' off the trunk to create different versions of the same project (for example if you were developing a game, you might have a PC branch and a console branch)
Conflict - when the system is unable to reconcile two or more changes made by different people to the same document, a conflict occurs. Conflict resolution is built into git.
Head - the most recent revision (commit)
Repository - the online location, e.g. server, where the files are stored remotely
Update - to get changes from the server to your local machine, when a full checkout is not needed
Git also has some specific terms, which you should be familiar with:
Clone - the same as 'checkout', to clone is to make a local copy of the repository on your machine
Pull - to get changes from the server (like update)
Push - to put changes onto the server (similar to commit, although git also uses 'commit' so don't get confused!)
The Software You'll Need
In case you haven't already gotten started with git, you'll need a few things:
- A github account or similar
- The git software
- TortoiseGit for Windows
Github
github, available here, is basically server space for you to store your software on (it is a repository service). Accounts are free, but if you want the repository to be private there is a small fee payable. There are other services which offer repositories, but I've found github to be the best.
Git software
Git, available here, is the software you'll need to work with github and TortoiseGit. It is a version control system, free to use (it is open source), and the best version control system in my opinion. Just click through the installation, you don't need to set up anything special.
TortoiseGit
TortoiseGit makes working with git in Windows an easy task! Downloadable here, it adds stuff to the Windows shell (don't worry about what that means!) to allow you to interact with git without having to memorise a bunch of command line tools.
Install all the software you need, and you're ready to get going!
Creating a Repository on github
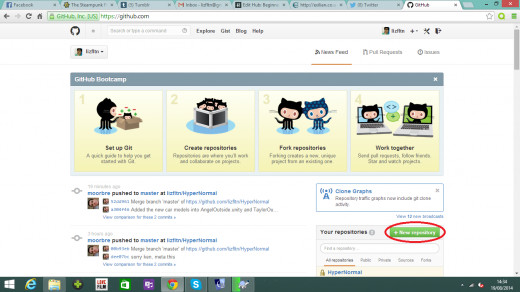
When you sign into github, you'll be presented with a dashboard. In the bottom right-hand corner, there will be a button for creating a new repository. Click that.
Give your repository a name, decide if you want it to be public or private (private repositories come at a small fee), and check the box for creating a Readme.
Congratulations, you've just created a repository!
Creating a Working Copy
You're now ready to start using TortoiseGit.
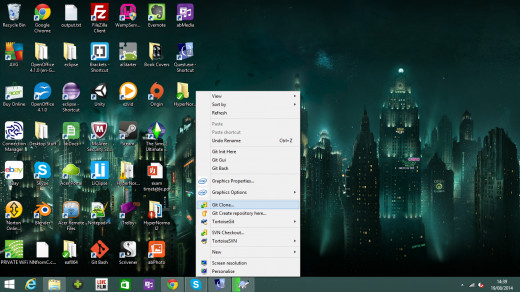
TortoiseGit adds commands to the Windows shell, which means that you don't actually run TortoiseGit itself like you would a standalone program - instead, right click on your Desktop (or wherever you want to create your working copy) and click the option in the drop-down menu for 'git Clone'.
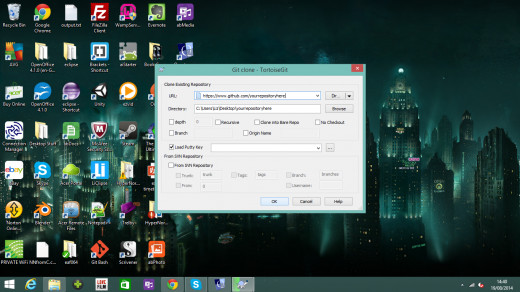
That will bring up a box which you'll need to fill in the details for. Put the name of your repository in the url bar (i.e. http://www.github.com/yourrepositorynamehere) and click OK.
The system will then checkout your repository to your local machine. Well done, you just created a working copy!
Making Changes
Feel free to add some files to the working copy. These will stay local on your machine until you commit the changes.
To commit the changes, right-click on the folder that the working copy is in, and select "git Commit -> Master".
This will bring up another menu. Check the files you want to commit, add a log message (let other people know what you've changed!), then press OK.
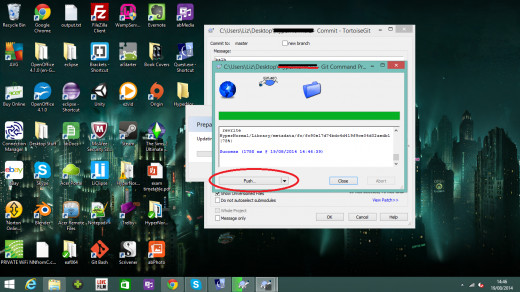
On the next screen, wait until the progress bar has finished then click 'Push' to send your changes to the repository.
Getting Changes
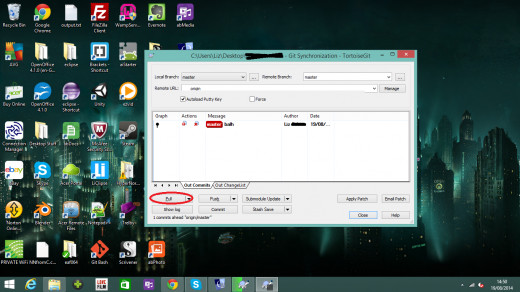
Before you start any work, even if working alone, it's good practice to 'Pull' changes from the repository before you begin working. To do this, right-click on the folder and click "Git Sync".
At the bottom of that screen you'll have a variety of options, you want to click 'git Pull'.
This will ensure you get all changes from the repository before you start working, and saves you having to reconcile conflicts later down the line!
