Configure Skype - Part 3
Configuring Skype - Part 3
Click on the - IM & SMS – link in the left hand side of the Skype configuration window. A slide down menu will appear which has three options.
IM Settings
The IM configuration settings will be visible on the right hand side of the Skype configuration window when you click the – IM Settings – menu item as shown in diagram 1.
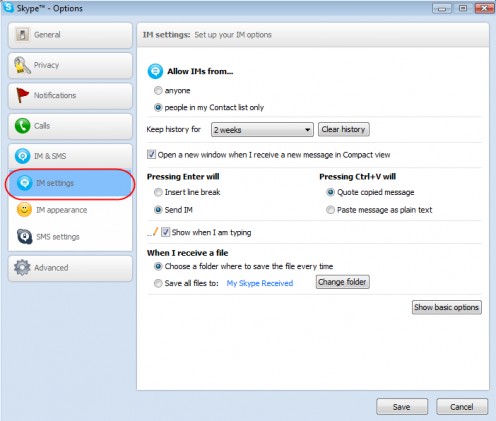
You can choose to receive IM’s from anyone ( not a sensible choice really ) or from people in your contact list only ( the sensible choice ).
Next you can determine just how long Skype will keep your chat history. Adjacent is the button – Clear History – which instantly clears all your Skype IM history.
You can choose to open a new window when an incoming chat message is received. I’ve kept that check box – On. All incoming IM chat requests as well as actual chatting occurs in a new window and not within the existing Skype window.
Next you can determine how some of the keys on the Keyboard will behave with respect to Skype. I kept the default settings which were.
Pressing Enter will – Send IM
Pressing Ctrl+V – Quote copied message
I’ve left the radio button adjacent to - Choose a folder where to save the file every time – I prefer that setting myself.
If you would prefer to setup a specific folder into which all the files downloaded by Skype will be saved then activate the next radio button. Using the button - Change Folder – you can manually choose the folder on your hard disk drive into which all the files exchanged via Skype will be saved.
Next you are ready to setup the Skype IM appearance.
Just click the link – IM Appearance – in the left hand side of the Skype configuration window, and you will be ready to setup how your Skype IM window will appear.
Take a look at diagram 2.
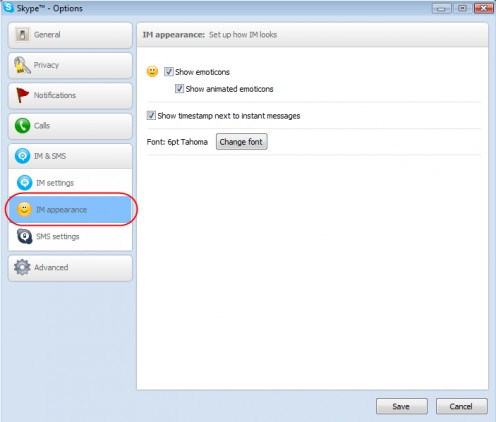
You can setup the IM window to show emoticons as well as animated emoticons, both of which are built into the Skype chat window and used extensively when chatting.
You can also decide to show a time stamp next to the instant messages in your IM window or not by checking On or Off its check box.
Finally you can set the font that IM’s will display in your Chat window.
Now you are ready to setup SMS on Skype.
Just click the link – SMS Settings – in the left hand side of the Skype configuration window and the SMS settings configuration panel will be displayed on the right hand side as shown in diagram 3.
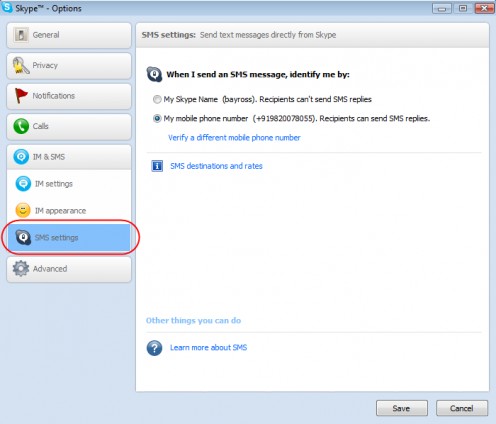
In the SMS setup panel you can tell Skype which mobile number Skype should send SMS’s to. You can also find out about Skype rate for its SMS service by clicking the link - SMS destinations and rates.
At the bottom of the SMS configuration window there is a link that will take you to a Skype website page that will provide all the details about Skype SMS service as shown in diagram 4.
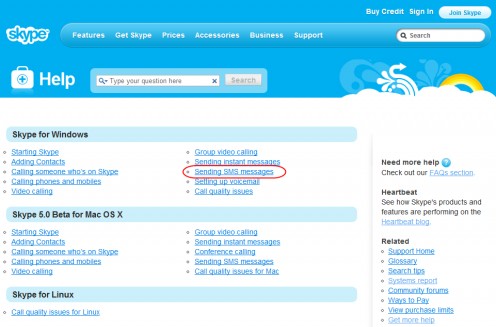
You are now poised to deal with Skype – Advance Settings – click that link on the left hand side of the Skype configuration window and the Skype advanced settings – setup page will appear on the left hand side as shown in diagram 5.
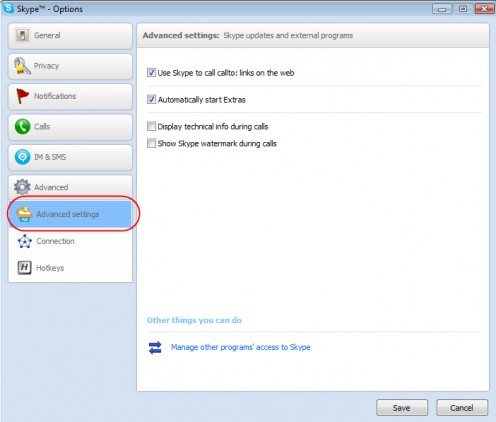
Just accept the default settings that come up there is very little you can do here. Hence click the – Connection – link in the left hand side and the Skype connection configuration settings will be visible on the right hand side as shown in diagram 6.
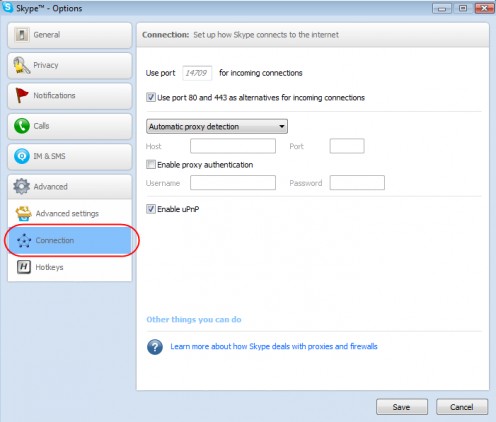
Just accept the default settings that come up unless you are very sure of what you are doing. Most laptops and desktop computers that are individually owned may not have firewalls installed, even if they do just let Skype hand this by itself.
If you are curious click the link - Learn more about how Skype deals with Proxies and firewalls – at the bottom of the this window and you will taken to a Skype website page that will fill you in on such details as shown in diagram 7.
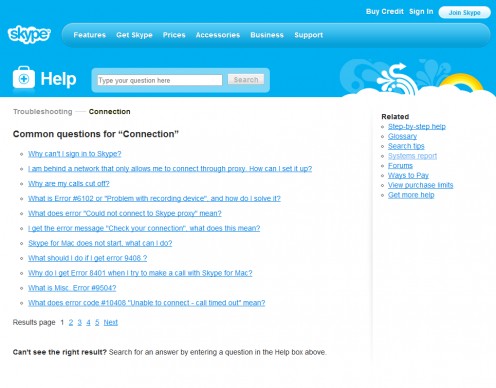
Finally, you are ready to set keyboard shortcuts to activate different functions of Skype. Click the – HotKeys – link in the left hand side of the Skype configuration window. The Hotkey configuration panel will open up in the right hand side as shown in diagram 8.
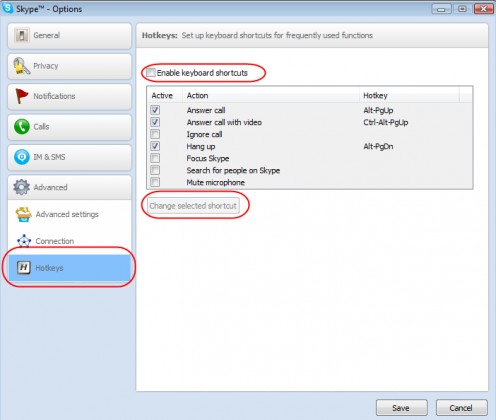
To set up Hotkey combinations to enable you to use various key press combination to invoke Skype functionality remember to switch – On – the Enable keyboard shortcuts checkbox at the top of this section.
Next select the keyboard shortcut you wish to edit by clicking it once and then click the button – Change selected shortcut.
A popup window will appear and you can choose your key combination that will enable that specific Skype functionality as shown in diagram 9.
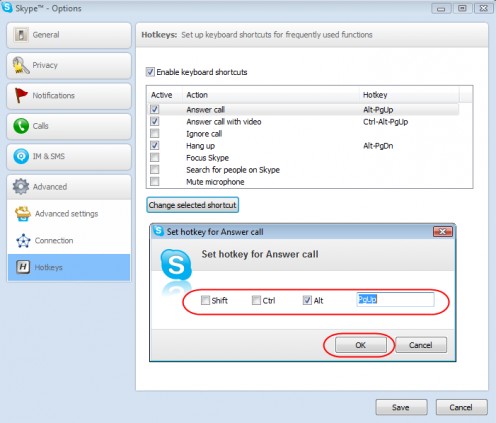
Choose you key combination using the check boxes available and then click the OK button to save these changes to Skype. From then on the key combination you chose will invoke a specific Skype functionality.
Here I must confess that I am not a great keyboard short cut person, I’m pretty much into mouse clicks. I’ve never used this section of Skype configuration.
This brings to an end my Hubs on Skype configuration.
If you found these Hubs helpful, please do vote for them and leave your comments. I will be over the moon if you do. Thanks.

