- HubPages»
- Technology»
- Computers & Software»
- Computer Science & Programming
Create Text Color Changer using Notepad in Simple Steps

Use HTML Javascript in notepad to create the magic !!
Introduction
Notepad is a great feature in windows machines to create various applications with a simple knowledge of HTML combined with power of Javascript.
You don't require any special skills, just need to type in a notepad and have fun. Here I have tried to create a simple text color changer using HTML and javascript tags in notepad. We will go slow and line by line, explaining the tags and at last getting a sweet simple color changer webpage.
Open a notepad
First let us open a notepad. On your system go to Start > All Programs > Accessories > Notepad.

Start the magic, First few lines !!
< HTML><body><h1><p> <br> <strong>tags
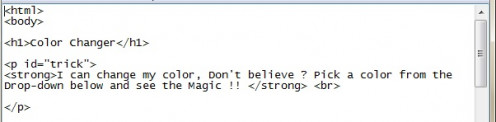
html: The starting <html> and the end </html> tags describes the page as a webpage.
body: The starting <body> and the end </body> tags are contained within the html tags and contents between the body tags are displayed on the webpage to the user.
h1: The starting <h1> and the end </h1> tags define the heading text for the webpage.
p: The starting <p> and the end </p> tags define the paragraph cotent for the webpage. The id attribute ( id="trick") uniquely identifies the paragraph object.
br: The <br> tag provides a line break between contents in the webpage
strong: The start <strong> and the end </strong> tags change the display text property to bold.
In the above lines we have defined the page as webpage using the html tag and used the body tag for content display. h1 serves to add headline to the page and tag p servers as adding the paragraph content to the body. The id attribute used in the p tag can be used as object reference to change properties of the tag using javascript, we will delve into the same later.
So now we have our content lets now proceed to add in the Pick a color list to the webpage.
Add the select tags between the body tags
<Select>, <option>, <label> tags
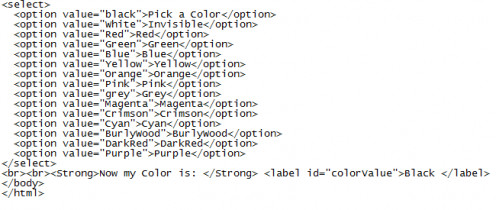
Select: Used to create dropdown list in a webpage.
Option: Options define the option to choose from in the dropdown list. The value attribute provides a unique value for the selected dropdown option.
label: The label tag renders the text as innerHTML, which can be later used to populate values dynamically using javascript.
In the above lines we have created a dropdown list with various colornames. Now we need to use Javascript to link the dropdown to the paragraph, such that whenever the user chooses a color name from the dropdown the paragraph content reflects the same color for the text rendered.
Javascript function to link dropdown option to paragraph
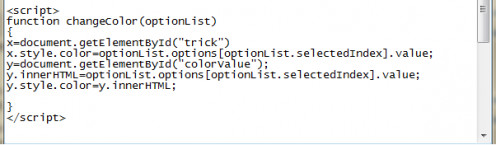
Javascript is a light weight programming language for webpages. You can perform many actions by just placing javascript start <script> and end </script> tags within the HTML body tags. Each action to be performed from a html tag can be achieved by calling a javascript function. A java script function is defined as function(valuename){ <Action to be performed>} and is placed between the <script> tags.
Now let us delve into the javascript code used above:
x=document.getElementById("trick")
document.getElementById("trick") finds the p tag object with id trick and as seen above the object is assigned to x.
x.style.color=optionList.options[optionList.selectedIndex].value;
Now as x contains the reference to the p trick tag, we can change its properties using various attributes that would define a p tag.
In the above line we use the style attribute of the p tag and then refer to the color attribute of the style property.
optionList.options[optionList.selectedIndex].value gets us the value for each option selected by the user in the dropdown. For example if the user selects the Invisible option, value of white gets assigned to the color attribute of P tag. Thus changing the color of the P text to white.
y=document.getElementById("colorValue");
The label object is found using the colorValue id and is assigned to y.
y.innerHTML=optionList.options[optionList.selectedIndex].value;
Now we populate the label value same as the option value selected by the user.
y.style.color=y.innerHTML;
Now assign the selected option value to the color attribute of the label, to display the label text in the same color.
Lets now add in the script tag and its content between the ending </p> tag and the begining <select> tag.
Ok now we need to call the above function changeColor(optionList) whenever the user selects a option value from dropdown and pass the select tag object as optionList.
This can be achieved by adding the onchange attribute to the select tag.
The onchange attribute calls the defined javascript function whenever the select option (dropdown value) is changed.
<select onchange="changeColor(this)"> where this passes the current select option object refernce.
Entire Code Snippet !!
<html>
<body>
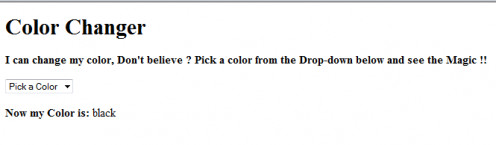
<h1>Color Changer</h1>
<p id="trick">
<strong>I can change my color, Don't believe ? Pick a color from the Drop-down below and see the Magic !! </strong> <br>
</p>
<script>
function changeColor(optionList)
{
x=document.getElementById("trick")
x.style.color=optionList.options[optionList.selectedIndex].value;
y=document.getElementById("colorValue");
y.innerHTML=optionList.options[optionList.selectedIndex].value;
y.style.color=y.innerHTML;
}
</script>
<select onchange="changeColor(this)">
<option value="black">Pick a Color</option>
<option value="White">Invisible</option>
<option value="Red">Red</option>
<option value="Green">Green</option>
<option value="Blue">Blue</option>
<option value="Yellow">Yellow</option>
<option value="Orange">Orange</option>
<option value="Pink">Pink</option>
<option value="grey">Grey</option>
<option value="Magenta">Magenta</option>
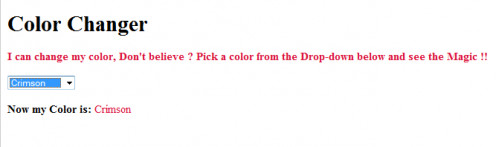
<option value="Crimson">Crimson</option>
<option value="Cyan">Cyan</option>
<option value="BurlyWood">BurlyWood</option>
<option value="DarkRed">DarkRed</option>
<option value="Purple">Purple</option>
</select>
<br><br><Strong>Now my Color is: </Strong> <label id="colorValue">Black </label>
</body>
</html>
Finishing Touches !!
We have almost completed the entire marathon and are just near the finishing line now. So why wait ? Lets touch the finishing rope and bow out to the Loud cheerful audience !!
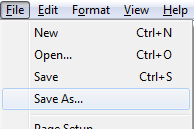
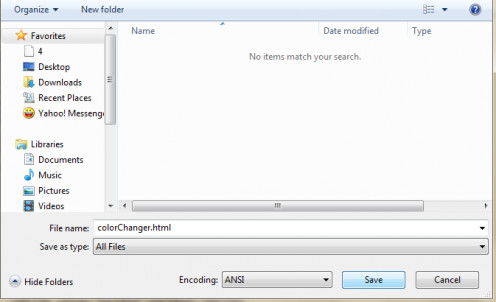
You can now save the notepad with the entire content (you can also copy and paste the whole code content above to a notepad) by clicking File > Save As
And input file name as 'colorChanger.html' or '<name of your choice>.html' , just need to make sure your file has a .html extension, so that the browser recognises it as a webpage.
And in File type choose 'All Files' and click save.
Hurray !! we are done. Now double click on the colorChanger.html file, it will launch in your default browser as a webpage.
Select any value from the dropdown and see the magic.
Save the file and Play with it !!
Conclusion:
We have learnt here how to build a color changer using a simple notepad and some basic knoweldge of html and javascript. Javascript is a powerful yet simple language which can work wonders for you. You can even do animations by placing pictures instead of the p tag text in the above code snippet. I will try and get an example for same soon.
Till then if you have any questions or want to try anything that's in your mind, don't hesistate to leave me a comment and I will reply back promptly !!
Hope you had a good learning experience !!
Thanks !!


