- HubPages»
- Technology»
- Computers & Software»
- Computer How-Tos & Tutorials
Create a 3-D Text Effect in Photoshop


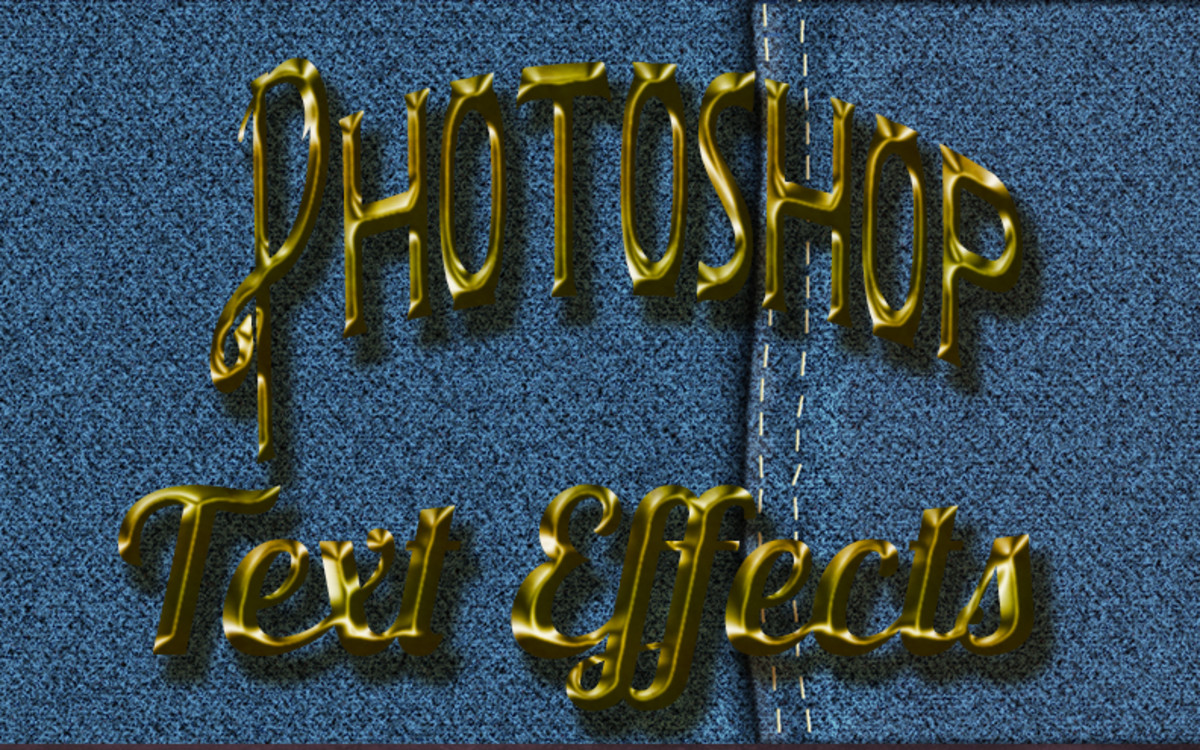
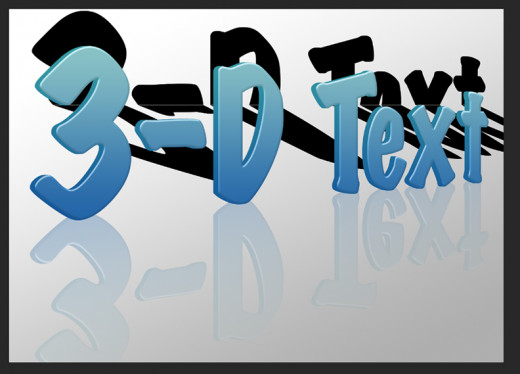
Text Effects Are Eye Catching
This is a super simple, easy to follow tutorial on creating a 3-dimensional-text effect for headings and images in Adobe Photoshop. I have Adobe Photoshop CS6 but you can also use this technique with older versions. I’m using the gradients and the Perspective tool to create the 3-D look and coloring. I also added shadows and reflections to add to the effect. Once you have created one of these text effects, you can use the technique for a number of other projects in the future.
There are many avenues to the same function in Photoshop. I found after months of going the long direction (up to the toolbar, click an option, wait for the drop-down menu, choose one, get another drop-down menu, choose one, etc.) that there are shortcuts to almost all the functions. I will try to give some of these short cuts because the more you use them the easier they are to remember. However, if you can’t remember a shortcut, you can always go the long direction to get to the same place. I like to call the short cut functions, the Backdoor. It gets you there faster.

The Useful Undo Feature
This tutorial makes a really beautiful text heading for your flyers or business cards, or even a cover for an e-book. You can even drag a photo or wood texture to the background layer as long as you treat it like the 3-D shadow and split it to make 2 planes: the back wall plane and the floor plane. The application possibilities are virtually endless. So let’s get started.
Undo: If you are fairly new to Photoshop, you should always keep in mind that you can Undo any step you did wrong or mess up on by pressing Control (on a PC) or Command (on a Mac) and Z. This will allow you to back up only one step. If you need to back up more than one step you have to go to Edit>Stepback and press this again and again for each step back. The problem with this is that the default setting will only let you step back about 20 times. If you think you need to undo more than that, you will need to change the default setting before you start. I find if I have to make that many changes, I might as well start over.
New Document
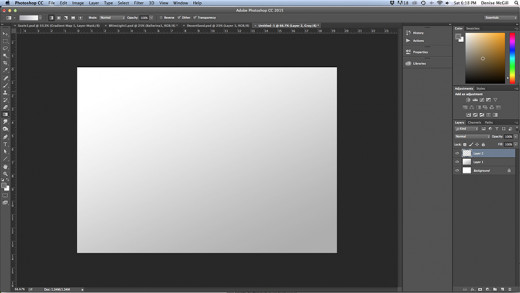
Step 1. New Document
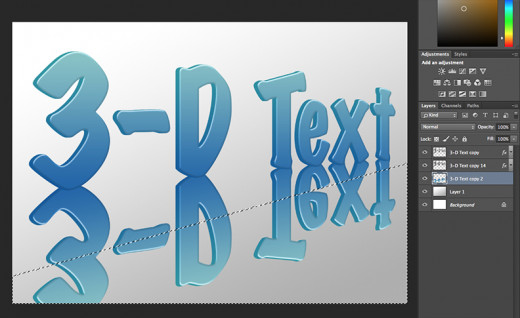
Start a New document, 1400 x 1000 pixels, and 72 dpi and white background. Make sure it is in RGB. For the background, I used the Gradient Tool to make a soft white to the grey gradient, aeaeb7.
Text
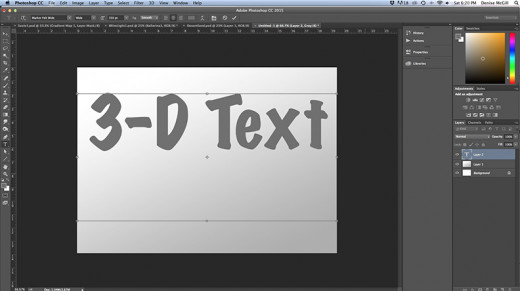
Step 2. Text
Grab the text tool and create a box filling the greater portion of the page. Set the font to 350 pts. Use a big bulky font that will work well for the 3-D effect. I used the Marker Felt font I downloaded from dafont.com. With the font of choice, and making sure the color is black, type whatever you want to create the 3-D effect on one and “3-D Text” on another.
What are you reading this for?
Step 3. Rasterize
Center the text and Rasterize by going to Layer>Rasterize on the Mac. On the PC, the instructions say to Right Click and go to Rasterize on the menu.
Perspective
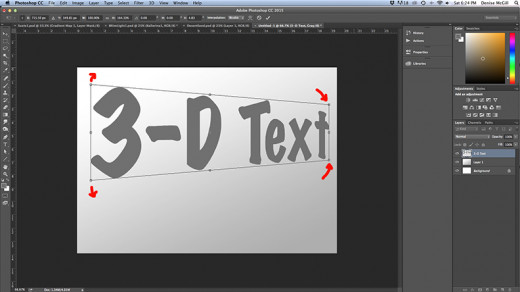
Step 4. Transform/Perspective
Click Command/Control+T to get the Free Transform menu and click Perspective. I got to the same menu by going to Edit>Transform>Perspective. Then drag the corners of the box up and down to make one end taller than the other. I created the perspective so that the “e” of Denise was closer and the “D” farther away. On “3-D Text” I made the “3” larger and therefore closer with the “t” farther away. Your choice.
Step 5. Duplicate
Go to Layer>Duplicate Layer and accept the name as “Denise copy.” Then making sure you have the lower layer highlighted, or the original “Denise” layer, hold down the Control-Option (ctrl-alt) and press the right arrow several times to make the depth of the name. I pressed it 13 times for the depth.
Gradient Colors

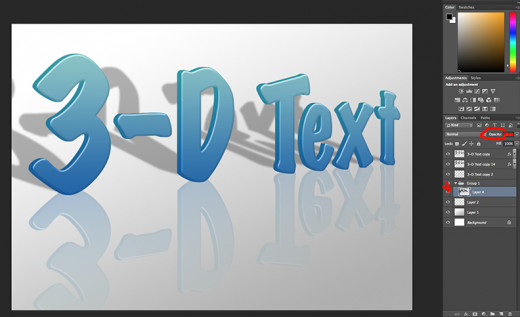
Step 6. Merge Depth Layers
Merge the layers my highlighting the second from the top layer and holding down the Shift key, click the bottom Text layer. This highlights all the Text layers except the top one. Go to Layer>Merge Layers and click okay.
Gradient Colors
Step 7. Gradient Overlay
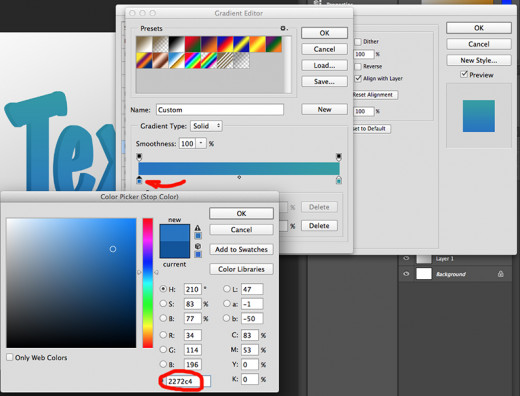
Create a nice gradient for these merged layers by going to the FX at the bottom of the Layers panel and choose Gradient Overlay and then click onto the gradient bar and choose a nice gradient in the color of choice. I created one using several blues: 309da4 and 0c539c. Pinks would be nice too.
Step 8. Top Layer Gradient
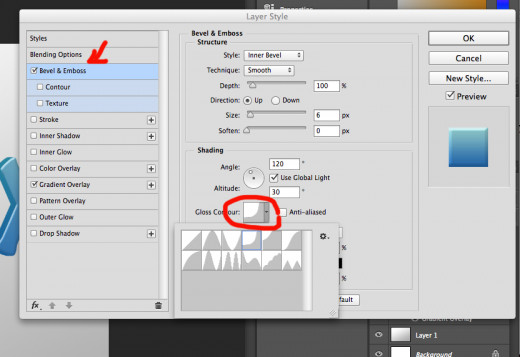
Do the same for the top layer or the “face” of the text. Create a pleasing gradient overlay by going to Layer>Blending Options>Gradient overlay and choosing the one you like: 2272c4 and 9ee1e5. While the Blending Options is open, click on the Bevel and Emboss button. The standard setting should look nice but you can add more bevel if you like.
Bevel and Emboss
Step 9. Reflection
For the reflection, click both layers and duplicate by Layer>Duplicate Layers or by pressing Control/Command+J. This should give you two new layers with the same effects. Merge them together by highlighting both and going to Layers>Merge Layers.
Reflection
Step 10. Flip
Press Control/Command+T for Transform, or go to Edit>Transform>Flip Vertical. This new layer will be flipped on top of the old layer, so move it down to touch the bottom. You may need to move this layer under the original Text layer so it is under it. Go to Edit>Transform>Skew to move the corners up so the bottom of the two Texts touch.
Quick Mask
Step 11. Gradient Mask
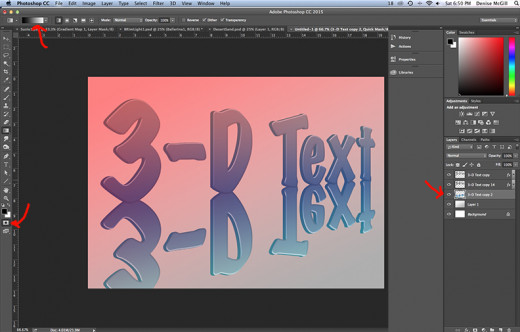
Go to Quick Mask by pressing the little camera icon on the toolbar. Next, click the Gradient Tool and get a black to white gradient and drag it vertically along the background so that most of the page is red and only the bottom corner of the reflected text is white. Exit the Quick Mask by clicking the camera icon again and notice that the bottom corner is selected. If it is not, go to Select>Inverse to Reverse the selection.
Marching Ants Masked Area
Step 12. Apply Gradient
Press the Delete key (or backspace key) until you are happy with the fade on the reflection and drop the opacity to about 50%.
Apply Gradient
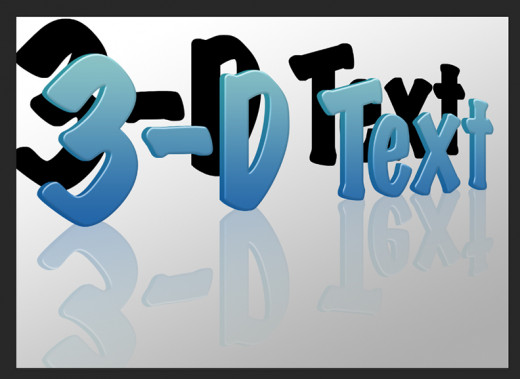
Step 13. Shadow
For the shadow, create a new layer just above the background layer. Go to the depth merged text layer, highlight it by pressing Control/Command and then clicking on the layer icon. Make a duplicate copy by going to Layer>Duplicate Layer or pressing Control/Command+J. This should be black so go to Edit>Fill and choose black. Press the Move tool and move this new layer up. It should be behind the lettering. If it isn't dragging it down to just above the background layer.
Shadow
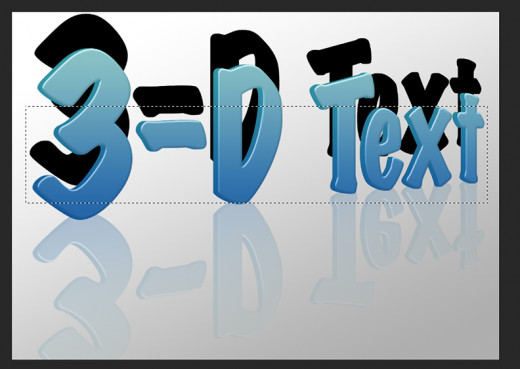
Step 14. Cut Shadow
With the Rectangular Marquee Tool, select about half of the Shadow Text. Go to Layer>New>Layer via Cut, which will cut the Text and put half of it on a new layer. With the bottom half highlighted, go to Edit>Transform>Skew and pull the bottom middle anchor so that half the lettering appears to be on a flat surface and the upper part appears to be a shadow on a vertical wall.
Cut Shadow
Click thumbnail to view full-size

Step 15. Blur
Select the two layers that make up the Shadow and Merge them by going to Layers>Merge Layers. Pull them down to touch the bottom of the text. Then apply a Gaussian Blur by boing to Filter>Blur>Gaussian blur. Move the slider bar to 9 and the opacity to 45%.
Move Shadow And Blur
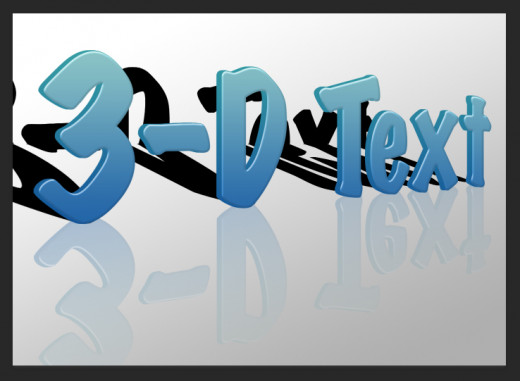
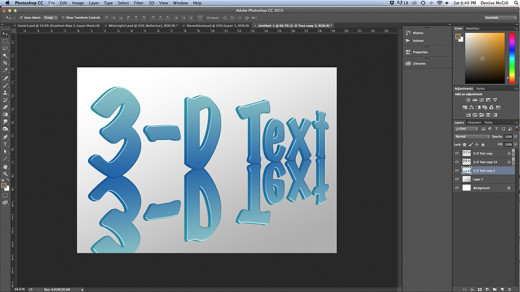
Finished
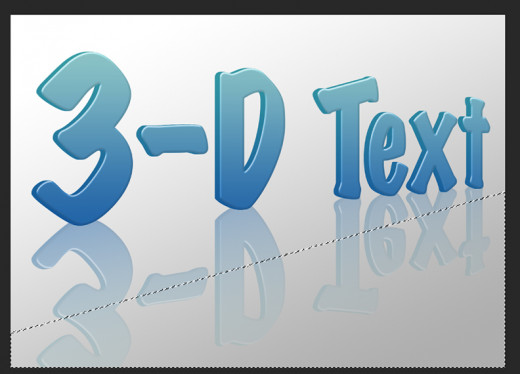
There you have it. It really looks cool when it is done and gives the illusion of a 3-D text standing on its own. You can use it for a number of things and you will love the comments you get.