- HubPages»
- Technology»
- Computers & Software»
- Computer Science & Programming»
- Computer Programming Tutorials
Create a HTML Table

What a Table is
Tables are one of the most common elements used in Web page design. A table may be used to display data or as a layout template for a Web page. Students in my introductory programming classes often try to create tables without understanding the design or layout of a table and ask "why doesn't it look right?"
To understand how a table's look on a page relates to the code of a table, one must first understand what a table is. A table is a collection of data items displayed in rows and columns; the intersection of a row and column makes up a cell. A familiar representation of a table is a spreadsheet, such as a Microsoft Excel Spreadsheet, which addresses each data element with a cell reference..

Students of my introductory programming class, which uses HTML and JavaScript as demonstration languages for lab assignments, often get confused when inserting tables by trying to make the task too complicated. Hence, I wrote this hub to reduce the confusion.
The Simplest HTML Table
In HTML, a programmer creates a table using the HTML <table> ... </table> tag pair. As mentioned in the hub Essential HTML Tags, HTML is a tag based language so the table element contains whatever content the programmer places between the <table></table> tag pair.
Since a table is a collection of rows and columns, the programmer needs some method to identify those rows and columns. To identify those rows and columns, use the HTML <tr> ... </tr> and <td> ... </td> tag pairs. The <tr></tr> tag pair represents a table row and the <td></td> tag pair represents table data, which contains the content of a specific table cell.
The programmer places the <td></td> tag pair inside the <tr></tr> tag pair. According to the above explanation, the simplest HTML table would resemble the following code snippet:
<table>
  <tr>
    <td>My One Cell Table</td>
  </tr>
</table>
The above code when inserted in a Web page will render a very simple table containing one row with one data element as pictured to the right.
However, the table does not look like a table but like a simple page with one line of text. There are four reasons for this representation:
- the table rendered flush to the left
- the table only contains one element
- the table contains no grid-lines
- the table contains no header
Please Note: All the code snippets in this hub only contain the elements being explained. If you need help displaying the examples in a browser, consult the hub Essential HTML Tags.
Position the Table
Let us clean up the look of the above table a bit by positioning the table. One method to position the table is to use the HTML <center>... </center> tag pair. This tag pair centers all the elements between the tags so if we encapsolate our simple table code within the <center> tag pair, the table will render in the center of the browser screen.
As long as we are cleaning up the look of the table, how about we add another data element to the table to begin to meat out the content somewhat? You like the idea; very well. We'll add a little more content by adding another data element using the <td> tag pair and we will center the table using the <center> pair.
<center>
  <table>
    <tr>
      <td>My One Cell Table</td><td>or maybe two cells</td>
    </tr>
  </table>
</center>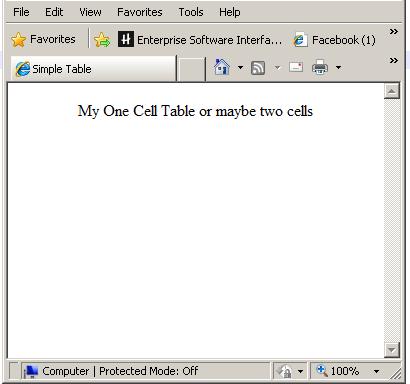
As you can see, the table to the right is horizontally centered within the display and contains a little more data. However, although coded as a table, what we see displayed appears to be a simple statement.
Tables comprise both rows and columns so adding some more rows with begin to transform the table from a simple statement to a presentation of data. We will use the <tr> tag pair to add more rows to the table and the <td> tag pair to place some data within the rows.

Table Grid Lines
These steps alone will add more content to the table but the table will still lack in presentation. Simply adding more rows and columns will appear to stack the items above one another in rows and columns but the table still needs some form of separation.
We will add table grid lines in the form of a border around the cells to provide the separation and provide a more defined appearance to our table. In order to add borders around the the table and cells we will add the border attribute to the <table> tag in the table definition along with the added rows and columns as follows:
<center>
  <table border>
    <tr>
      <td>My One Cell Table</td><td>or maybe two cells</td>
    </tr>
    <tr>
      <td>or three</td><td>or four</td>
    </tr>
    <tr>
      <td>kinda</td><td>sounds like</td>
    </tr>
    <tr>
      <td>Dr.</td><td>Seuss</td>
    </tr>
  </table>
</center>
HTML Table Headers
Now our table is starting to look like a table. The table contains multiple rows and a couple of columns and we defined the borders of the cells. Simply adding the borders ads focus to the table's presentation and helps isolate individual cells.
To further define the content of the table, we alos added a couple of headers using HTML <th></th> tag pairs. We inserted these tags within individual rows represented by the <tr> tag pairs at the top of the table.
In the next step, we will also add a little depth to the table by increasing the size of the border, which gives the table a 3d appearance. To do this, we will add the size attribute to the border attribute in the table tag.
<center>
  <table border="10">
    <tr>
      <th colspan="2">Two Column Table</th>
    </tr>
    <tr>
      <th>1st Column</th>
      <th>2nd Column</th>
    </tr>
    <tr>
      <td>My One Cell Table</td><td>or maybe two cells</td>
    </tr>
    <tr>
      <td>or three</td><td>or four</td>
    </tr>
    <tr>
      <td>kinda</td><td>sounds like</td>
    </tr>
    <tr>
      <td>Dr.</td><td>Seuss</td>
    </tr>
  </table>
</center>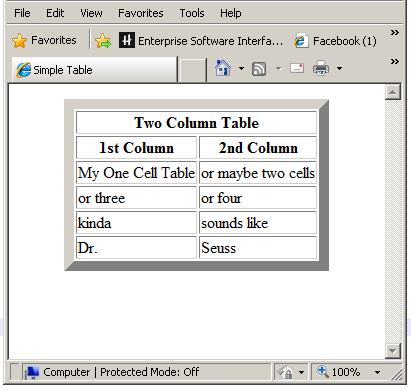
Header Background Color
Now our table has some depth of field. It looks like a table and presents a 3d look. You can increase the size of the table by adding more rows and columns within the HTML <td> and <tr> tags if you wish. Also notice that we added another header at the top of the table and that the header flows across both columns. We spanned the row across the columns by adding the 'colspan="2"' attribute to the opening <tr> tag. This added header defines the table or adds a title.
But suppose we would like our table to really stand out and look more organized. To do this, we could add a background color to the header rows and possibly center the data within the cell elements. There are deprecated methods to do this within the HTML <th> and <td> tags themselves but these methods would not pass validation checks for newer versions of HTML code (more on versions to come in another hub). However, we can accomplish the task by using styles within the HTML document.
- Text Editors for HTML Programming
If you are new to writing source code then you need to learn about the proper development tools.
Using Style to Format HTML Tables
In order to use style to format the appearance of a HTML table, you must add some code to the header section of the HTML file within the HTML <head> .. </head> tag pair just below the HTML </title> closing tag for the title. The hub Essential HTML Tags illustrates the location of those tags within the HTML file.
For our table, we will format two types of table elements, which are the table header and table data elements; represented by the HTML <th> .. </th> and <td> .. </td> tag pairs respectively. However, we must first direct the browser to use our style for formatting. The HTML <style> ... </style> tag pair directs the browser to use a particular style, identified by the specification 'rel="stylesheet" type="text/css".' Thus, the code for the style is located between the <style> tag pair and the type of style is CSS, which stands for Cascading Style Sheet.
<style rel="stylesheet" type="text/css">
  th {
    height: 30px;
    font-weight: bold;
    text-align: center;
    background-color: aqua;
  }
  td {
    text-align: center;
  }
</style>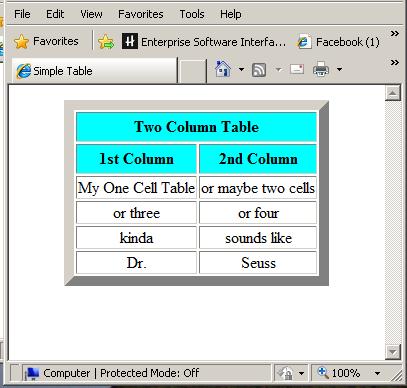
In the code above on line 2, the "th" identifies the table header element as the element that this block of style code controls. The block of code is everything between the left and right curly braces "{ .. }".
The "td" on line 8 identifies the table data element and it's block of code, identified in the same manner as above.
The attributes within the blocks controls the formatting so once the styles have been added to the header, those styles apply to every one of the identified elements within the Web page. Therefore, you only have to write the code for the styles one time in the header and those styles will apply to every table you create in the table.
Within the above th style, the height: attribute specifies the height of the header row in pixels, the font-weight: attribute controls the appearance of the text (bold in this case), text-align: specifies where to position the text within a cell, and the background-color:attribute controls the background color of the element. Colors can be specified using the name of a color (as long as the identified color is one recognized by web browsers) or the color values for each of red, blue, and green may be used. For instance, #ffffff would specify white, ff0000 would specify red, 00ff00 would specify blue, and 0000ff would specify green. Shades are created by adjusting each of the pair values between 00 and ff.
Our table finally exhibits some real character.
Note: There are many other style attributes that may be used for many other elements and there other ways to apply style using Cascading Style Sheets (CSS) but those methods are outside the scope of this hub.
Want to learn more? continue on to discover how to create a HTML form.
Was this hub interesting, Id love to hear from you,
Please leave a comment.