Dual boot Ubuntu 12.04/12.10 and Windows 7

There are many dual booting guides out on the internet that may or may not work, depending on your computer. This guide explains the most universal way of dual booting Windows and Linux that works on almost every computer. Note: I am not responsible for any damage that may occur during this process. Please, backup any important files before proceeding.
Things you will need: Windows 7 installed already, a copy of Ubuntu (here), a blank DVD, a computer, and 1-3 hours of free time.
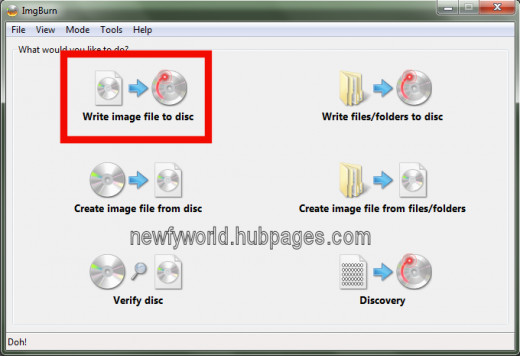
Before we start digging into the process, we need to burn a DVD, first. We are not going to light the DVD on fire, but we are going to use our favorite burning app to make an Ubuntu installation DVD. Just for the sake of this article, I recommend using ImgBurn so we are all on the same track. You can download ImgBurn from here. (Mirror)
Once you have ImgBurn installed, launch it and click "Write image file to disc."
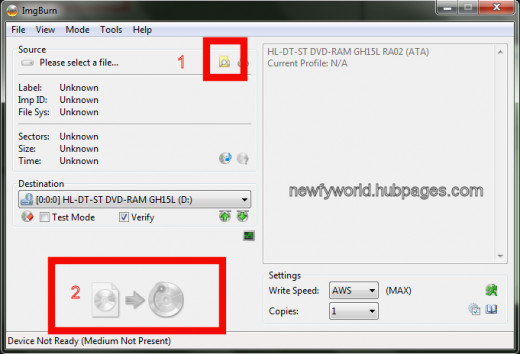
Click the little folder icon near the left-top of the window and navigate to your Ubuntu ISO. Then, pop your blank DVD in your drive, and click the giant button on the bottom-left and let it burn. IMPORTANT: I recommend setting the write speed to something like x4 or x2 so you avoid turning your DVD into a frisbee.
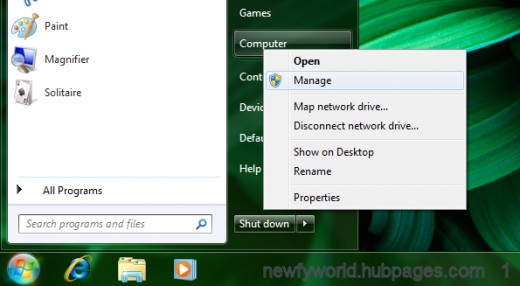
Once the disc is burnt, we can start getting our hands dirty. Click Start, and right-click on Computer, and click Manage.
In the window that pops up, click Disk Management on the left of the window. Then, click "C:" in the list near the top of the window. (Then again, you don't REALLY have to...)
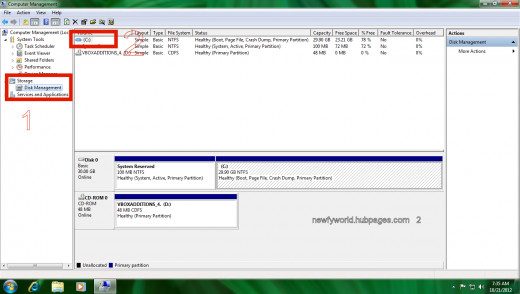
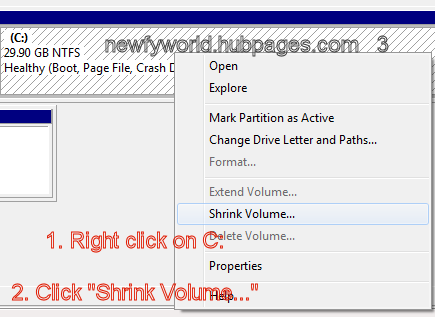
Now, right click on your C: partition, and click "Shrink Volume." (NOTE: Do not click the System Reserved partition, as that is for booting, and you don't want to mess with that.)
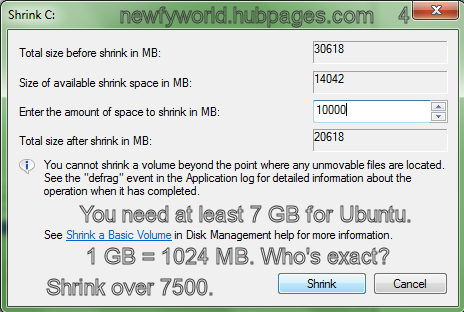
Once the shrink window pops up, this is where you need to think. Do you want a minimal installation, or do you want 100 GB of free space for your Ubuntu installation? My virtual machine only has a 30 GB hard drive, so I am going to shrink it by 10000 MB, which is close to 10 GB. (1024 MB = 1 GB, but who's counting?)
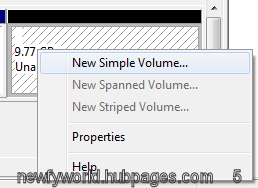
Once you have shrunk your C: partition, right-click on the Unallocated space (Which looks like a partition with a black bar on top), and click "New Simple Volume..."
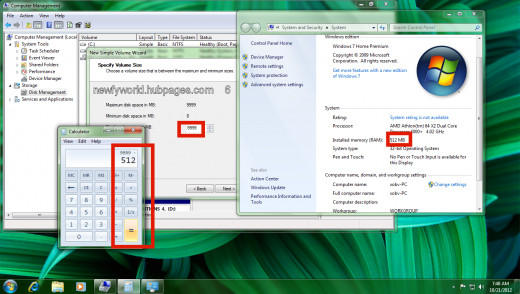
Click the next button on the dialog that pops up,and then pull up a calculator (Start>calc), because you are going to need it unless you're a math wiz. Now, you will need to find out how much RAM you have. Most people know this, but if you don't, click Start, right-click on Computer, and click properties. There, you will find your RAM size. With your calculator still up, subtract your RAM size from the amount of free space you have. Example below:
Once you have a number, copy and paste that into the text box in the new simple volume dialog, and then put a brick on the Enter button on your keyboard. (Meaning: The default settings for the rest of it are fine.)
Now, right-click on the unallocated space, and click "New Simple Volume..." Just keep clicking next, as all the defaults are fine.
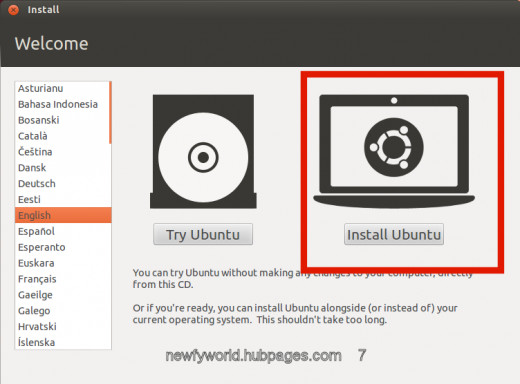
Now that we have are partitions set up, now we get to do the fun part! Just pop in your Ubuntu installation disc that we previously made, and reboot your computer. (Assuming your computer will boot from the disc. If it doesn't, google how to change boot order for your computer) Once the disc boots, you will be presented with a purple screen. Just wait a dialog asking you if you want to try or install Ubuntu comes up. Click "Install Ubuntu."
Once the installation window pops up, go through the installation until this window comes up:
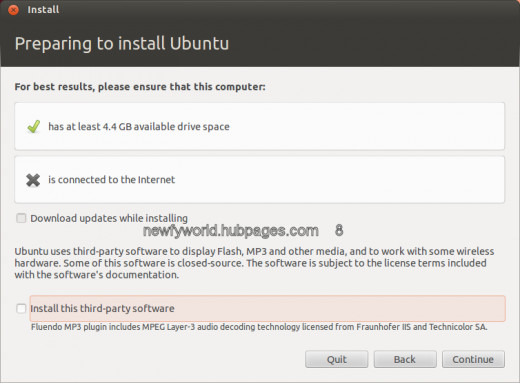
This screen is somewhat important. I recommend that you are not connected to the internet, because it will download useless language packs that add 40 minutes to the installation. Plus, in my past experiences, updating your computer isn't always the best thing to do. Trust me.
You will probably want to install the third-party software, as it includes packages like Adobe Flash, MP3 plugins, etc.
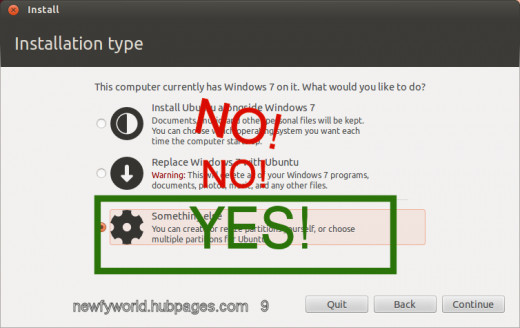
After your done, click Next. Once you are at the installation type screen, get some peanuts and a coke bottle, as this is going to be a tedious section. You do not want to click the first two options. You will want to click the third option.
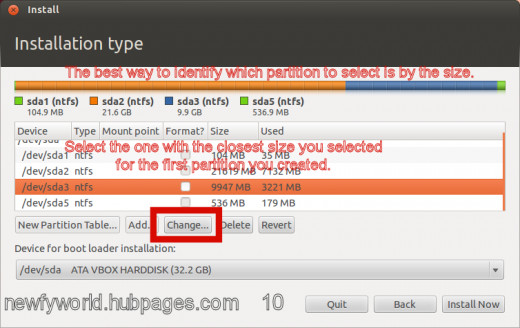
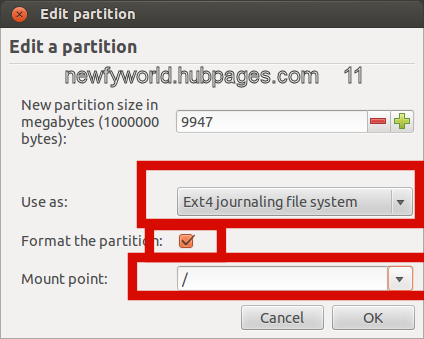
Now, concentrate. You need to identify which partition you created first. You can usually tell by the size. I cannot really help you on this part, so you will need to figure this out on your own. I will tell you that it is NOT the partition with a size close to 104 MB, as that is the system partition. Once you identified which partition you created first, click that partition, and click "Change..."
The window that pops up is actually quite simple. Just use the configuration below: (Do not change the size to below, though. Use as: Ext4 journaling file system Format the partition: Yes Mount point: /)
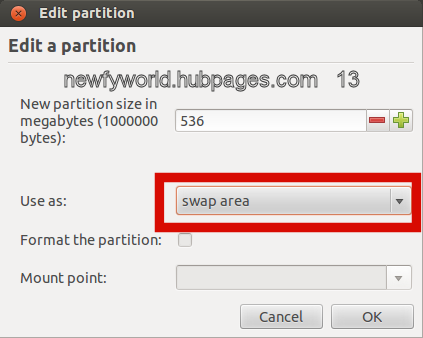
Once finished, click OK. Now, this part is somewhat easier. To identify which partition you created second, look for the one with the closest size of your RAM. Once identified, click that partition, and click change.

Use the configuration below for the dialog that pops up: (Do not change the size though. Use as: Swap Area)
Once done, click OK. IMPORTANT!!! Before clicking install now, you need to make sure the device for bootloader installation is correct. It needs to be the name of the hard drive you are installing Ubuntu on. Not Windows 7 (Loader). Once done, Click Install Now, and finish up those peanuts and coke.
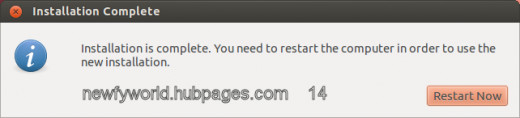
Once installation is complete (30-50 mins), you will see a dialog telling you that the installation was complete. Click restart now, and it will tell you to remove your installation media. Once done, the computer will reboot into your dual boot environment.


Dual booting Windows 7 and Ubuntu is a mystery when you are overloaded by dozens of tutorials online on how to do it. Not all of them work, but this one isn't the only one that does work. There are methods of keeping the MBR, or installing Ubuntu alongside Windows 7. The reason I didn't use that method was because installing Ubuntu alongside Windows 7 can ruin the Ubuntu installation if Windows updates. It's safest if you install Ubuntu to a separate partition. Good luck, and happy dual booting!
Related

Best Computer Operating System Software for Old Slower Computers

How to Install Windows Server 2012 / 2012 R2

How to Install Metatrader From Metaquotes on Ubuntu Linux Using Wine

Installing Python on Redhat Enterprise Linux Server RHEL 6 and RHEL 7

How to Install NComputing X550 Card, XD2 Thin Client and vSpace Virtualization Software


