Epilog Laser

Mini 24 Laser

Epilog Laser
I debated on buying a Epilog Laser for a long time. I had it down between a CNC machine and a laser and decided to go with the laser. The reason I choose it is because it is so versatile and it can do things a CNC will not. After using it for a while I have decided that it would be a good idea to add a CNC machine as well to augment the power of the laser. This article will show you some cool things I am doing with this machine.
Sizes and Prices
The Epilog comes in a lot of different sizes from the mini to a full size machine. The sizes are based on the bed size of the unit, which means the size stock that you would be able to engrave on. For example I have a 40 Watt mini 24 which has a bed size of 24" x 12. This means that I can engrave a 24" x12" piece. The wattage refers to the power of the unit. You determine that by the power you may need to cut through something.
Do Some Planning
The best advice I can give you when you are thinking about purchasing a laser is to do some planning. Figure out what you want to make before you buy the machine. I would not recommend buying it first and then trying to figure out something. When you get the machine, it can be a bit overwhelming with all that it can do and you may get caught up in a lot of general ideas and nothing specific. I bought mine for engraving into wood, I had a pretty good idea of what designs I wanted to use and how I wanted the items to look.
Another great idea is to go watch a demo live. Most Lasers are carried by a dealer, and they have one set up. Setting up an appointment takes some of the mystery out of the machine.
Figure out where you want to put the unit since you will need to have it vented to a blower so that the odors go outside. One thing no one will tell you is that you have to operate the unit in a space that is 90 degrees or less. If you put it in the garage, lets say in florida, and it gets hot, it voids the warranty.
Plan on buying a small air assist pump and a blower in addition to the laser unit.
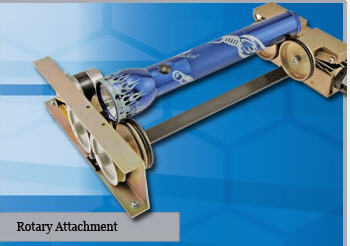
Rotary Attachment
The opportunities are endless
This machine does a ton of different things well. You can engrave on just about anything. You can buy attachements to make engravings on glasses and mugs too. I was not too interested in becoming "another engraver" I wanted the units to manufacturer products for my website. This is why I bought the unit. I will post some sample projects so that you can get a feel of how the machine works. There is a ton of videos on the epilog main site. They do a great job of showing you what you can create.
Software
The one thing no one really tells you is that you need to buy some photo software for the unit to work off of. They recommend using Corel Draw. This was a big sticking point for me because the last thing I wanted to do was to learn some new software. Operating the machine is fairly easy, I learned it in about 2 hours with a training period (provided). The software has a larger learning curve.
Epilog recommends Corel Draw and references it a LOT in their extensive manual. (yes an actual printed manual) So I went with the software even though photoshop seems to be pretty popular. I bought mine online and found an older version so I saved some money. I am using version 4 and I have to say, its amazing software. I am learning a lot and its really well done and beefy.
Test
I found out a couple of ways to save some time and money. I took my final design and tested it on either scrap wood or cardboard. This allows me to tweak the settings and get the desired effect I wanted without ruining good wood.
Wood
If you are thinking about using the engraver for wood, here is a couple of ideas that may save you some time.
- Light woods work best. Red Alder is what I have had the best luck so far. Oak does not work well since it has a larger grain pattern and tends to darken a lot. Dark woods do not work well at all
- Plywood does not work well either since the glue in the layers does not play well with the laser and does not give you good effects.
- Certain images and designs laser better than others, so play with different materials and test different power settings.
Metals
The best metals to engrave into are aluminum. However it should be noted that for best results just grabbing any old piece will not always work. Using engravable aluminum gives the best results. When you buy the machine you get all sorts of suppliers that have all different kinds of stock that you can buy. Don't sweat this part at all. When engraving on metal, plan on wasting some untill you get your design just right.
Keep in mind, you can cut through aluminum on the machine, only engrave. With wood you can cut through about 3/16" (my model) up to 1/4" with higher wattage units.
Price
This is where the rubber meets the road for some people. My unit (Mini 24) with all the accessories costs about $14,000. That may seem high and it kind of is, but it does a lot. Mine is used for business, so as you know, its an instant deduction. (see your accountant)
The real value is making something you can sell right away so that the laser can create income to pay for itself.
Sample work
Here are some samples that I make for one of my sites. I sell Aviation items so this is more or less the theme for most of my work. You can see some of my Aviation supplies at Airspeed Junkie.
Live to Fly

Aviation Wings
")
Mini Bag tag


