- HubPages»
- Technology»
- Computers & Software»
- Computer How-Tos & Tutorials
Fix Your Own Headphones

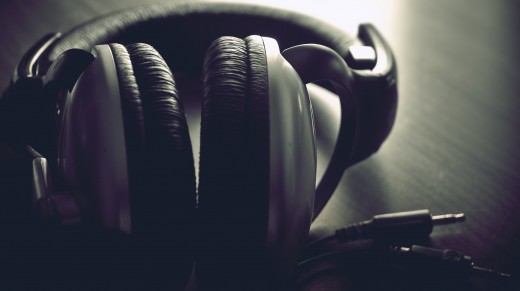
Headphones
Headphones are very dear to everyone especially if that headphone is the one where you invested a handsome amount of money. Headphones are the medium which helps us to gain immense please of music. Headphones are subjected to rain, sun, seat backs and also to our backpacks as they are very much essential to change our mood and set us going. But once our beloved headphones gets busted we tend to breakdown. It is very hard to accept the fact that our headphones won't work again properly. We tend to become restless and sad if our headphones malfunction and we know that we have to replace them. But guess what, we can repair our headphones and make them work like a new one with a little effort.
Common Problems with Headphones
Don't ditch your favorite pair of headphones just because they break, one can easily repair them and they will work like a new pair. Plug is the most sensitive part of the headphone as they go into our phones, computer and music system. It is the part which clearly undergoes a lot of stress as they are tugged the hardest and used very roughly.
Also sometimes we face the problem of hearing sound from one of the ears and when we adjust or twist the plug then we can hear sound from the other or both but at the cost of low volume and clearly no bass and additionally accompanied by a thin noise which clearly sets our moods low. These are signs of our plug getting damaged, There is one way to know whether our headphone plug is malfunctioning or it is our device and the best way to find is by plugging in another headphone to the same device and if we face the same problem than feel lucky that your favorite pair of headphone are working fine but the bad news is that your device jack is the main culprit and you need to take it for repairs which may sometimes prove to be a little heavy on your pocket. One can clearly repair their headphone with ease provided they are familiar with the equipments that will be required for its repair.
Things Required for Repairs
- 1 x 3.5 mm stereo jack
- Soldering Iron
- Solder
- A pair of strippers or scissors
- Heat Gun or matches
- Damp sponge or cloth
- And a pair of helping hands (optional)


Steps to fix it
Step 1 : Cut the cables and prepare the wires
This step may hurt if your headphone is very dear to you but i will say its worth. You need to cut the cable about one inch or two from the plug but before that we need to ensure what is the problem. After cutting the cable try to expose the inner wires. There you will see three wires one for the right ear and the other for the left ear and there may be two ground wires. If two ground wires are present then we will solder them together later.
Step 2 : Tin the wires
Now connect the soldering iron to a power source and let it heat. Once it reaches its maximum temperature tin the tip of the soldering iron with solder and clean off the extra solder that is there on its tip with the wet sponge. We will also have to tip the loose ends of the wires. Most of the headphone cords are coated with enamel. If its coated with the enamel then we need to burn and remove the enamel and expose the ends of the wire in order to solder it. Here, we can use clips to hold the wires that are to be soldered. And if it has rubber insulation than we need to use a sharp object or wire strippers to get rid of the insulation. It needs a drop of solder to tin the raw wire ends and if there are two ground wires then tin the wire after connecting both the groung wires.
Step 3 : Solder the wires and the plug together
Open the casing of the plug and slip the casing on the wire. Also keep track that the casing faces the right way when you are going to screw it up. There you will see two contacts : shorter ones is for the ears and the longer ones is for ground. If the wires are enamel coated then the left signal wire is likely to be green and right signal wire is likely to be red and if its rubber coated then the left signal wire is likely to be white and the right signal wire is likely to be red and the ground will be black or bare metal. Now place the wires accordingly and solder them together, there is chance for to mix the wires up.
Step 4 : Test it
After the solder has cooled down, assemble all the parts of the headphone and test it. If it does not work then you might have mixed up the left signal wire and the right signal wire. You can again desolder the wires and solder them accordingly. But if it works properly then, you succeeded in restoring your favorite headphones and enjoy your music on it.


, Affects Laptop and Desktop Computers")