- HubPages»
- Technology»
- Computers & Software»
- Computer Software
How To Resize An Image Using GIMP
First, Meet Wilbur
First before I start, I just want to point out that if you are in a hurry you can get the answer to resizing images in GIMP by watching the video further down the page. It shows you exactly how to do it. This hub is just re-iterating what the video says.
Now let's meet Wilbur (the little guy on the right). He's the GIMP mascot and you'll see him wherever GIMP is mentioned. GIMP is the free open source alternative to Photoshop.
Photoshop is an excellent program, but it costs a lot of money, so if you either don't have the cash right now, or prefer not to spend it on a proprietary graphics program, GIMP could be for you.
As someone who spends time online, you will often want to resize or crop an image. You can do this using GIMP. First, you must download and install GIMP
How I Learned To Use GIMP

Where You Can Find Out More About DIY Web Design
- Help for DIY Affiliate Marketers
I am an affiliate marketer and Wordpress site developer. This is the site I use to place helpful hints about anything that can help the DIY webmaster achieve his or online goals. Go there to ask about Affiliate Marketing and use of Wordpress.
Step By Step Instructions for Resizing Images Using GIMP
Look below and you'll see I've created a video to show you how to resize an image in GIMP. It explains how to do it in a step by step way. But in case you don't like videos - I have prepared a bullet list of steps here too.
The video also shows you how to make sure the image is the right size (pixel dimension) for your web page too.
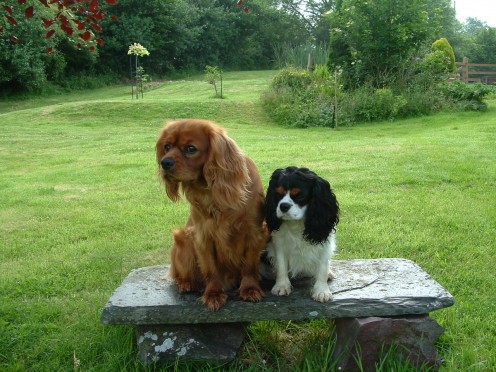
My starting image is the one you can see on the right here. It came straight out of my camera and is larger than I need for a web page.
Why Are You Resizing?
Before you resize an image using GIMP - let's look at why you might want to do that. Usually when you take a photo with a modern digital camera, the resulting jpeg file is HUGE. I mean mega-huge! It's big in two ways - first it has large pixel dimensions (height and width), and secondly, it occupies a large file size on disk.
By reducing the pixel dimensions of the image (say, taking it down from 3200px wide and 2400px high, to 600px wide and 400px high) you will almost certainly also reduce the image's file size on disk. But you should check the file size in GIMP just to make sure, and reduce it if necessary.
How To Figure Out The Right Dimensions for Your Image
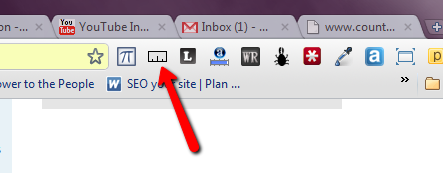
The other thing to do is to work out exactly what size you want image to be. The way I do this (assuming I don't already know) is to use a tool on my browser to measure the available space on a web page where I want the image to go.
Here is what the tool looks like (see right).
I always use the Google Chrome Web Browser and you can add the Measure It tool to that browser really easily. Just go to Measure It Chrome Extension whilst in Google Chrome, and install the Measure-It tool.
I know a lot of people use Firefox (and a similar tool is available there too) but life is too short for Firefox in my opinion. It's way too slow,
With Google Chrome and Measure-It you can figure out the exact width that your image should occupy (I don't worry about the height - because that will be worked out in GIMP.)
Resizing The Image
So using this method I worked out that to fit on my web page the image needed to be 484px wide, but the current image is 1280px wide.
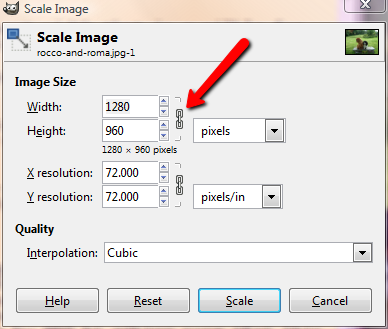
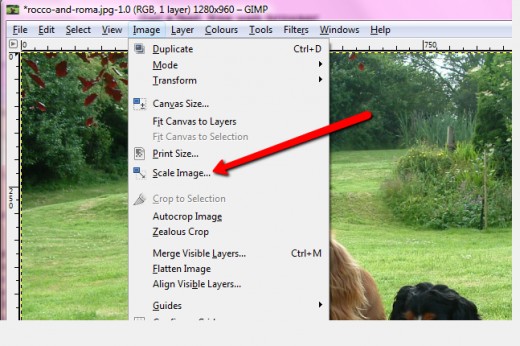
Using GIMP I simply click on the menu option at the top called Image, and then on Scale Image when it drops down. This brings up a pop-up window where you can specify the new dimensions. (See image below).
At this point you can specify the new width of the image - but first make sure that the link symbol is not broken (shown by red arrow in image on right), because then when you specify a new width for the image, the height is automatically calculated.
You should type in the new width - in my case 484px, and then click into the height box. By clicking, you will automatically calculate the new height for the image (assuming the link symbol remains unbroken).
Resizing in GIMP is called SCALING
Saving and Reducing File Size
Next we need to save the image. Bear in mind you should choose a new name for the resized image so that you do not overwrite the original. Also, if the image is destined to appear on a web page, you need to make it as light-weight as possible so your web page loads fast. Don't forget that Google is taking page speed into account nowadays in terms of it's ranking algorithm.
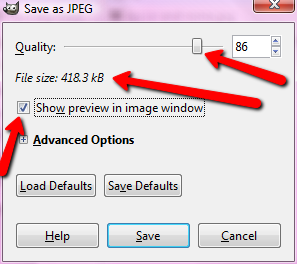
To save the image click on File / Save As. Choose a new name for the image and click on OK. This will bring up another pop-up box where you can specify the file size and click on the checkbox to enable a file preview. This also gives you the file sizes of the various qualities at which you can save the image. Use the slider to find a suitable file size. I would try to make the image under 30K bytes if I could. And if it is a very small image (dimensionally) - even less than that.
I Host My Finished Images on Amazon S3
Now like many people I uses Wordpress, but I don't upload my images to the Wordpress blog itself. I prefer to host my images on Amazon S3. There are lots of good reasons for this but I will cover those in another video.
I place my image on Amazon S3 and then using the HTML window in Wordpress's post editor, I paste in a line like this. This is much faster and easier than uploading to Wordpress and placiing the burden ofimage hosting and organisaiton on Wordpress.


