GNS3 and vmWare IOSv part2: configuring IOSv virtual machines

Running IOSv within GNS3 or vmWare Workstation
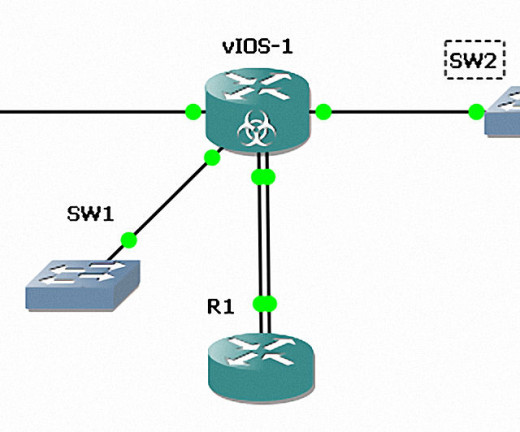
Now that we have extracted IOSv (see Part 1)
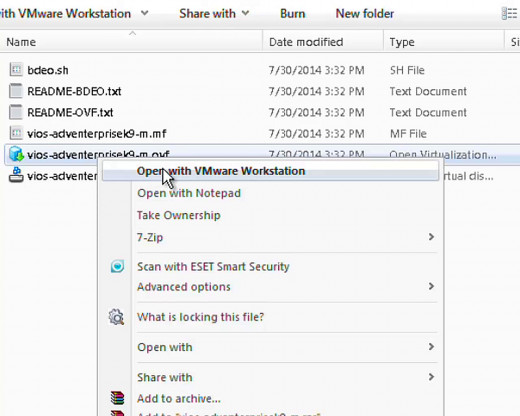
Now, if you want to get this thing running in vmWare... Just Right Click on the *.ovf file we've isolated from the one-PK download. And then select the option to open with vmWare Workstation.
Right Click - open with vmWare
Click thumbnail to view full-size


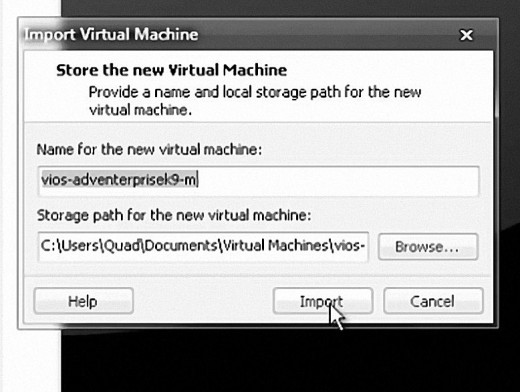


Importing the image will take a minute. But vmWare will store the machine in it's "Virtual Machines" folder under user/documents, when running vmWare under Windows.
The first half of the following video shows the basic configuration of IOSv in vmWare. The second half of the video demonstrates initial configuration of IOSv to run in GNS3.
A Video Demonstration for this article
Now Edit the settings of the new VM - Add a SERIAL PORT
Click thumbnail to view full-size


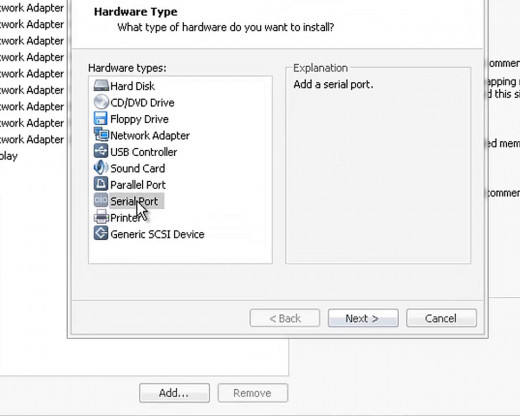

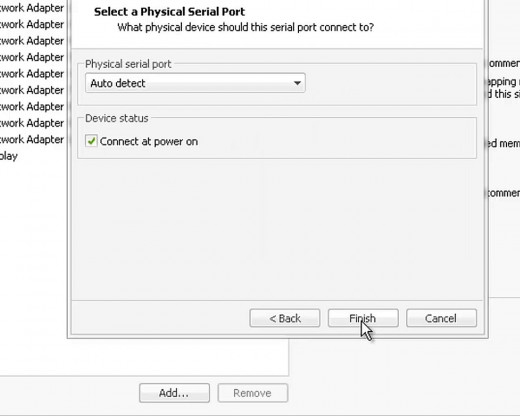
We redirect files so that we can use COM1 with this VM
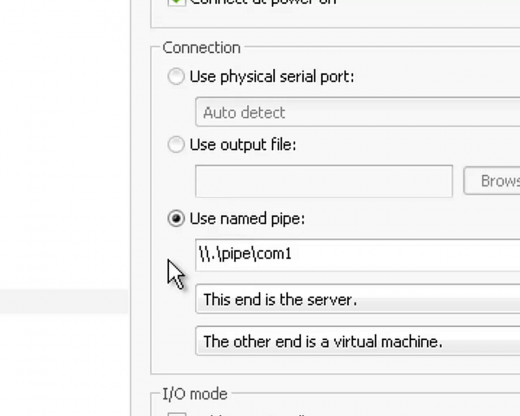
The IOSv VM does not have a com port in the usual sense. So we must do a little configuration trick here. Inside vmWare Workstation, under the properties of the com-port you just installed for IOSv, you must input a "named pipe" with the following exact nomenclature:
\\.\pipe\com1
Now, ... IF for some reason you do configure multiple machines on this instance of vmWare, you may add several other named pipes numbered consecutively as...
\\.\pipe\com2
then \\.\pipe\com3 ... etc.
Create a "Named Pipe" for COM1- \\.\pipe\com1
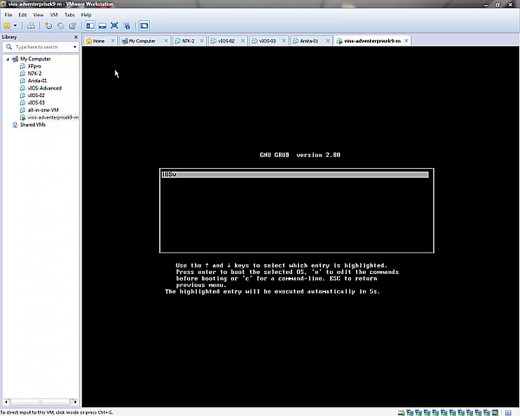
Now "POWER UP" the Virtual Machine -
Click thumbnail to view full-size

")

")
Use this link to download PUTTY terminal emulator
- Download PuTTY - a free SSH and telnet client for Windows
USE THIS LINK... to obtain a copy of the PUTTY terminal emulation program. It's free for use, and in the public domain. You just download the file and execute it. It requires NO installation at all.
Now you are "ready" to use that named pipe for Com1
Just download and then double click the PUTTY executable file. And...
The PUTTY start screen, and connection information


In "serial line" type in: \\.\pipe\com1
Be sure you've got "SERIAL" selected. Leave the speed set at 9600.
In this particular picture showing information inside putty, you can see some previous sessions I'd saved- like; ESXi - ssh, N7k, vIOS-Com1-2-and-3. And for the video I've made to go along with this article, I named and saved a session called IOSv AIO
Once you put in the info you need for serial connection (including the name of the session) you click on "save" and the config will be saved for next time. All you'll have to do is double click the "saved" session. And the PUTTY terminal will open up ready for action.
OR, you could just input the info each time... if you are fine with that. It's up to you.
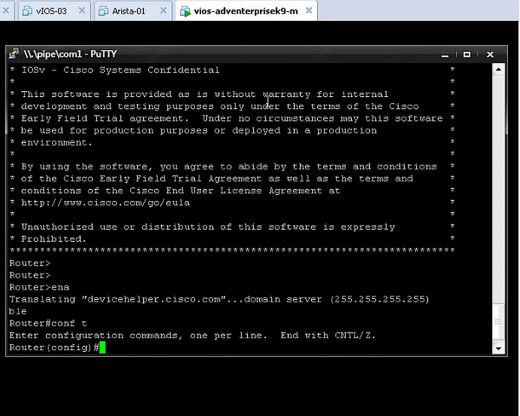
Once you start a session with PUTTY, it's possible it could take the Virtual Machine a moment to respond- (see my video to get an idea of how long it may take) . If the machine is still in a startup-mode, just be patient. Give it a minute or two to finish running it's startup routine. Once it's settled down, it'll behave just fine and "talk" to you through putty very nicely.
And that's it... that's all she wrote. You're connected now
Click thumbnail to view full-size


Continued in Part 3
In part 3 I'll go over Configuring and Starting IOSv in GNS3


