Gmail - How To Create A Customised Label To Categorize And Sort Your Inbox

Fold The Folders, We Use Labels Instead
Without folders, how can we possibly sort and categorize our emails? Thankfully, labels are here to pick up the slack, and hey do act like folders, but with one huge advantage.
Gmail's labels are better than folders because you can place any email in multiple labels. With folders, you would have to have duplicate copies of important work emails if you have, for example, a 'Work' folder and an 'IMPORTANT' folder. With labels, you can set up labels for 'Work' and 'IMPORTANT' and have emails with both labels. So when you click on either label, Gmail will present the relevant emails correctly.
You can also get Gmail to automatically assign labels to incoming (or outgoing, or any emails for that matter) emails which meet certain criteria by setting up filters.
So, how do we set up labels?

Creating a Label
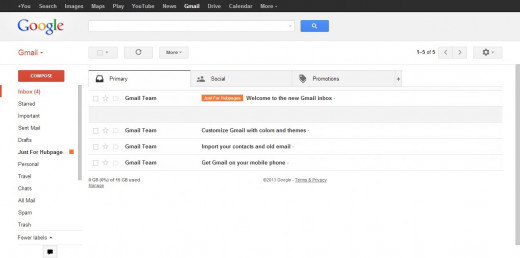
To create a label, first you have to go to Settings. Click on the gear-looking icon on the top right side and select "Settings" on the drop-down menu that appears.
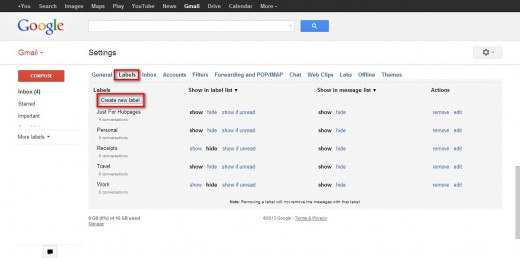
Then click on "Labels" on the Settings page. You can either create a new label or edit a label that was set up previously.
For this Hub, we shall look at how to create a new label. On the screen you should see common Gmail labels such as "Inbox" and "Starred". Scroll down and click on the "Create a new label" link at the bottom of the dialogue box.
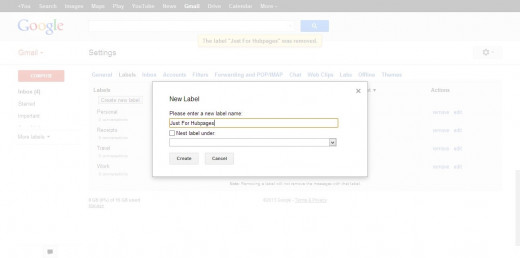
A new (smaller) dialogue box will appear. Here you can choose the name of your new label, as well as whether the new label would be nested under any other label.
Here there are similarities between folders and labels, in that a label nested under another label acts like sub-folders within folders.
And Your Label Is Created
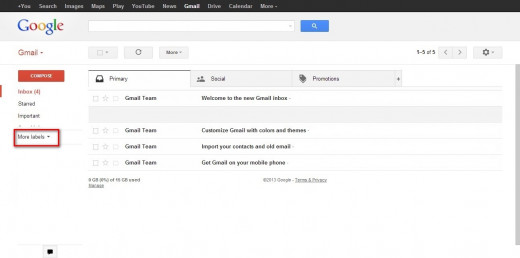
That's all there is to creating a new label. You can now drag-and-drop labels from the left hand side of Gmail to any email, and the label will be assigned to that email.
Depending on your settings and screen size, not all labels might be visible. If the new label you created is not shown in the list, click on "More labels" on the left side to reveal the full list of labels.

Extra - Customise Your Labels
To customise your new label, click on the small downwards triangle beside the label name. You can choose to change the color of your label and to change whether it appears in the left hand side list or not.
To change you label's color, click on "Label Color". You will see a list of colors that you can use to more-easily identify your new label. You can also use RGB color codes to create custom colors.
To change the label's visibility behaviour, check the respective options.
New Label Created
And there you have it, a new label that you customized to suit your fancy.
With the new label set up, you might want Gmail to automatically search for emails to tag with the new label. To find out how to do this, be sure to check out my Hub on "How To Create A Customized Filter To Perform Tasks On Email Messages Automatically".
Thanks for reading!


