- HubPages»
- Technology»
- Computers & Software»
- Computer Software
Guide to recording Macros in Excel 2007
Introduction
Welcome to my latest hub on Excel 2007 on recording macros in Excel 2007. Simply put, a macro is a series of Visual Basic commands that you have recorded within Excel 2007 so that they can be replayed and therefore re-used using a keyboard shortcut. They can be any combination of commands you chose to use. Whenever you are performing identical actions on your data multiple times, a macro could easily be recorded to enable you to perform the same actions repeatedly using the keyboard short cut associated with your macro.
In my example, I want to instantly format one particular pivot table as it is afflicted with a well known Excel 2007 bug which causes it to lose its formatting whenever it is refreshed.
Configuring Excel 2007 to enable the recording of macros
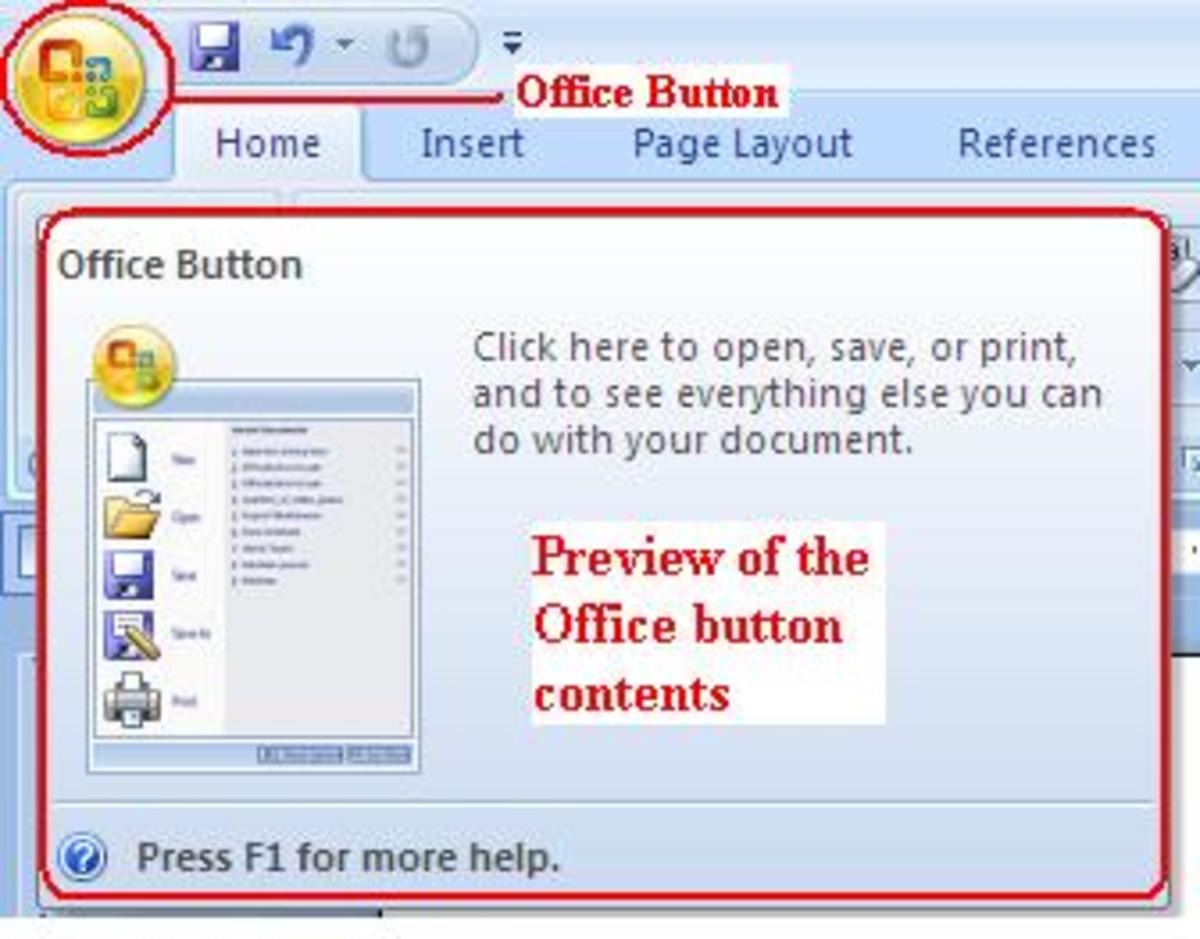
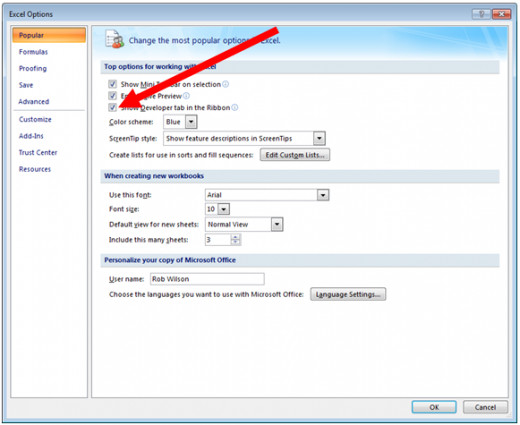
To enable you to record macros, you need to ensure that the Developer tab is available to you in Excel 2007 (it is not visible by default). To turn the Developer tab on, select the Office button and then Excel Options.
Ensure that the option Show Developer tab in the Ribbon is selected as shown below.
The next required step is to save your workbook as a macro enabled workbook. Go to Save As via the Office button and save your workbook as an Excel Macro-Enabled Workbook (*.xlsm). If you do not save your workbook as macro enabled you will receive the below error when you first click Save (or when you edit and try to save a macro). In addition, if you create a macro in a spreadsheet that is not macro enabled, when you re-open the spreadsheet Excel 2007 will not have saved your macro.

Recording a macro in Excel 2007
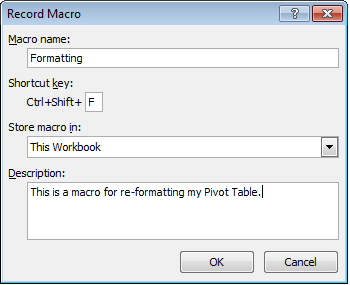
To begin recording a macro, select the Developer tab and then in the Code group and finally click the Record Macro button. In the dialogue box that appears,
- Firstly, give your macro a meaningful name
- Secondly, assign it a short cut key. I have chosen F for format so I can remember it easily. The full short cut is CTRL+SHIFT+F in my example
- Lastly, give your macro a description so that in future you can remember exactly what it does.
You will end up with a dialogue box similar to mine below.
Once you have completed all the actions that you want recorded in your macro, click the Stop Recoding button again in the Code group on the Developer tab.
Testing your macro
Now that you have created your macro, it is time to test it. If your macro is a formatting macro similar to mine, then clear the formatting from the cells you want to test your macro on and then invoke your macro using your short cut keys.
There is also another way to run macros, using the Macros button on the Developer tab, in the Code group. This button will provide you with a list of all your current macros which you can run by selecting your macro and then Run.
Editing your macros
The Macros button is also used to administer, modify and delete your recorded macros.
If you wish to make a change to your macro, select the macro you wish to change and then click Edit
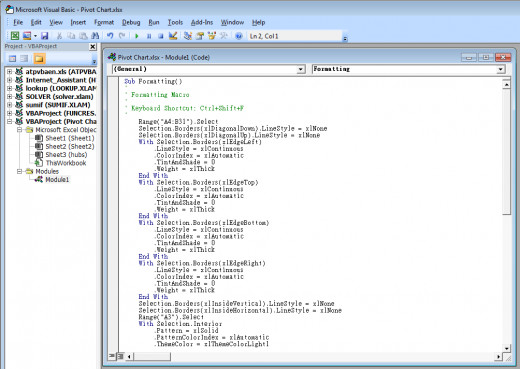
You will end up with a screen similar to that above. This is the actual Visual Basic that Excel uses to execute your chosen macro. You can edit the Visual Basic shown here directly if you are confident in your knowledge of Visual Basic. If you are not familiar with Visual Basic I would recommend against making changes to your macro here.
That being said, it is possible to edit a macro with little knowledge of Visual Basic. In my example, I forgot (deliberately) to format my Grand Total row. I would like to add the formatting of this row to my initial formatting macro. To do this,
- First I click Record Macro to start recording a new macro
- Then I perform my formatting of the Grand Total row
- Next I click Stop Recording
- I now have a macro containing the steps I wish to add to my first formatting macro.
- Now I test my macro by clearing the formatting and then running my macro
But now I have two macros where I want one. To combine them, I need to copy the Visual Basic from my second macro and copy it into my formatting macro.
To do this,
- Click the Macros button and select your macro and then click Edit.
- You will see the Visual Basic for all of the macros you have currently created.
- Look for the macro you just created (mine is called Macro3) in green text.
- Select all the text between the name of your macro and the End Sub line and copy it. Your screen should look similar to mine below.
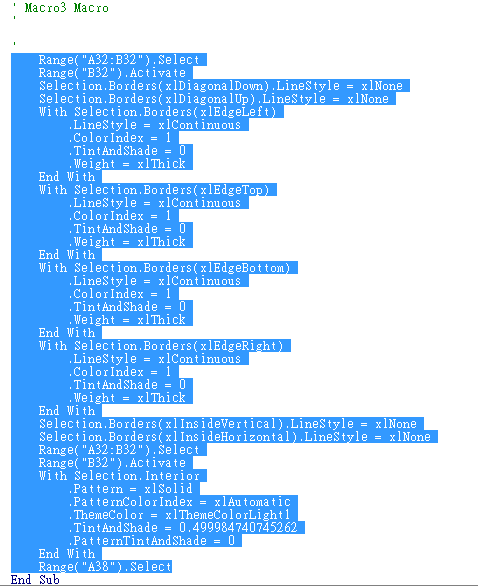
Scroll to your original macro (mine is called Formatting Macro) and add a line above End Sub in that macro. The screenshot below illustrates where the line should be added.
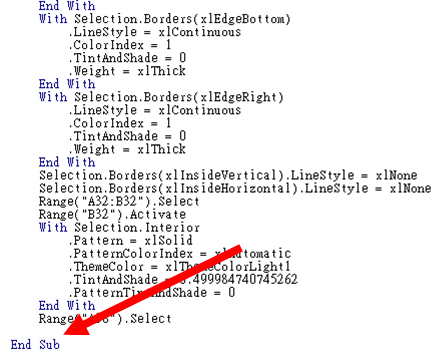
Paste in your Visual Basic code from the other macro and then click Save.
Finally, delete the second macro that you no longer need and test your complete macro by clearing the formatting and re-running your macro.
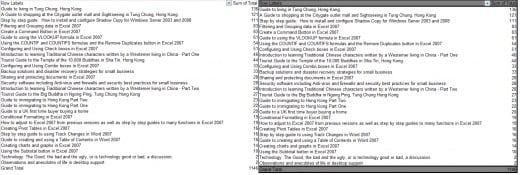
You can see my pivot table below, before (left) and after (right) my macro has been run. Now, by using my short-cut keys I can instantly re-format my pivot table.
Conclusion
Using a macro in Excel 2007 will allow you to quickly automate common repetitive activities such as formatting cells or tables, among other things. As with many powerful Excel 2007 functions, its usability is only limited by your imagination. It can save you enormous amounts of repetitive manual work and allow you to concentrate on other more interesting things. I have shown through my example how to ready Excel 2007 for recording and saving macros as well as how to configure, edit and combine macros.
I do hope you have found my hub useful and are now happily creating and using macros to automate those tedious repetitive parts of your Excel 2007 workbooks. Please feel free to leave any comments you wish below.
I also have a number of other hubs on aspects of Excel 2007, covering everything from Conditional Formatting to creating charts and graphs. I have an Index hub which also covers how I successfully transitioned from Excel 2003 to 2007 as well as outlining my other Excel 2007 hubs which can be found here


