How to Make a Solar Panel

When it comes to building solar panels, what makes it most appealing to you?
Principle
If your considering using solar power for your home, you will need to know how to make solar power.Making solar panels can be a enjoyable hobby for the do-it-yourselfer as well as experiencing the satisfaction of reducing and/or eliminating your electric bill each month.
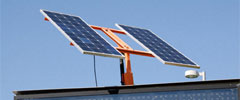
Firstly, you will have to know solar panels. They are photoelectric cells made of glasses and silicon. They capture sunlight and convert it to energy. The good point about them is that they are lightweight and movable. You can place them on the top of your roofs or place them on your backyard. Anywhere would be acceptable as long as they face enough sunlight in the southern direction.The more sunlight they capture, the more that is converted into electricity.
Material List :
1-2'x4' sheet of 3/4" plywood
12' of 3/4 strips of wood
1-2'x4' sheet of plexi-glass
1-2'x4' sheet of pegboard
1-16oz tube of clear Silicone
1-3.0 amp diode
36-3"x6" solar cells
1-qt white enamel paint
1-16 oz of Wood Glue
Instructions:
Solar cells: Each 3X6" solar cell produces .5 volts APR. In order to recharge a 12v Battery, you must connect 36 cells in series. 36 x .5 volts= 18volts. This would give the battery a sufficient charge. You will notice that on the top blue side there are two strips. These are the negative terminals. On the back side you will find six soldering points. These are the positive terminals of the solar cell. To hook up in series connection, you must go from negative on the top side, to the positive terminal of the next cell, which is on bottom.. This is called a series connection. I personally feel that it is easier to solder bus wire across three terminals on the bottom side allowing a 1" protrusion of to the side. This protrusion will allow connection to the next cell. Make three strings of cells using 12 cells in each string. Be very careful as cells are very fragile and may require assistance when aligning the three strings of cells.
Plywood: Plywood must be coated with at least 3 coats of white paint. This protects against any moisture inside the panel such as condensation. Paint also the pegboard. The 3/4" strips of wood are to be mounted on the outside edge of the plywood all the way around. It also must be painted.
PEGBOARD: The Pegboard serves as a insulator for the solar cells. Coats the pegboard with at least three coats of white paint. The purpose of the is to seal from moisture. If the pegboard absorbs the moisture, it will buckle and break the solar cells. The pegboard must be cut to loosely fit on the plywood within the 3/4"strips. The purpose of only using 3/4" strips is to keep the sides of the panel low to maximize the sunlight on the solar cells.
MOUNTING CELLS: Arrange the solar cells on the pegboard. Each string will have 12 cells each. This particular panel will have three strings. When laying out the cells, use a bus wire to run over to the adjacent string to continue the connection. Each cells is to have a daub of silicone in the cent of the cell to glue to the pegboard. By gluing in the center, it allows the solar cell to "float" thus reducing stress to the fragile cell and prevent breakage. Drill a hole in the side of the 3/4" strip and run the negative and positive wire to the exterior of the panel.
TESTING CELLS: It is important to test the voltage output of the solar panel in direct sunlight prior to mounting the plexi-glass to the panel. Using a voltmeter, test the voltage output. If the voltage shows a negative reading, switch the terminals of your test leads. This will establish the true negative and positive ends the the cell run. On the positive end, solder the 3.0 amp diode to the terminal. The purpose of the diode is to protect the batteries from being drained by the solar panels at night. The diode only allows voltage to flow in one direction. It is important to solder the diode in the right direction. Otherwise, you will show no voltage output on your panel. In direct sunlight, you should show at least 18 volts. When I tested mine, I was showing 19.4 volts.
PLEXI-GLASS:Apply a bead of Silicone all the way around on the top edge of the 3/4" strips. This seals the panel from any moisture intrusion. Gently drill screw mounting holes every 12 inches or so. Be gentle on screwing down the screws. They must be snug. Over torquing will break plexi-glass.
You will find out by doing it yourself, you will save a substantial amount of money. In short, it is a great way to get you your project up and running at a fraction of the cost.
More information on solar panels
- More informatin on solar panels
This article explores the Pros and Cons of solar panels - How to Live Off-Grid Successfully
- The Pros and Cons of Solar Energy
In our continuing efforts to live a greener life we have been contemplating solar panels for our roof. Of course there are pros and cons to using solar energy, but it seems to me that the advantages outweigh...


