How to Configure DNS Server Addresses in Windows XP?

DNS is a distributed database and it translates computer names to IP address. So, you must have to configure DNS addresses to browse or to use Internet. DNS configuration is really very easy. This page will tell you the details, how to configure DNS server addresses in your Windows XP computer.
Steps to configure DNS addresses
Follow the following steps to configure DNS server addresses on your Windows computer:
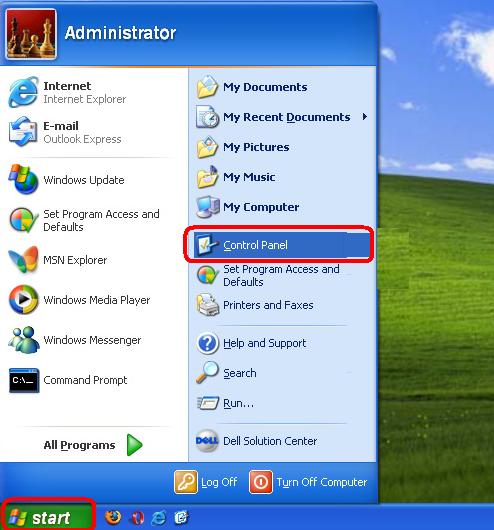
Step 1:
Click on Start menu and then click on Control Panel.
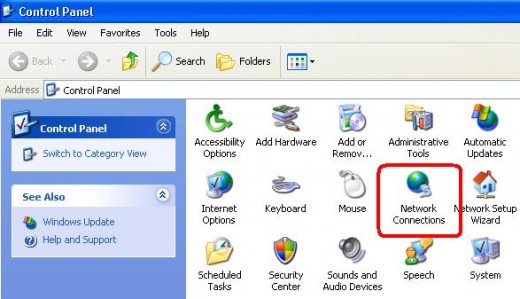
Step 2:
Form the Control Panel window, double-click on Network Connections icon.
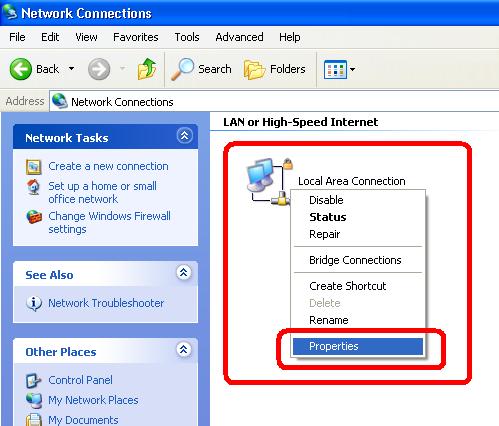
Step 3:
In the "Network Connections" window, you will see Local Area Connections and right click on it and select Properties and you will see Local Area Connection Properties.
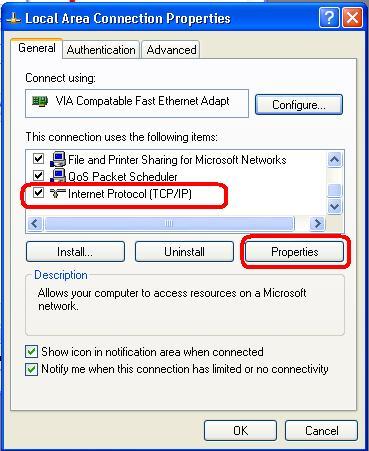
Step 4:
From "Local Area Connection Properties" window, click on Internet Protocol(TCP/IP) and then click on Properties.
Step 5:
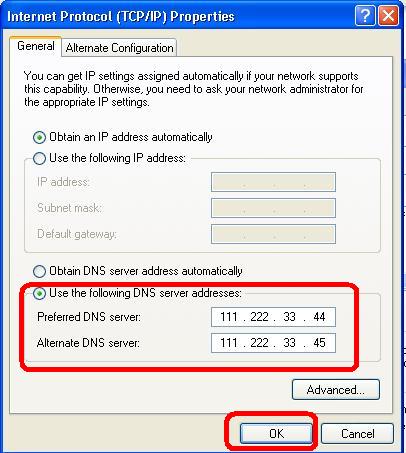
After finishing all of the above steps, you will see Internet Protocol (TCP/IP) Properties dialog box will be appeared. Now, select any of the following two options:
[a] Obtain DNS server address automatically
[b] Use the following DNS server addresses
[a] Obtain DNS server address automatically:
You can only use this option, if you have DHCP server on your network. If you have DHCP server, then the server will provide the IP address of a DNS server.
[b] Use the following DNS server addresses:
This option enables you to manually enter the DNS IP address. If you select this option, you must have to assign the IP address of the DNS server. Here, you will entered two DNS server IP addresses. One is for Preferred DNS Server and another is for Alternate DNS Server.
Now, after finishing assigning IP address, click OK and finished configuration of DNS server addresses.
By following the above mentioned steps, you can easily configure the DNS Server addresses in Windows XP. It's quite similar to other Windows Operating system also.Just a little difference. You may try and if you have problems, you can ask for the solution in the comment section.
© Written by rancidTaste
If you are enjoyed this post, please consider to give a thumbs up and leave a comment. You may Subscribe to rancidTaste's RSS feed to get new pages which will be delivered to your feed reader. You can also read more hubs by rancidTaste.
JOIN HUBPAGES & EARN MONEY


