- HubPages»
- Technology»
- Internet & the Web»
- Web Page & Web Site Development
How to Convert PSD to WordPress in 5 Easy Steps
Basic requirement of a website is that, first it needs to have an attractive and user-friendly design, and secondly, the website should have functional and efficient design. A website cannot be considered a complete site if it’s missing either of the two because both of these are necessary for creating a great site. Along with the creativity of the design, there is also another important aspect of the website called coding.
In order to implement the design, the designer also needs strong coding skills in whatever language he is using. This could include languages such as HTML, PHP, CSS, JavaScript, and jQuery. There are many other languages that can also be used but these are the most common ones that web developers and web designers are currently using.
Being a web designer myself, I will teach you how simple it is to convert PSD to WordPress in 5 easy steps. Most people don’t find it difficult to create a PSD image of their design but often struggle in the coding part as it requires in depth knowledge of HTML, JavaScript, CSS, and PHP.
For someone who is not familiar with these programming languages or find it difficult to learn, they can use WordPress instead. WordPress is a content management system (CMS), and an open source tool that has been gifted from the open source community. The best feature of this tool is that it is extremely user friendly and an efficient tool that can create a website in a flash. However, if you want to create a custom website, it is not such an easy task.
For that purpose, I have created this post to help alleviate that problem, and teach you how to convert a PSD design to a WordPress template in 5 simple steps.

Step 1: Slicing PSD
The first step in the process PSD to WordPress conversion is Slicing.
Slicing takes place when a PSD image design file is divided into number of design files, with each file based on different design components of the main design.
One important thing to remember is that it is not possible to code the whole design into a single image. When you design a website, many images are put together flawlessly, where each image or component has its own use and functionality.
The Slicing is done through an image editing software such as Adobe Photoshop, which is a very popular tool among graphics and web designers. Designer needs to make sure every image is cut pixel perfect. Although, simple application such as Microsoft paint can also do this job, but it is highly recommended to use Adobe Photoshop as it makes the task it much easier.
Most designers now prefer to use graphic software that allows image creation in layers. Here the design files are already divided into various components and subsequent layers. This practice has made the slicing process obsolete, however it is better to know how it is done.
Important thing to remember is that it is entirely up to the designer to decide what he/she wants to create dynamically and otherwise. As there are some features such as header color, footer color, solid color background that are created dynamically and do not need to be cut in full. On the other hand, other features like embedded images and buttons are difficult to create dynamically, therefore they need to be cut in full.
Step 2: Creating style.css and Index.html
Now that you have sliced the images, it’s time to code them into HTML and XHTML and then style using CSS. For this step one much have thorough knowledge of HTML and CSS. There are plenty of software available that can accomplish this task but it’s entirely up to the web developer or designer to decide. Most commonly used software used for this purpose is Fireworks and Dreamweaver.
This is the step where the sliced images are coded with complete pixel perfect placement and rollover effects. It is also the time when you decide if the website will be responsive or not. This is achieved by modifying the CSS accordingly. For better understanding the HTML file is named index.html, and CSS file as Style.css.
Step 3: Breaking index.html with respect to WordPress theme file structure
Once a custom WordPress website theme is created, it is uploaded onto the WordPress software.
Within the PSD to WordPress process, first you will need to convert a PSD design into a WordPress theme, after that with the help of some tools and plugins you can add any functionality you want to that theme.
To get started, your initial html file should be designed according to your WordPress theme file structure. Then this html file is broken into multiple html files. This is done according to the file structure of the theme.
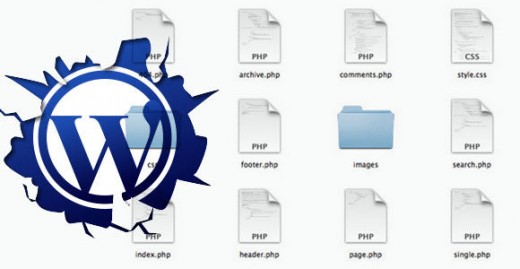
Usually a WordPress theme has number of php files like footer.php, header.php, index.php, page.php, single.php, category.php, sidebar.php, search.php, comments.php, 404.php, and comments-popup.php. However, for a theme to work, you just need two files, index.php and style.css, which are necessary. Whereas, all the other files are needed to simplify theme coding and compartmentalization.

Step 4: Adding WordPress tags
What makes WordPress exciting is its hundreds of built-in functions. With these functions you can add various functions to the WordPress theme. There is no need to write a complex html code. In this step, all you need to do is add some WordPress built-in function tags within the theme files for desired functionality. After this step you will have a combined WordPress theme. At this point your job is now complete, as WordPress itself will take care of rest the process. This is what makes WordPress so special and fun to use.
The following links will help you find a complete list of WordPress tags and are also explained in full detail. The second link will provide you a complete reference guide for all the functions found in WordPress software. Each of these links has a complete page dedicated for each tag and function along with their examples.
All these files are saved in a folder, and named after the theme’s name itself. It is placed in the folder /wp-content/themes/ present in the WordPress installation. All the files will be placed in directory WordPress-testing/wp-content/themes/theme-test/. After the completion of this step you will have your custom theme available for working in WordPress software. This theme can now be activated through WordPress dashboard.

Step 5: Adding functionalities
At this point when your theme has been created and activated, you can see the benefits of WordPress. You can still add further functionality if you wish, for that you just need to install and configure a plugin using the WordPress dashboard.
Conclusion
Now there will be no need for you to change the code html code and by doing so will save lot of time and energy. The process of making your theme compatible after the changes, also becomes easier as there will be no need to each line of code. For example, if you want to add a new slider, you can do it without the need of learning JavaScript and embedding it afterwards. All you need to do is, download and install a plugin, and let it do its work.
There is another option available, if you are finding it difficult to convert PSD to WordPress yourself. Simply hire a professional web development company. They will give you precise, prompt, and consistent web designing services every time. You can easily search them online.
Although, there are some free online PSD to WordPress converters and some software available that can automatically do the job, but it can never be the same as hiring a professional software developer to program your designs. These software companies offers and inexpensive PSD to WordPress conversion services at affordable rates.


