- HubPages»
- Technology»
- Computers & Software»
- Operating Systems»
- Windows
How to Give Windows XP Administrator Privelages to Other Users
Introduction
Non-administrative accounts in versions of Windows XP limit what the owners of those accounts are capable are doing. For example, in Windows XP Home edition, users with limited privelages can't delete some files, and in both Windows XP Home and Professional versions, users with non-administrative accounts won't be able to install new software when logged in with their accounts. Granting existing users and new users using either version of Windows XP can easily be done by a user who already has administrative privelages.


Windows XP Pro Existing User
- Restart your Windows XP Pro computer and log in using an administrator's username and password that's associated with that computer when you arrive at the Windows XP login screen.
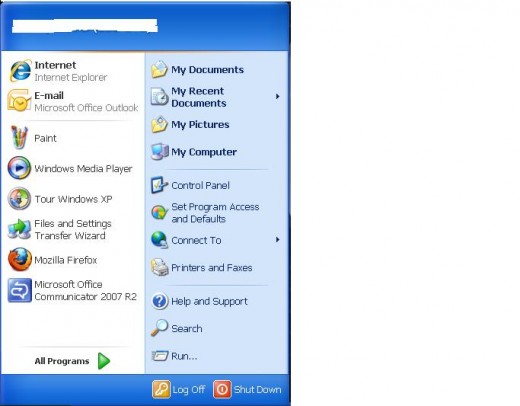
- Click the "Start" icon on the Windows XP taskbar to open the Start menu.
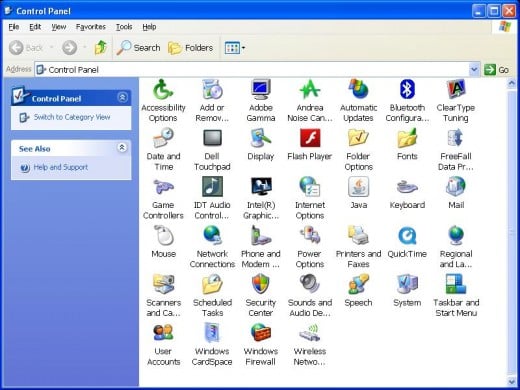
- Click "Control Panel" on the right side of the Start menu.
- Click "Switch to Classic View" if that option appears beneath Control Panel in the upper-left corner of the Control Panel window. If that option doesn't appear, you're already in Classic View.
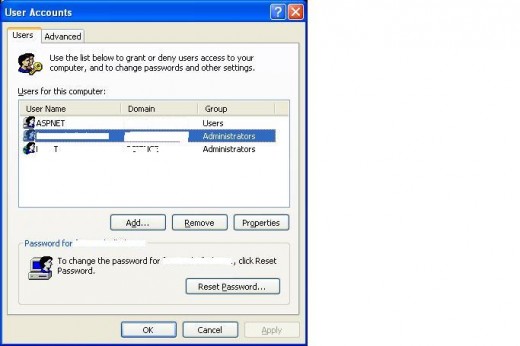
- Click "User Accounts." The User Accounts dialog box appears.
- Select the "Users" tab.
- Double-click the existing user account that you want to grant administrative privelages. The Properties dialog box for that specific user will be displayed.
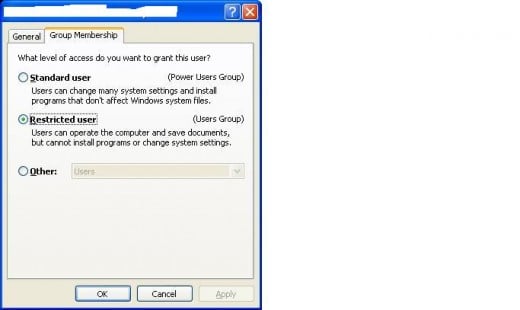
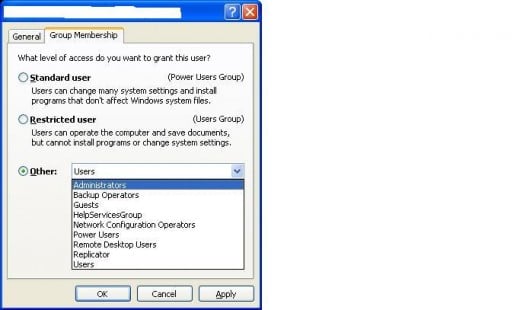
- Select the "Group Membership" tab if multiple tabs appear in the Properties dialog box for that user.
- Click the circle to the left of Other to place a black dot in it and then click the drop-down arrow to the right of Other.
- Click to select "Administrators."
- Click "Apply" and then click "OK." The Properties dialog box will be closed and you'll return to the User Accounts dialog box.
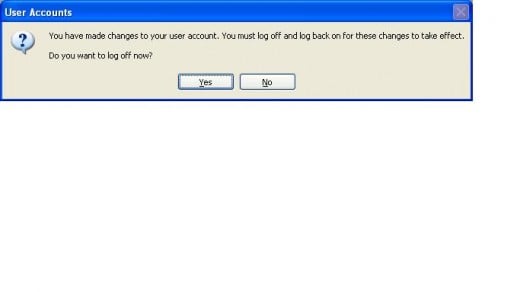
- Click "OK" to close the User Accounts dialog box. Another User Accounts dialog box appears on the screen telling you that changes have been made to your user account and that you must log off and then log back in for those changes to be applied.
- Click "Yes" to log off of your computer at that moment or "No" to log off of your computer at a later date. Upon logging off and then logging back in to your account, the changes will be finalized and the other user will be granted administrative privelages on that specific computer.
More Technology Articles!
- How to Clear Your Browser Cache
Is your Web browser slow? Are you having problems seeing new information on websites you know have been updated? Clear your Web browser's cache to resolve these problems and even free up a little hard drive space. - How to Avoid Unexpected Charges When Traveling Internationally with iPhone
Learn how to set up your iPhone so you can continue using some of the phone's functionality while traveling internationally without incurring what can be monstrous and unexpected data usage charges.
Windows XP Pro New User
- Follows Steps 2 through 6 in the Existing User section to arrive at the User Accounts dialog box.
- Click "Add." The Add New User dialog box appears.
- Enter the username and domain associated with the user you want to give administrative rights on this machine, then click "Next."
- Select "Other."
- Click the drop-down arrow to the right of Other and then click "Administrators."
- Click "Finish."
- Click "OK" to close the User Accounts dialog box. Another User Accounts dialog box appears on the screen telling you that changes have been made to your user account and that you must log off and then log back in for those changes to be applied.
- Click "Yes" to log off of your computer at that moment or "No" to log off of your computer at a later date. Upon logging off and then logging back in to your account, the changes will be finalized and the other user will be granted administrative privelages on that specific computer.
Windows XP Home Existing User
- Follow Steps 1 through 6 in the Windows XP Pro Existing User section.
- Click the name of the user account you want to grant administrative privelages beneath "or pick an account to change."
- Click "Change the account type" beneath "What do you want to change about ***** account?"
- Select "Computer administrator" beneath "Pick a new account type for ******."
- Click "Change Account Type." The account type will be finalized upon restarting your computer.
Windows XP Home New Account
- Follow Steps 1 through 6 in the Windows XP Pro Existing User section to arrive at the User Account dialog box.
- Click "Create new account" beneath "Pick a tak...."
- Type a name for the new account when you're prompted at the "Name the new account" screen and then click "Next."
- Select "Computer administrator" beneath "Pick an account type" and then click "Create Account." The new account will be available as option for you to log in with the next time you reboot the computer.

